ZyXEL NWA-3500 Quick Start Guide - Page 13
Install the Hardware, 1 Attaching Antennas, 2 Hardware Mounting
 |
View all ZyXEL NWA-3500 manuals
Add to My Manuals
Save this manual to your list of manuals |
Page 13 highlights
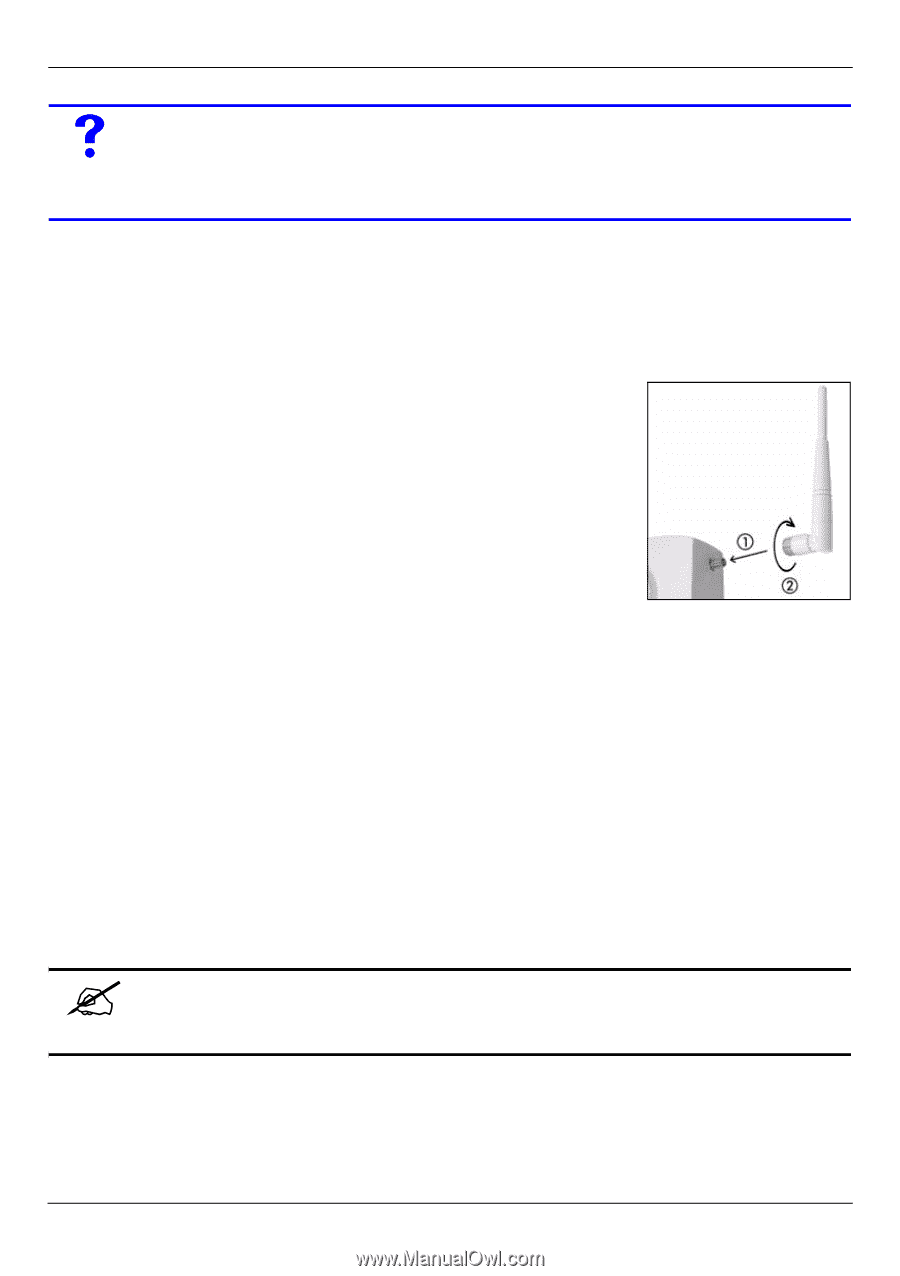
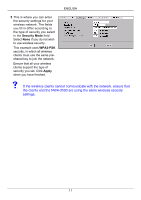
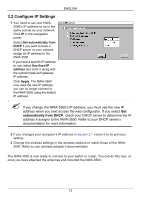
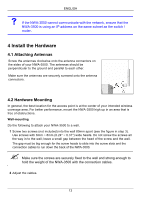
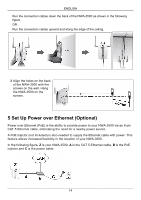
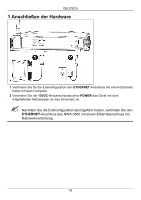
ENGLISH V If the NWA-3500 cannot communicate with the network, ensure that the NWA-3500 is using an IP address on the same subnet as the switch / router. 4 Install the Hardware 4.1 Attaching Antennas Screw the antennas clockwise onto the antenna connectors on the sides of your NWA-3500. The antennas should be perpendicular to the ground and parallel to each other. Make sure the antennas are securely screwed onto the antenna connectors. 4.2 Hardware Mounting In general, the best location for the access point is at the center of your intended wireless coverage area. For better performance, mount the NWA-3500 high up in an area that is free of obstructions. Wall-mounting Do the following to attach your NWA-3500 to a wall. 1 Screw two screws (not included) into the wall 80mm apart (see the figure in step 3). Use screws with 6mm ~ 8mm (0.24" ~ 0.31") wide heads. Do not screw the screws all the way in to the wall; leave a small gap between the head of the screw and the wall. The gap must be big enough for the screw heads to slide into the screw slots and the connection cables to run down the back of the NWA-3500. " Make sure the screws are securely fixed to the wall and strong enough to hold the weight of the NWA-3500 with the connection cables. 2 Adjust the cables. 13
-
 1
1 -
2
-
3
-
4
-
5
-
6
-
7
-
 8
8 -
 9
9 -
 10
10 -
 11
11 -
 12
12 -
 13
13 -
 14
14 -
 15
15 -
 16
16 -
 17
17 -
 18
18 -
19
-
20
-
21
-
22
-
23
-
24
-
25
-
26
-
27
-
28
-
29
-
30
-
31
-
32
-
33
-
34
-
35
-
36
-
37
-
38
-
39
-
40
-
41
-
42
-
43
-
44
-
45
-
46
-
47
-
48
-
49
-
50
-
51
-
52
-
53
-
54
-
55
-
56
-
57
-
58
-
59
-
60
-
61
-
62
-
63
-
64
-
65
-
66
-
67
-
68
-
69
-
70
-
71
-
72
-
73
-
74
-
75
-
76
-
77
-
78
-
79
-
80
-
81
-
82
-
83
-
84
-
85
-
86
-
87
-
88
-
89
-
90
-
91
-
92
-
93
-
94
-
95
-
96
-
97
-
98
-
99
-
100
-
101
-
102
-
103
-
104
-
105
-
106
-
107
-
108
-
109
-
110
-
111
-
112
-
113
-
114
-
115
-
116
-
117
-
118
-
119
-
120
-
121
-
122
-
123
-
124
-
125
-
126
-
127
-
128
-
129
-
130
 |
 |