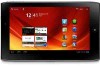
Acer A100 User Guide
Acer A100 Manual
 |
View all Acer A100 manuals
Add to My Manuals
Save this manual to your list of manuals |
Acer A100 manual content summary:
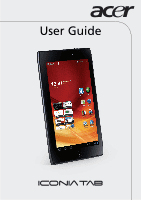
- Acer A100 | User Guide - Page 1
User Guide 1 - Acer A100 | User Guide - Page 2
© 2011. All Rights Reserved. Acer ICONIA TAB User Guide Model: A100 (Wi-Fi only models) and A101 (Wi-Fi+3G models) First issue: 06/2011 Acer ICONIA TAB Model number Serial number Date of purchase Place of purchase 2 - Acer A100 | User Guide - Page 3
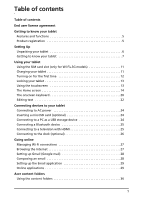
Charging your tablet 11 Turning on for the first time 12 Locking your tablet 13 Using the touchscreen 13 The Home screen 14 The onscreen keyboard 20 Editing text 22 Connecting devices to your tablet Connecting to AC power 24 Inserting a microSD card (optional 24 Connecting to a PC as a USB - Acer A100 | User Guide - Page 4
55 Adjusting Bluetooth settings 56 Connecting to a PC 56 Synchronization 56 Setting the date and time 57 Setting alarms 57 Changing language and text options 58 Managing applications 58 Updating your tablet's operating system 58 Resetting your tablet 58 Appendix FAQ and troubleshooting 60 - Acer A100 | User Guide - Page 5
is not obligated to provide technical or other support for the Software. ACER LIVE UPDATE Certain software contains elements that enable the use of the Acer Live Update service, which allows for updates for such software to be automatically downloaded and installed on your device. By installing the - Acer A100 | User Guide - Page 6
OR INABILITY TO USE THE SOFTWARE, THE PROVISION OF OR FAILURE TO PROVIDE SUPPORT SERVICES, OR OTHERWISE UNDER OR IN CONNECTION WITH ANY PROVISION OF THIS AGREEMENT, EVEN IN THE EVENT OF THE FAULT, TORT (INCLUDING NEGLIGENCE), STRICT LIABILITY, BREACH OF CONTRACT OR BREACH OF WARRANTY OF ACER OR ITS - Acer A100 | User Guide - Page 7
product for the first time, it is recommended that you immediately register it. This will give you access to useful benefits, such as: • Faster service from our trained representatives. • Membership in the Acer community: receive promotions and participate in customer surveys. • The latest news from - Acer A100 | User Guide - Page 8
new tablet comes packed in a protective box. Carefully unpack the box and remove the contents. If any of the following items is missing or damaged, contact your dealer immediately: • Acer ICONIA TAB • Poster / product and saftey information / safety leaflet • USB cable • AC adapter • Warranty card - Acer A100 | User Guide - Page 9
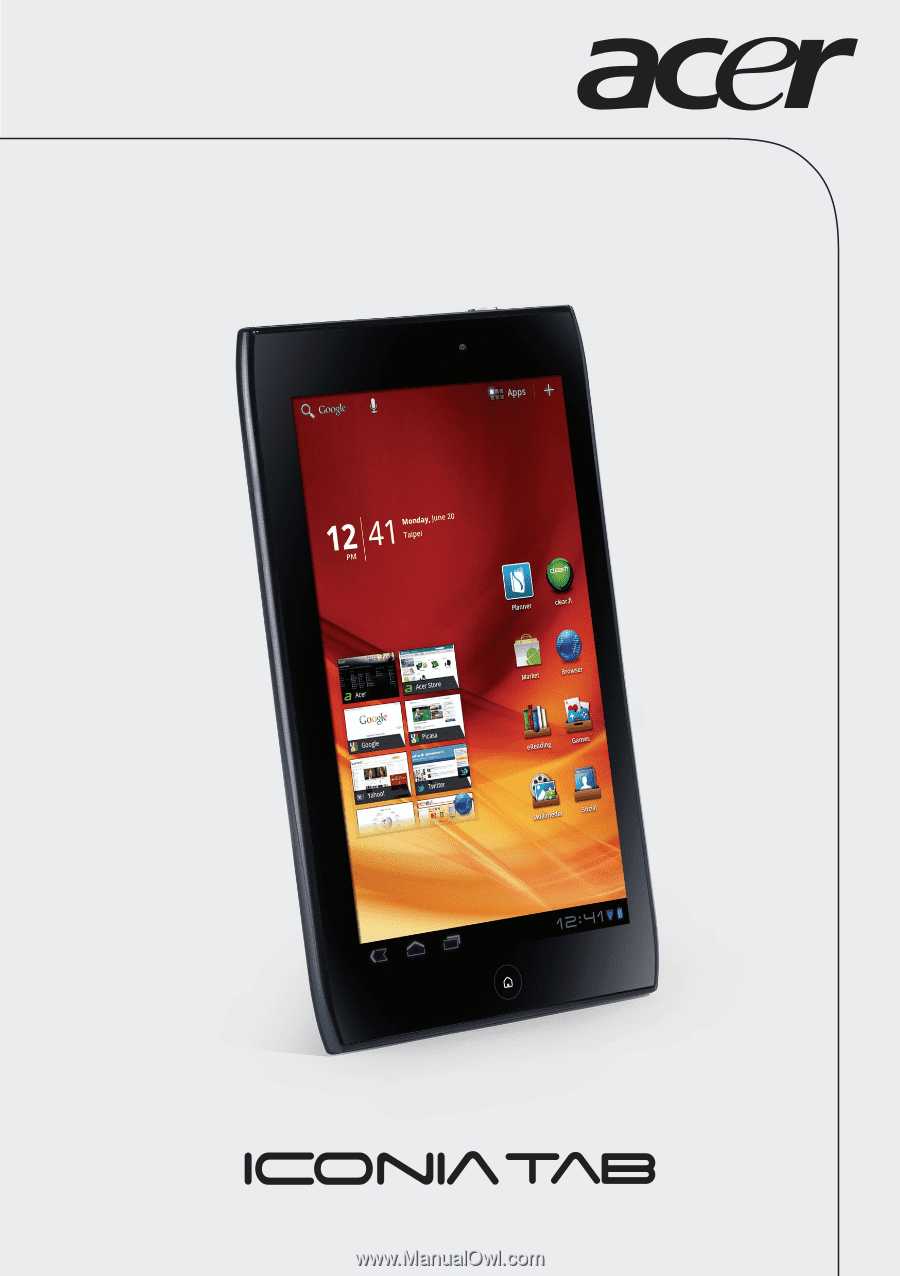
Getting to know your tablet Front view 4 3 1 No. Item 1 Touchscreen 2 Home button 3 Front-facing camera 4 Light sensor 2 Description 7-inch, 1024 x 600 pixel capacitive touchscreen. Tap this icon to go directly to the Home screen. A 2-megapixel camera for video chatting and self-portrait images. - Acer A100 | User Guide - Page 10
for taking highresolution images. Lights to illuminate images. 12 No. Item Description 1 Power button Long press to turn the tablet on, press briefly to turn the screen on/off or enter sleep mode; press and hold to turn the tablet off. 2 3.5 mm headphone jack Connects to stereo headphones. 8 - Acer A100 | User Guide - Page 11
to an HDMI cable with a Type D connector. Connect your tablet to the dock accessory. Connects to a computer with a USB cable. Connects to the DC power supply. Side view 1 2 3 No. Item 1 Screen rotation lock switch 2 Volume control key Setting Up Description Use this switch to lock the screen - Acer A100 | User Guide - Page 12
No. Item 3 Card slot cover Description Insert a micro SD card into the slot under this cover. See "Inserting a microSD card (optional)" on page 24. An optional SIM card slot allows you to access the Internet if you have a cellular data subscription. 10 - Acer A100 | User Guide - Page 13
data subscription before turning on your tablet. See "Installing a SIM card" on page 50. Charging your tablet For first-time use, you need to charge your tablet for four hours. After that you can recharge the battery as needed. Connect the DC-in jack to your tablet and plug the AC adapter into any - Acer A100 | User Guide - Page 14
on for the first time To turn on your tablet, press and hold the power button for two seconds. You will then be asked some questions before you can use your tablet. To start, tap to select your language, then tap Start. Follow the rest of the instructions as they are displayed. Sign in to or create - Acer A100 | User Guide - Page 15
power button to lock access. This saves power and ensures your tablet does not unintentionally use any services. Your tablet will lock automatically if it is not used after a while. To change the delay, tap Apps > Settings > Screen > Timeout. Waking your tablet If the screen is off and the tablet - Acer A100 | User Guide - Page 16
to applications. Some have been pre-installed on your tablet, while others may be downloaded from the Android Market. The Home screen already features some useful controls and information. Search Application menu and Customize screen Navigation Time and Status Search To search for applications - Acer A100 | User Guide - Page 17
to go up one level in a menu. This icon may be replaced with the hide icon in certain cases (such as if the keyboard or list of recent applications is shown). Hide Home Tap this icon to go directly to the Home screen. Recent Tap this icon to see recently opened applications. Tap an - Acer A100 | User Guide - Page 18
and notification icons are shown in the bottom-right corner of the screen. This area contains a variety of icons to inform you of your tablet's status. The icons on the right side of the clock indicate connectivity and battery status. The left side of the clock displays the event notification icons - Acer A100 | User Guide - Page 19
indicate connection strength) Battery is very low An open wireless network is available Battery is low Bluetooth is on Battery is partially drained Connected to a Bluetooth device Airplane mode (wireless connectivity disconnected) Battery is full Battery is charging Using your tablet 17 - Acer A100 | User Guide - Page 20
USB Application update available System update available Virtual private network (VPN) status Description Speaker is silenced Tablet microphone is off GPS is on Receiving location data from GPS More status notifications Syncing data Sync is on Problem with sign-in or sync Uploading data Downloading - Acer A100 | User Guide - Page 21
Home screen will switch to the screen in that direction. Release the item when it is positioned correctly. To remove an item from the Home screen, tap and hold the item until the trash icon appears in the top-right corner of the screen. Simply drag the item to the trash icon. Using your tablet 19 - Acer A100 | User Guide - Page 22
the Application menu then tap and hold an icon until an image of the Home screens appears. Drag the icon to a Home screen to create a shortcut. The onscreen keyboard When you tap a text box to enter text, an onscreen keyboard will appear. Simply tap on keys to enter text. Tap the ?123 button to see - Acer A100 | User Guide - Page 23
turn predictive text on or off with the Android keyboard, tap the Input options key, and then Android keyboard settings. Tap Auto correction or Show correction suggestions and select one of the options. Changing the keyboard To use a different keyboard type, tap the Keyboard status icon; this will - Acer A100 | User Guide - Page 24
your tablet. Tap the settings icon next to the XT9 Text Input entry. Function Description Languages and settings Set the languages that will be different application. Note: Certain applications may not support text selection, or only support it in certain areas. Other applications offer - Acer A100 | User Guide - Page 25
a cursor is inserted below the text. Note: The cursor indicates where text you type or paste will be inserted. 2. If the cusor is not in the desired position, simply drag it to the correct , paste or delete text. 4. Tap Enter on the keyboard, or tap the Close Keyboard button. Using your tablet 23 - Acer A100 | User Guide - Page 26
PC as a USB storage device Download and install the latest USB driver on your computer before connecting your tablet to the computer. Visit www.acer.com for the latest drivers: Select Support, Download, Tablet. Select your tablet model, and then the Driver tab, select USB and accept the download. 24 - Acer A100 | User Guide - Page 27
devices. Note: Please check for updates to the tablet's software that may add support for additional Bluetooth devices. See "Updating your tablet's operating system" on page 58. Connecting to a television with HDMI Connect an micro HDMI (Type D) cable to your tablet then plug the other end of - Acer A100 | User Guide - Page 28
using the micro HDMI port to connect the tablet to an external device, the tablet's screen will switch orientation to landscape to mimic the aspect ratio of the external device. Connecting to the dock (optional) The optional dock holds your tablet and allows you to easily charge the battery with - Acer A100 | User Guide - Page 29
the Wi-Fi status icon in the bottom-right corner of the screen. If Wi-Fi is not on, tap Turn on Wi-Fi, and wait for your tablet to detect nearby networks. Tap the name of your network and enter a security password, if needed. Browsing the Internet In order to browse the Internet - Acer A100 | User Guide - Page 30
a (+). Simply tap one of the tabs across the top of the screen to switch pages. New tab Pinch to zoom in or out of password when you first started your tablet, follow the instructions. Note: You need to activate a Google account before you can use Gmail. Composing an email 1. Make sure your tablet - Acer A100 | User Guide - Page 31
Google services. Setting up Acer Sync on your computer Acer Sync must be installed on your computer before it can be used. Follow the steps below to install Acer Sync on your computer. 1. On your computer visit http://support.acer.com and select your device. 2. From the device support page, download - Acer A100 | User Guide - Page 32
3. Follow the instructions on your computer screen to configure Acer Sync and start the synchronization. Configuring Acer Sync on your tablet 1. Tap Apps > Acer Sync. 2. Tap the settings icon in the top-right corner. 3. Select Settings from the menu. Acer Planner Acer Planner helps you to manage - Acer A100 | User Guide - Page 33
monthly. The bottom frame in the Agenda screen can be flicked left or right to show , up and down to cycle through the status updates. Tap on a status to view more details tablet. If you want to use Flash content on in your browser, you can visit the Android Market (see below) to easily download - Acer A100 | User Guide - Page 34
Android Market, you must read and accept the Terms of Service. You can browse the market by category or tap the search icon to search for a specific application. Once you have selected an application, tap the DOWNLOAD button to download and install the application. You will be told which services - Acer A100 | User Guide - Page 35
download them. You will need to have a Google Checkout account in order to pay for these applications. Using downloaded applications Once you've downloaded and your Home screen. See "Personalizing the Home screen" on page 19. Uninstalling downloaded applications Once you've downloaded and installed - Acer A100 | User Guide - Page 36
to open it. Rotate your tablet to the best angle to read the book. Adding books You may either add books that you already own, or download new books directly to your tablet. To download books, click on the Shop icon in the top right of the screen. A new web browser window will open to the Google - Acer A100 | User Guide - Page 37
To add books you alread own, see "Transferring files between a microSD card and your PC" on page 24 or "Connecting to a PC as a USB storage device" on page 24. Reading a book Simply swipe across a page to change the page. More options, such as searching the book, or jumping to a - Acer A100 | User Guide - Page 38
from that category. Using the content folders Each category already contains shortcuts to essential applications. Simply tap a shortcut to open the application. The shelves along the bottom of the screen may contain links to portals that allow you to download related applications from trustworthy - Acer A100 | User Guide - Page 39
applications. You may view up to twenty shortcuts on a single screen. If you add more than twenty shortcuts, swipe the screen up to see additional shortcuts. Moving or removing Tap and the shortcut from the screen. Note: Certain preloaded applications may not be removed. Acer content folders 37 - Acer A100 | User Guide - Page 40
Playing music and video Multimedia playback Your tablet comes supplied with a variety of programs that you can use to enjoy multimedia content. Music Use Music to listen to music and other audio files that you download or copy from your computer. Tap Apps > Music to open the application. Tap the - Acer A100 | User Guide - Page 41
the same network (wired or wireless) with clear.fi-installed software. Note: When using an external USB storage device to access media files, the device may not be recognized for a few minutes. Tap clear.fi. Acer clear.fi will automatically detect devices that are connected to the network and are - Acer A100 | User Guide - Page 42
hold any of the connected devices showing an arrow. Select Play or Save. To upload a photo to Facebook, or Flickr via Acer Photo Uploader, or to paired devices using Bluetooth, tap and hold a photo thumbnail, then tap Share. clear.fi videos Tap a folder under Collection to view the thumbnails. Tap - Acer A100 | User Guide - Page 43
Note: The Acer clear.fi video player only plays MP4 files. Please check for updates to the tablet's software which may add support for other types of video. See "Updating your tablet's operating system" on page 58. To send video files, for example, to paired devices using Bluetooth or to YouTube, - Acer A100 | User Guide - Page 44
supported by your tablet. See "Multimedia" on page 62. Media Server Your tablet can act as a digital media server using UPnP technology. This means that you can use menu and tap Media Server. You will need to enable Share contents before you can start using the service. You may select to share Video, - Acer A100 | User Guide - Page 45
contacts in a new group. Adding a new contact Tap New to add a new contact. You will be asked which account you want to use to store the contact. If you select the name of your tablet it will be stored in the tablet's internal memory, and not synchonized with other accounts. Managing contacts 43 - Acer A100 | User Guide - Page 46
an entry. Tap Add another field for more categories. To assign an image to your contact, tap the silhouette and select an image from your tablet's picture gallery (select Gallery if requested). You may also take and crop a new photo. Tap Done to finish and save the contact. Tip: Set each - Acer A100 | User Guide - Page 47
computer If you have synchronized your Google account and contacts, you can use your computer to access and edit your contact list. Open the Internet the list; the next time your tablet synchronizes with your computer, these changes will also be made to your tablet's contact list. Warning! Back up - Acer A100 | User Guide - Page 48
digital camera mounted on the front. This section will take you through all the steps in taking photos and videos with your tablet. Note: Photos and videos can only be saved to internal memory or a microSD card, not an external USB the screen. Normally, the video chat software you are using will - Acer A100 | User Guide - Page 49
screen. Take photo After taking a photo, tap the thumbnail in the bottom-left corner to view the photo in the Gallery. Flash mode Choose when to use mode Switches to the camera. Internal memory Saves photos to the tablet's internal memory (this is the default). Memory card Saves photos to - Acer A100 | User Guide - Page 50
, then check the camera description. Icon Description Start / stop recording Flash mode Turns the flash on or off. Video quality Choose the quality (resolution) of the video: High, Low, YouTube. Note: YouTube uses the High quality setting, but is limited to 15 minutes. Time lapse interval - Acer A100 | User Guide - Page 51
tablet and zoom in or out as needed. 3. Tap the record icon to begin recording. 4. Tap the record icon to stop recording. Note: Zoom is only available in certain resolutions. Supported of the screen. Alternatively, open using various services. Tap Menu and then Share. Note: Share options - Acer A100 | User Guide - Page 52
3. Replace the card slot cover. Note: Ensure that the SIM card is inserted all the way into the card slot. Caution: Turn off your tablet before installing or removing a SIM card. You may damage the card or your tablet if the power is still on. Activating a new SIM card and PIN If you are using a SIM - Acer A100 | User Guide - Page 53
switch on the cellular data function. SIM card lock Your tablet may come with a SIM card lock, i.e., you will only be able to use the SIM card provided by your network operator. To cancel the SIM lock, contact your network provider. Note: If you need to turn the 3G network on or off see "Putting - Acer A100 | User Guide - Page 54
your mobile Internet connection with a computer, you can connect your tablet to a PC using the supplied micro USB cable. 1. Plug the USB sync cable into the micro USB port on your tablet. 2. Plug the USB client connector into an available USB port on your computer. 3. Alternatively, you can tap Apps - Acer A100 | User Guide - Page 55
Wi-Fi hotspot You can turn your tablet into a portable Wi-Fi hotspot to share your mobile Internet connection with up to eight clients. set the Network SSID and adjust security settings (such as adding a password). 4. Tap Save to finish. Using a cellular data network (only for Wi-Fi+3G models) 53 - Acer A100 | User Guide - Page 56
pressing soft keys and on certain UI interactions. Screen You can adjust your tablet screen settings by tapping Apps > Settings > Screen. Item Brightness Animation Timeout Description Adjusts screen brightness. Enables window animations. Sets a delay before the screen will be turned off. 54 - Acer A100 | User Guide - Page 57
turn off network and Bluetooth functions and use your tablet during a flight. Check with your airline to make sure this is permitted onboard. Switch your tablet settings. Each connection will have a green check when turned on. Alternatively, Shares your tablet's mobile data connection via USB or as - Acer A100 | User Guide - Page 58
updates to the tablet's software which may add support for additional Bluetooth devices. Connecting to a PC If you wish to transfer information between your tablet and your computer, you can connect your tablet to a PC using the supplied micro USB cable. Plug the USB sync cable into the micro USB - Acer A100 | User Guide - Page 59
tablet, PC and corresponding Google services. You must install the Acer Sync program on your computer; download and install Acer Sync and Acer PIM for the PC from the mobile.acer uses daylight saving time, and have mobile network access, activate Automatic date & time from this menu. Your tablet will - Acer A100 | User Guide - Page 60
Android operating system. Updating your tablet's operating system Your tablet can download and install system updates, adding support for new devices or expanding software options. To check for updates, tap Apps > Settings > About tablet > System update > Check now. Note: Downloading new firmware - Acer A100 | User Guide - Page 61
from the application menu, then tap Privacy > Factory data reset; click Reset tablet and then Erase everything to format your tablet. Note: If you are experiencing problems with your tablet, please read "FAQ and troubleshooting" on page 60 before performing a clean boot. Advanced settings 59 - Acer A100 | User Guide - Page 62
of my device? Tap Apps > Settings > About tablet to check the OS version (Kernel/build number) and other hardware and software information. Power I couldn't turn on the device. The battery power may be depleted. Recharge the device. Refer to "Charging your tablet" on page 11 for more information - Acer A100 | User Guide - Page 63
number of wrong entries, you will be presented with an option to reset your pattern. Tap Forgot pattern? and enter your Google account username and password. Note: You must have an active Google account on the tablet. Alternatively, you can clean boot the tablet and erase all data. See "Clean - Acer A100 | User Guide - Page 64
Android™ operating system Display • 7" WSVGA TFT-LCD capacitive multi-touch screen • 1024 x 600 resolution • 262K color support Multimedia • Micro (Type D) HDMI PNG, BMP USB ports • Micro USB port (slave) Power • DC power-in (12 V, 1.5 A) Connectivity • Bluetooth 2.1+EDR & A2DP support • Wi-Fi - Acer A100 | User Guide - Page 65
3G support (only available on Wi-Fi+3G models) • aGPS • GSM 850 / 900 / 1800 / 1900 • battery operation will depend on power consumption which is based on system resource use. For example, constantly using the backlight or using power-demanding applications will shorten battery life between charges - Acer A100 | User Guide - Page 66
safety reasons, turn off all wireless or radio transmitting devices when using your device cases, transmission of data files or messages may be delayed until such a connection is available. Ensure that the above separation distance instructions are followed until the transmission is completed. Parts - Acer A100 | User Guide - Page 67
any regulations posted in these areas instruct you to do so. Hospitals or health care facilities may be using equipment that could be sensitive to . Hearing aids Some digital wireless devices may interfere with some hearing aids. If interference occurs, consult your service provider. Vehicles RF - Acer A100 | User Guide - Page 68
and obey all signs and instructions. Potentially explosive atmospheres include areas where you would normally be advised to turn off your vehicle engine. Sparks in use, you may first need to turn those features off before you can make an emergency call. Consult this guide or your service provider - Acer A100 | User Guide - Page 69
, a fully charged battery will lose its charge over time. If the battery is completely discharged, it may take a few minutes before the charging indicator appears on the display or before the device can be used. Use the battery only for its intended purpose. Never use any charger or battery that is - Acer A100 | User Guide - Page 70
or battery in your car in high temperatures. • Avoid dropping this device or battery. It can cause damage. • Contact your service provider or reseller to have them checked if this device or battery get wet or damaged from dropping or high temperature. Replacing the battery Use original products - Acer A100 | User Guide - Page 71
battery. If the host or battery is dropped, especially on a hard surface, and the end user suspects damage, take it to a service center for inspection. • Improper battery use Listen to the audible turn-byturn directions, if available. Also, using a mobile device or accessory may be prohibited or - Acer A100 | User Guide - Page 72
burn. Glass parts Some parts of your device may be made of glass. This glass could break if the product is dropped on a hard surface or receives a substantial impact. If glass breaks, do not touch or attempt to remove. Stop using your device until the glass is replaced by a qualified service center - Acer A100 | User Guide - Page 73
icnirp.de Export Law Assurances This product, including any software or technical data contained in or accompanying the product, the product. To delete data, perform a master reset. Deleting date from the device memory does not restriction of the use of certain hazardous substances in electrical and electronic equipment - Acer A100 | User Guide - Page 74
more details. LCD pixel statement The LCD unit is produced use. Depending on configuration, this product may or may not contain wireless radio devices (such as wireless LAN and/or Bluetooth France have a restricted frequency band. The worst case maximum authorized power indoors is: • 10 mW for the - Acer A100 | User Guide - Page 75
• Maximum authorized power outdoors is 10 mW Departments in which the use of the 2400 - 2483.5 MHz band is permitted with has been tested and found to comply with the limits for a Class B digital device, pursuant to Part 15 of the FCC Rules. These limits are designed to provide reasonable protection - Acer A100 | User Guide - Page 76
instructions, may cause harmful interference to radio communications. However, there is no guarantee that interference will not occur in a particular installation If this equipment does cause harmful interference to radio or television reception, which can be determined by turning (s) used for digital - Acer A100 | User Guide - Page 77
du mêre type ou d' un type équivalent recommandé par le constructeur. Mettre au rebut les batteries usagées conformément aux instructions du fabricant. ADVARSEL! Eksplosjonsfare ved feilaktig skifte av batteri. Benytt samme batteritype eller en tilsvarende type anbefalt av apparatfabrikanten. Brukte - Acer A100 | User Guide - Page 78
the device is designed to operate at multiple power levels so as to use only the poser required to reach the and meets the FCC RF exposure guidelines for use with accessories that contain no metal and that position the health protection. The limits are part of extensive recommendations for the - Acer A100 | User Guide - Page 79
was included in the European Standard EN 62311 and EN 62209-2 for use with accessories that contain no metal and that position the device a minimum of 1.5 cm from Model A100 FCC ID HLZTMDMA100 IC ID 1754F-TMDMA100 You can view certification logos on your device: open Settings > About tablet > - Acer A100 | User Guide - Page 80
For users in Thailand This telecommunication equipment conforms to the requirements of the National Telecommunications Commission. 78 - Acer A100 | User Guide - Page 81
79 - Acer A100 | User Guide - Page 82
Acer Incorporated, of 8F., No. 88, Sec. 1, Xintai 5th Rd., Xizhi Dist, New Taipei City, 22181, Taiwan Declare under sole responsibility that the product: Model: A100 Description: Tablet technical documentation relevant to the above equipment will be held at: Acer Incorporated 8F., No. 88, Sec.
-
 1
1 -
 2
2 -
 3
3 -
 4
4 -
 5
5 -
 6
6 -
 7
7 -
8
-
9
-
10
-
11
-
12
-
13
-
14
-
15
-
16
-
17
-
18
-
19
-
20
-
21
-
22
-
23
-
24
-
25
-
26
-
27
-
28
-
29
-
30
-
31
-
32
-
33
-
34
-
35
-
36
-
37
-
38
-
39
-
40
-
41
-
42
-
43
-
44
-
45
-
46
-
47
-
48
-
49
-
50
-
51
-
52
-
53
-
54
-
55
-
56
-
57
-
58
-
59
-
60
-
61
-
62
-
63
-
64
-
65
-
66
-
67
-
68
-
69
-
70
-
71
-
72
-
73
-
74
-
75
-
76
-
77
-
78
-
79
-
80
-
81
-
82
 |
 |
User Guide