Acer B247YC Lifecycle Extension Guide - Page 11
Picture 1, Picture 2, Picture 3, Picture 4, Picture 5
 |
View all Acer B247YC manuals
Add to My Manuals
Save this manual to your list of manuals |
Page 11 highlights
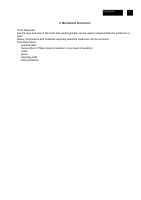
ACER B247Y 11 4.2 Assembly Procedures Preparation before assemble: 1.Clean the room for work 2.Identify the area for material 3.Prepare the implement, equipment, materials as bellow: 1) working table 2) Screw-driver 3) Knife 4) glove 5) cleaning cloth 6) ESD protection After unplugging the power cord, the power board still have power energe. Please pay attention when disassembling/assembling Power BD. S1-1 Assemble the MAIN board, power board and USB board. (This step is only for SKU with USB) Put the SHD on the worktable. Insert USB-Power BD wire to the Power BD as the picture 1. Locate the Power BD into the SHD as the picture 2. Insert FFC LVDS to the I/F BD as picture 3. Insert the wire on the P/BD to the I/F BD. Locate the I/F BD and the USB BD into the SHD as picture 4. Lock 7 screws as the picture 5 and Put Mylar on P/BD. PICTURE 1 PICTURE 2 PICTURE 3 PICTURE 4 P/BD P/BD I/F BD P/BD I/F BD PICTURE 5 P/BD I/F BD USB BD USB BD
-
 1
1 -
2
-
3
-
4
-
5
-
 6
6 -
 7
7 -
 8
8 -
 9
9 -
 10
10 -
 11
11 -
 12
12 -
 13
13 -
 14
14 -
 15
15 -
 16
16 -
17
 |
 |
