Apple TW020LL/A User Guide - Page 169
Trimming a Portion of an Image
 |
UPC - 013803101218
View all Apple TW020LL/A manuals
Add to My Manuals
Save this manual to your list of manuals |
Page 169 highlights
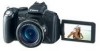
167 Trimming a Portion of an Image You can trim a required portion of a recorded image and save it as a new image file. Trimming is only possible at the same aspect ratio as that of the image. The aspect ratio is fixed to the aspect ratio set when shooting (p. 80). 1 Select [Trimming]. 1. Press the MENU button. 2. In the menu, use the or button to select . 3. Press the button. Playback/Erasing 2 Select an image. 1. Use the or button to select an image for trimming. 2. Press the button. Trimming Frame • The trimming frame (the area of the image which can be trimmed) is displayed in green. Image After Trimming
-
 1
1 -
2
-
3
-
4
-
5
-
6
-
7
-
8
-
9
-
10
-
11
-
12
-
13
-
14
-
15
-
16
-
17
-
18
-
19
-
20
-
21
-
22
-
23
-
24
-
25
-
26
-
27
-
28
-
29
-
30
-
31
-
32
-
33
-
34
-
35
-
36
-
37
-
38
-
39
-
40
-
41
-
42
-
43
-
44
-
45
-
46
-
47
-
48
-
49
-
50
-
51
-
52
-
53
-
54
-
55
-
56
-
57
-
58
-
59
-
60
-
61
-
62
-
63
-
64
-
65
-
66
-
67
-
68
-
69
-
70
-
71
-
72
-
73
-
74
-
75
-
76
-
77
-
78
-
79
-
80
-
81
-
82
-
83
-
84
-
85
-
86
-
87
-
88
-
89
-
90
-
91
-
92
-
93
-
94
-
95
-
96
-
97
-
98
-
99
-
100
-
101
-
102
-
103
-
104
-
105
-
106
-
107
-
108
-
109
-
110
-
111
-
112
-
113
-
114
-
115
-
116
-
117
-
118
-
119
-
120
-
121
-
122
-
123
-
124
-
125
-
126
-
127
-
128
-
129
-
130
-
131
-
132
-
133
-
134
-
135
-
136
-
137
-
138
-
139
-
140
-
141
-
142
-
143
-
144
-
145
-
146
-
147
-
148
-
149
-
150
-
151
-
152
-
153
-
154
-
155
-
156
-
157
-
158
-
159
-
160
-
161
-
162
-
163
-
 164
164 -
 165
165 -
 166
166 -
 167
167 -
 168
168 -
 169
169 -
 170
170 -
 171
171 -
 172
172 -
 173
173 -
 174
174 -
175
-
176
-
177
-
178
-
179
-
180
-
181
-
182
-
183
-
184
-
185
-
186
-
187
-
188
-
189
-
190
-
191
-
192
-
193
-
194
-
195
-
196
-
197
-
198
-
199
-
200
-
201
-
202
-
203
-
204
-
205
-
206
-
207
-
208
-
209
-
210
-
211
-
212
-
213
-
214
-
215
-
216
-
217
-
218
-
219
-
220
-
221
-
222
-
223
-
224
-
225
-
226
-
227
-
228
-
229
-
230
-
231
-
232
-
233
-
234
-
235
-
236
-
237
-
238
-
239
-
240
-
241
-
242
-
243
-
244
-
245
-
246
-
247
-
248
-
249
-
250
-
251
-
252
-
253
-
254
-
255
-
256
-
257
-
258
-
259
-
260
-
261
-
262
-
263
-
264
-
265
-
266
-
267
-
268
-
269
-
270
-
271
-
272
-
273
-
274
-
275
-
276
-
277
-
278
-
279
-
280
-
281
-
282
-
283
-
284
-
285
-
286
-
287
-
288
-
289
-
290
-
291
-
292
-
293
-
294
-
295
-
296
-
297
-
298
-
299
-
300
-
301
-
302
-
303
-
304
-
305
-
306
-
307
-
308
 |
 |

167
Playback/Erasing
You can trim a required portion of a recorded image and save it as a
new image file. Trimming is only possible at the same aspect ratio as
that of the image. The aspect ratio is fixed to the aspect ratio set when
shooting (p. 80).
Trimming a Portion of an Image
1
Select [Trimming].
1.
Press the
MENU
button.
2.
In the
menu, use the
or
button to select
.
3.
Press the
button.
2
Select an image.
1.
Use the
or
button to
select an image for trimming.
2.
Press the
button.
• The trimming frame (the area
of the image which can be
trimmed) is displayed in green.
Trimming Frame
Image After Trimming