Asus P5B DELUXE Motherboard Installation Guide - Page 145
Raid 10 Raid 0+1
 |
View all Asus P5B DELUXE manuals
Add to My Manuals
Save this manual to your list of manuals |
Page 145 highlights
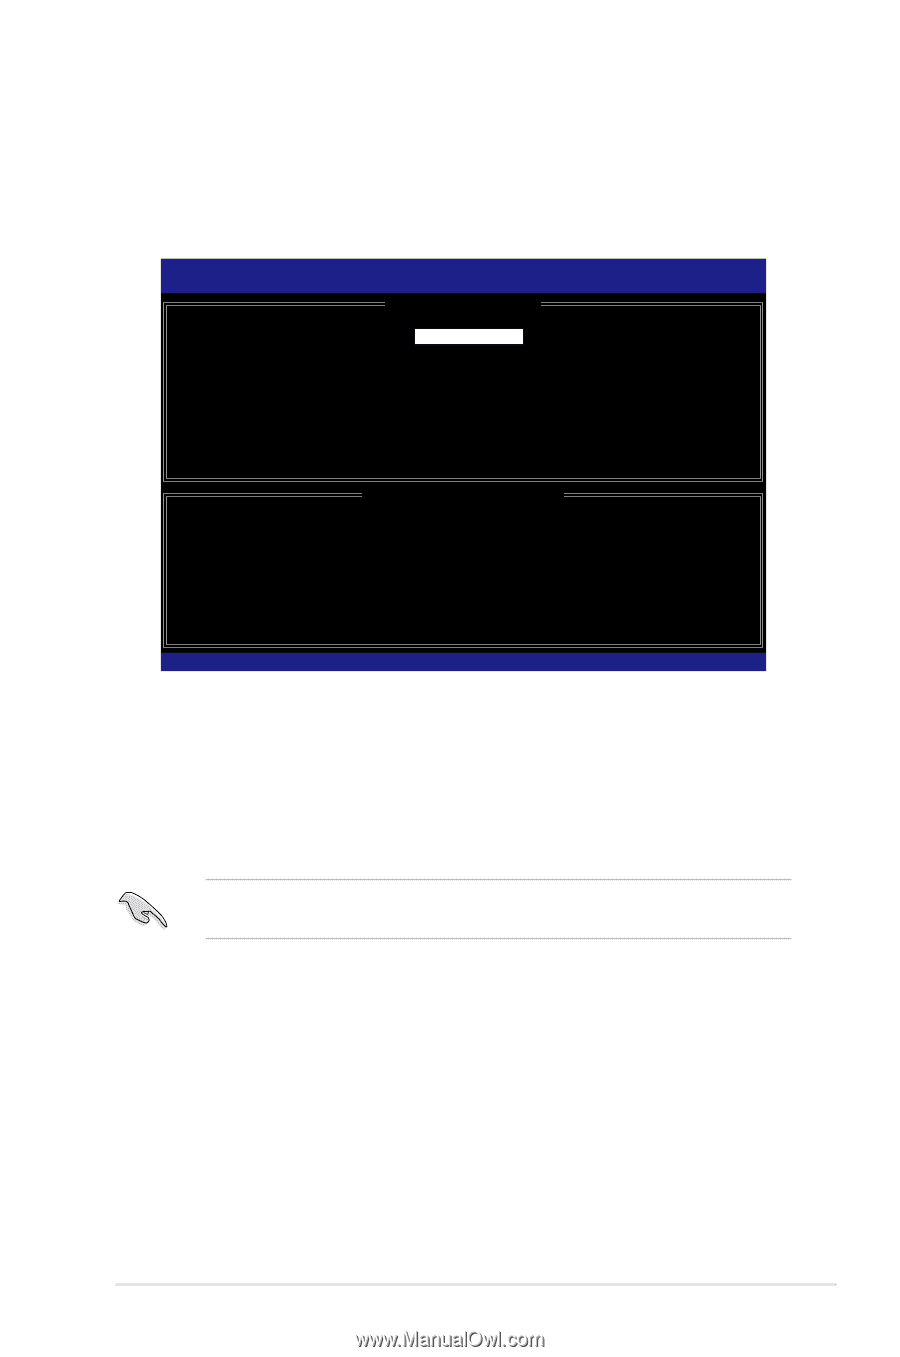
RAID 10 (RAID 0+1 1 1. Create RAID Volume Enter Intel(R) Matrix Storage Manager Option ROM v5.0.0.1032 ICH8R wRAID5 Copyright(C) 2003-05 Intel Corporation. All Rights Reserved. [ CREATE ARRAY MENU ] Name: RAID Level: Disks: Strip Size: Capacity: Volume10 RAID10(RAID0+1) Select Disks 128KB XXX.X GB Create Volume [ DISK/VOLUME INFORMATION ] Enter a string between 1 and 16 characters in length that can be used to uniquely identify the RAID volume. This name is case sensitive and cannot contain special characters. [↑↓]-Change [TAB]-Next [ESC]-Previous Menu [Enter]-Select 2. RAID 10 Enter 3. RAID Level RAID 10(RAID 0+1 Enter 4. Capacity RAID 10 Enter 4 KB から 128 KB 64 KBです。 5. Capacity RAID Enter ASUS P5B Deluxe 5-35
-
 1
1 -
2
-
3
-
4
-
5
-
6
-
7
-
8
-
9
-
10
-
11
-
12
-
13
-
14
-
15
-
16
-
17
-
18
-
19
-
20
-
21
-
22
-
23
-
24
-
25
-
26
-
27
-
28
-
29
-
30
-
31
-
32
-
33
-
34
-
35
-
36
-
37
-
38
-
39
-
40
-
41
-
42
-
43
-
44
-
45
-
46
-
47
-
48
-
49
-
50
-
51
-
52
-
53
-
54
-
55
-
56
-
57
-
58
-
59
-
60
-
61
-
62
-
63
-
64
-
65
-
66
-
67
-
68
-
69
-
70
-
71
-
72
-
73
-
74
-
75
-
76
-
77
-
78
-
79
-
80
-
81
-
82
-
83
-
84
-
85
-
86
-
87
-
88
-
89
-
90
-
91
-
92
-
93
-
94
-
95
-
96
-
97
-
98
-
99
-
100
-
101
-
102
-
103
-
104
-
105
-
106
-
107
-
108
-
109
-
110
-
111
-
112
-
113
-
114
-
115
-
116
-
117
-
118
-
119
-
120
-
121
-
122
-
123
-
124
-
125
-
126
-
127
-
128
-
129
-
130
-
131
-
132
-
133
-
134
-
135
-
136
-
137
-
138
-
139
-
 140
140 -
 141
141 -
 142
142 -
 143
143 -
 144
144 -
 145
145 -
 146
146 -
 147
147 -
 148
148 -
 149
149 -
 150
150 -
151
-
152
-
153
-
154
-
155
-
156
-
157
-
158
-
159
-
160
-
161
-
162
-
163
-
164
 |
 |
ASUS P5B Deluxe
´-²´
RAID 10 (RAID 0+1)
設定方法
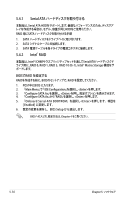
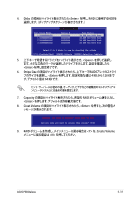
1.
ユーティリティメインメニューから
「1. Create RAID Volume」を選択し、<Enter>
を押すと、次のスクリーンが表示されます。
Intel(R) Matrix Storage Manager Option ROM v5.0.0.1032 ICH8R wRAID5
Copyright(C) 2003-05 Intel Corporation. All Rights Reserved.
[
CREATE ARRAY MENU
]
[
DISK/VOLUME INFORMATION
]
Enter a string between 1 and 16 characters in length that can be used
to uniquely identify the RAID volume. This name is case sensitive and
cannot contain special characters.
Name:
RAID Level:
Disks:
Strip Size:
Capacity:
Volume10
RAID10(RAID0+1)
Select Disks
128KB
XXX.X GB
Create Volume
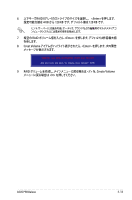
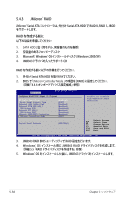
2.
RAID 10 の名前を入力し、
<Enter>を押します。
3.
RAID Level の項目がハイライト表示されたら上下キーで RAID 10(RAID 0+1) を
選択し、<Enter> を押します。
4.
Capacity の項目がハイライト表示されたら、希望の RAID 10 アレイのストライプ
サイズを入力し、
<Enter> を押します。可能な設定値は 4 KB から 128 KB です。デ
フォルトは 64 KBです。
ヒント:サーバーには低めの値、オーディオ、サウンドなどの編集用のマルチメディア
コンピュータシステムには高めの値を推奨します。
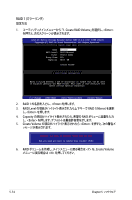
5.
Capacity アイテムがハイライト表示されたら、希望の RAID ボリューム値を入力し
<Enter> を押します。デフォルトは許容最大値を示します。
[
↑↓
]-Change
[TAB]-Next
[ESC]-Previous Menu
[Enter]-Select