Bernina Bernette 715 Manual
Bernina Bernette 715 Manual
 |
View all Bernina Bernette 715 manuals
Add to My Manuals
Save this manual to your list of manuals |
Bernina Bernette 715 manual content summary:
- Bernina Bernette 715 | Manual - Page 1
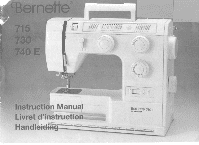
~f Irk it ;Or 'Mr 9R _ Instruction Manual Livret d'instruction A Handlei& Sernette 740E - Bernina Bernette 715 | Manual - Page 2
BPS - We wish you many hours of sewing pleasure. Nous vous fnliolons d'avoir acquis votre nouvelle machine a COUdrial Vousavez, en eftet.opte pour unmodulide eens een waag hebben die dit boek net kan beantwoorden. Uw Bernette vakhandelaar is dan akijd graag bereidomuadvies en tips to geven. Wij - Bernina Bernette 715 | Manual - Page 3
L 1992 Fritz Gegauf Ltd. Bernina Sewing Machines CH43266 Steckbern (Switzerland) 1992 Fritz Gegaut SA Faboque de machines a coudre Bernina CH-8266 Steckborn (Suisse) 1992 Fritz Gegauf AG Bernina Naaimachinefabtiek CH-8266 Steckbom (Zwitserland) We reserve the right to make technical changes in - Bernina Bernette 715 | Manual - Page 4
List of contents Accessories Automatic needle stop (Model 740E only) Athematic needle threader IM0001 7406 only' Band hemlingene stitch Bobbin - insening Bobbin - tension Bobbin - winding Bringing up the lower thread Bulb - changing Buttons sewing on (Model 740E onlyl Buttonholes Colour code green - Bernina Bernette 715 | Manual - Page 5
area. such as threading needle, changing needle. threading bobbin, or changing presser foot. and the like. 10. Always unplug sewing machine from the electrical outlet wen removing covers, lubricating. or when making an other user servicing adjustments mentioned in the instruction ma. nual. 11 - Bernina Bernette 715 | Manual - Page 6
The symbol n may also bemarked on theproduct. SAVE THESE INSTRUCTIONS This sewing machine is intended for household use only. Les consigns de de la machine. notamment pour le remplacement du raccordement de la pedalo do commando. Ce type de travaildot etre cantlea un techmciendu service aprea- - Bernina Bernette 715 | Manual - Page 7
foot lifter 5 Thread cutter on presser toot holder 6 Presser toot release 7 Extension table and open accessory box 8 Foot control socket 9 Main plug socket I 0 Power switch It Light switch 12 Bobbin winder Cover 13 Bobbin winder 14 Bobbin winder thread cutter 15 Handwheel 16 Bobbin thread guide - Bernina Bernette 715 | Manual - Page 8
I Details of the machine 1.10001 r1}) 1 1 Carrying handle 2 Stitch selection dial 3 Handwheel 4 Stitch length dial 2 5 Reverse sowing button 3 6 Bobbin winder cover 7 Hinged bobbin cover 4 8 Bobbin case 5 9 Drop feed control 6 10 Stich plate II Thread cutter on presser fool holder - Bernina Bernette 715 | Manual - Page 9
cal' 2 3 IMO iQ 4 C tiCZO 10 Accessories a General purpose fool No. 3 b Embroidery toot No. 4 e" c Overlock foot No 8 d Zipper foot No. N et' Cording foot No. 2 f Darning foot g Buttonhole Idol h• Hemmer No. I i Blind hem loot No. 9 le Button sewing foot No. 6 We recommend the use - Bernina Bernette 715 | Manual - Page 10
overlook I Elastic overlock I Stretch overlook I Standard overlook -; Bridging Feather stitch i Ribbon 1 Scallop I Double scallop i Triangle long / Square stitch I Cross stitch : Diamond stitch 715 730 • • • • • • • • • • • • • • • • • • • • • • • • • 740E • • 12 - Bernina Bernette 715 | Manual - Page 11
: The Foot Controller Model 4C-3378 is for using with Sewing Machine Model 740E. The speed control function is particu. lady useful for intricate work. e.g. sewing corners. matching up pat. terns etc. and is ideal for beginners. ► minimum ►► maximum Sewing light IModel 740E) Press power switch - Bernina Bernette 715 | Manual - Page 12
fully in the Outlet, Turn on power switch 'C' reverse the plug. II it still does not fit. contact a qualified electrician to install the proper outlet Do not modify the plug in any way Caution! The Foot Controller Model 3C-135B or 4C-3168 is for using with Sewing Machine Model 715 and 730A 16 - Bernina Bernette 715 | Manual - Page 13
Disconnect the machine from the power supply by removing the plug from the mains socket! - Loosen screw "C" on the back of the head cover. - Remove the head cover "Cr. • - Unscrew the bulb "E" arid fit new bulb. - Replace the head cover and tigh- ten screw. Should there be any problem, ask - Bernina Bernette 715 | Manual - Page 14
thick fabrics, the presser loot can be raised a second stage for easy positioning of the work. (2) Drop teed control For normal sewing. the feed-dog should be in the raised position. Press "K. (3) For certain types of work. e.g. darning or free-hand embroidery. the feeddogmust belowered. Press13". - Bernina Bernette 715 | Manual - Page 15
maritally. 2 Removing the presser foot Raise the presser foot. (3) Raise thelever's'and thelocitclisen. gages_ Attaching the seam guide Attach the sewn guide 'cit in the slot as illustrated. Adjust according to need for hems, pleats. etc. (4) Attention: Turn power switch to tr when carrying - Bernina Bernette 715 | Manual - Page 16
spindle. 3 Movement of the needle is automati- cally cut out. (2) Take the thread from the spool through the guide to the bobbin. (3/4) Wind thread a few times by hand round the empty bobbin in a clockwise direction. Press the foot control. As soon as the bobbinishill. wincing will stop and the - Bernina Bernette 715 | Manual - Page 17
Insert it into the shuttle. (5) Attention: Turn power switch to '0'. 41 Bobbin thread tension To test the bobbin thread tension. remove the bobbin case and bobbin and hold it by suspending it by the thread. Jerk it once or twice. II the tension Is correct, the thread will unwind by about an inch or - Bernina Bernette 715 | Manual - Page 18
the needle regularly. especially if It is showing signs of wear and causing problems. Insert the needle as illustrated as follows: A Loosen the needle clamp will go. Alfenfion: Turn power switch to 1:11 Needles must be inperfect condition. (2) Problems can occur with: A bent needles B blunt needles - Bernina Bernette 715 | Manual - Page 19
leather All work Leather needle 80-100 Cotton thread polyester thread Jeans thread. polyester thread Polyester thread Embroidery and darning thread cotton thread Cotton thread Embroidery thread Cotton thread Polyester thread Polyester thread Etoffes epaisses coutures p. ex. velours °Melo. tweed - Bernina Bernette 715 | Manual - Page 20
3 p O O I Threading the upper thread Attention:Tum power switch to *T. Raise the needle bar. - Take the thread through the guide on the back of the machine from nght to left, then (1) - between the thread tension dismi and (2) - from right to left in the thread takeup spring (3) - upandfromright - Bernina Bernette 715 | Manual - Page 21
f6 \ Upper thread tension Basic thread tension setting: 4 To increase the tension, turn the dial to the next number up. To reduce the tension, turn the dial to the next number down. A Normal thread tension B Thread tension too loose C Thread tension too tight 34 - Bernina Bernette 715 | Manual - Page 22
osce.,0 I 740h Cflly! - Raise the needle to its highest position - Press lever' right down - Thethreader automatically swings to the threading position "Ur - Take the thread roundthehook t" - Take the thread in front of the needle found the hook V from bottom to top - Release lever W - Pull the - Bernina Bernette 715 | Manual - Page 23
using the needle slop function or by lapping the foot control. 1 Hold the upper thread in your left hand 2 Press button 'A" Press button 'B' 3 Pull gently on the upper thread to bring up the lower thread. Lay both threads to the back under the presser foot. The lowerthread can also be brought up by - Bernina Bernette 715 | Manual - Page 24
up the lower thread (Mule% 715. 730) Hold the upper thread with the left hand. Turn the handvaieel forwards until the needle is raised. (1) Pull on the upper thread to bring the lower thread up through the stitch plate hole. Lay both threads to the back under the presser foot. (2) .\\.'"•'" 40 - Bernina Bernette 715 | Manual - Page 25
and the machine will sew forwards again. (1) Removing the work Turn the handwheel fontrardsto bring the thread take-up lever to its highest position, raise the presser foot and remove work towards the back (2) Cutting the thread: Hold the threads behind the presser foot with both hands, guide them - Bernina Bernette 715 | Manual - Page 26
depending on the type of stitch. Always sew on the right side of the fabric with Sewing with a Thin needle (Model 740E only) For visible seams in jerseys, decorative work, pintucks. (2) Attention: Turn power switch to "01 Insert the Twin needle, thread both threads, see Illustration Page 30, thread - Bernina Bernette 715 | Manual - Page 27
.71 0 t Colour coded stitch selection Model 715) Turn the stitch 5010-cbon dial to the desired position. (1) Note the colour of the chosen stitch. Turn the stitchlength dialIn therange of the same colour. (2) The stitch length can be adjusted within the same coloured area. The stitch width Is - Bernina Bernette 715 | Manual - Page 28
0 0 0 ewes flu 48 min,A • • t• • !PRP LED Display (141000 740E °Nil Stitch selection with light diode and colour code Colour code Green and Blue. Note the Stitch Balance (4) for stitches A: + lengthen - shorten (model 740E only) Colour Indicator dAcdol 730 oily) Stitch selection with coloured - Bernina Bernette 715 | Manual - Page 29
00000 t:It: Nunn» 60660000000 455181101 iimusammull.-C-A 7. " 0000000 0 s 11 4 1 4 321 a Straight stitch Set the machine as illustrated. Ruktofthumb:Thethickerthefabric, thread and needle. the longer the stitch should be. (I) Zigzag Adjust the stitch width. (2) Adjust to the zig-zag width - Bernina Bernette 715 | Manual - Page 30
0000 00000600000 tilt: S I`.-‹111 2473221110 IIIII7111011000 ,-10a • 1 00000000 MUM 31 Neatening edges Set the machine as illustrated. (I) Guide the fabric so that the needle goes in just over the edge of the labia (2) Attention: UseFoot No. 8 for fabrics which tend to pucker. Select - Bernina Bernette 715 | Manual - Page 31
00000 666466.0600 t:32: 24 23 n vs • A A 00000000 . )g[181 $$$$$$ 32 3-Step Zig-zag Sewing on lace and elastic, darning, mending, reinforcing edges. Set the machine as illustrated. (1) Place patch in position. The stitch length can be shortened to produce very close stitches (2) When mending - Bernina Bernette 715 | Manual - Page 32
fine knits, jerseys. neck edges. ribbing. Double overlook stitch (Mozlel 740E (ray) For line knits, handknits. seams. Overlock stitch For fine knits, jerseys. neck edges. ribbing. All overlock stitches are suitable for sewing and neatening edges and visible seams in one operation. When neatening - Bernina Bernette 715 | Manual - Page 33
1 41 2 1-1 Overlock (IOUS 230) Stretch warlock (Model 2301 Seams, neatening edges, visible hems. 0 Set machine as illustrated. t0 E for fine fabrics C for thick fabrics Both stitches aro suitable for sewing and neatening edges and visible • hems in ono operation. When nea- tening, the needle - Bernina Bernette 715 | Manual - Page 34
(3) to W. Turn the sfitch selection dial (1) until the red diode lights up as illustrated. Turn the stitch width dial (2) to '0'. The machine sews two stitches forwards and one stitch backwards. This given triple reinforcement. Triple zlisag For hardwearing seams, hems and decorators seams. Turn the - Bernina Bernette 715 | Manual - Page 35
I rr to • o Stitch selection Triple straight stitch llkdel 715 only) For hardwearing seams. Set the machine as illustrated. The machine sews two stitches forward and one stitch backwards. This gives triple reinforcement. Triple zig-zag tiloded ris only) For hardwearing seams. hems and decorative - Bernina Bernette 715 | Manual - Page 36
• 0 }MUN I ▪ 1 3 II 4 321 Smocking stitch Models raoiios wry) Seams, hems, T•shirts, underwear. etc. Set the machine as illustrated. This stitch can be used for all types of jersey as well as for woven fabrics. (I) Sew at 1 cm (7.") from the fabric edge and Him the surplus fabric. (2J • 2 - Bernina Bernette 715 | Manual - Page 37
\-1 16 17 C er C , __,) r C 18 66 Practical stitches Set the machine as illustrated. Turn the stitch selection dial (1) until the green diode lights up at the . Gathering with cord or shirring elastic Rampart 18 Nociel 740E Only) For flat joining seams, sewing on elastic. visible hems. - Bernina Bernette 715 | Manual - Page 38
II 5 14 131111•-lt-, 1 11 • • Practical stitches Set the machine as Illustrated. Turn the stitch selection dial (1) until the red diode lights up . • Double arrow 7 lorty for Model 740E) For seams and hems. Tins stitch is suitable for sewing and neatening stretch fabrics and as a decorative - Bernina Bernette 715 | Manual - Page 39
0 ooa 0 VOW •.0 0 0 00 OOO i3sm1u`e1lim19. 1 1 14 1 `-t-, (6--) z6r4 3 Practical stitches Set the machine as illustrated. Turn the stitch selection dial (1) until the red diode goes on at the stitch desired. Turn the stitch length dial (3) to "A' and adjust - Bernina Bernette 715 | Manual - Page 40
Pi Min .-Ma 0 0 0 0000000 0 Malar lai Decorative stitches Nadel 740E only) For edges, tablecloths. bed linen, cuffs, embroidery. 19 Square stitch 20 Diamond stitch 21 Ribbon 22 Scallop 23 Double results. use a paper or tearaway backing. Embroidery thread adds to the effect 19 20 21 22 23 24 - Bernina Bernette 715 | Manual - Page 41
, 0:e,7,,,s, 000006e/0 3UM2€ r t r 1 5 4 3?! 2 Decorative stitches i Mooea 740E onbl Edges. tablecloths. bed linen. cuffs. embroidery. Cross stitch 9 Turn the stitch selection chat (1) until the rod diode lights up at . use a paper or tear-away backing. Embroidery thread adds to the effect. 74 - Bernina Bernette 715 | Manual - Page 42
and attach the Buttonhole toot. The gauge is now set for sewing perfectly even length buttonholes. (3) When starting to sew the thread tension produces beget results. - Use a backing for line or stretchy fabrics. - It is advisable to use gimp cord for stretch or knit fabrics. The zigzag should sew - Bernina Bernette 715 | Manual - Page 43
rics. Set the machine as illustrated. (1) Note: It takes practice to sew blind hems. Always make a sewing test first. Fold guide (4) by turning the knob (5) so that the guide just rests against the fond. Sew slowly, guiding the fabric care. fully along the edge of the guide. Turn the speed control - Bernina Bernette 715 | Manual - Page 44
presser foot clamp. (2) Attach the Darning foot to the presser fool holder. The lever 'K should be behind the needle clamp screw 'W. Press the Deming foot on firmly from behind with your index finger and tighten the screw C. (3) First sew round the edge of the hole (to secure the threads). (4) First - Bernina Bernette 715 | Manual - Page 45
0 000 2:122 24 ZIA II 21 0000 c QSOGO NOef61a Own 1 (t) 1 Sewing in zips Set the machine as illustrated. (It The zip foot can be inserted right a left. depending on which side of the foot you are going to sew. (2.3) To sew past the zip pull. lower the needle into the fabric, raise the presser - Bernina Bernette 715 | Manual - Page 46
If 6 T4 131211 ,-10-• HMO 1 Sewing on buttons Imoce 140E ont, Set the machine as illustrated.Lower the teed dog. Needle position right (1) Position the work under the foot. Place the button on the marked position. 'ower the foot. adjuststtch width to 'V and sew a few securing slit• ches. Adjust - Bernina Bernette 715 | Manual - Page 47
. Set the machine as illustrated. (t) Neaten the edge of the fabric. At the beginning of the hem, turn under the edge Twice by about 3 mm (re") and Sew 4-5 stitches to secure. Pell the thread slightly towards the back. Insert the needle into the fabric, raise the presser foot and guide the fold into - Bernina Bernette 715 | Manual - Page 48
"II- , 1 999 120009 MISR 5 5 1 5 5 5 311 jr 721 :t., , '"\ h Sewing with the Cording foot dawn ROE 01919 Decorative effects. cushions. tablecloths, etc. Set the machine as illustrated. Various stitches are suitable for sewing on cord. e.g. Zig-zag. Triple zig-zag. decorative stitches. (1) Insert - Bernina Bernette 715 | Manual - Page 49
supply. --- - two hook retaining arms. Insert the bobbin case and bobbin and replace the stitch plate. Important Fabric fluff and threads must be removed regularly. Your machine should be serviced at regular intervats at one of our service agencies. Remove the stitch plate: Turn the handwheel - Bernina Bernette 715 | Manual - Page 50
Trouble shooting guide Problem uppoi ;Mead beaks sower tread breaks $kppod addles Neode breaks LOOSO 040-06 Seams gather or Outlier Unevon stitches. uneven reed The machnn is nosy The machete terns 92 Cause 1. The machine is flat bread correct' 2. The th read tension is too tghl 3. The thread is - Bernina Bernette 715 | Manual - Page 51
021010102(C) V/2/gPAAR^27
-
 1
1 -
 2
2 -
 3
3 -
 4
4 -
 5
5 -
 6
6 -
 7
7 -
8
-
9
-
10
-
11
-
12
-
13
-
14
-
15
-
16
-
17
-
18
-
19
-
20
-
21
-
22
-
23
-
24
-
25
-
26
-
27
-
28
-
29
-
30
-
31
-
32
-
33
-
34
-
35
-
36
-
37
-
38
-
39
-
40
-
41
-
42
-
43
-
44
-
45
-
46
-
47
-
48
-
49
-
50
-
51
 |
 |

it
~f
Ir
k
;Or
Instruction
Manual
Livret
d'instruction
A
Handlei&
'Mr
Sernette
740E
9R
_