Brother International 9200C Users Manual - English - Page 170
User Defined Button, Scanner Settings
 |
UPC - 012502565116
View all Brother International 9200C manuals
Add to My Manuals
Save this manual to your list of manuals |
Page 170 highlights
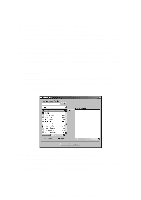
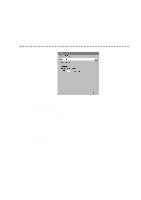
OCR Package-From the pull-down list, select TextBridge Classic OCR if you want to use the OCR package that was installed with the Brother software. Click the OCR Settings... button to choose how the OCR application will read the pages you scan into your word processor application. The Preferences window will appear: Select your setting and click OK. • Auto Orientation-Check this checkbox if you want your word processor application to read the page as it is set up. • Decolumnized Output-Check this checkbox if you want your word processor application to read across the entire page from left to right. • Document Format-From the pull-down list, select the file format you want to use for your word processor or text documents. User Defined Button Scanner Settings From the pull-down list, select the scanning mode that is appropriate for the type of file: Faxing, Filing and Copying; Text for OCR; Photos; Photos (High Quality); Photos (Quick Scan); Custom; Draft Copy or Fine Copy. To change any of the settings for that mode, click the Modify Settings... button. 16 - 12 U S I N G T H E W I N D O W S ®- B A S E D B R O T H E R C O N T R O L C E N T E R
-
 1
1 -
2
-
3
-
4
-
5
-
6
-
7
-
8
-
9
-
10
-
11
-
12
-
13
-
14
-
15
-
16
-
17
-
18
-
19
-
20
-
21
-
22
-
23
-
24
-
25
-
26
-
27
-
28
-
29
-
30
-
31
-
32
-
33
-
34
-
35
-
36
-
37
-
38
-
39
-
40
-
41
-
42
-
43
-
44
-
45
-
46
-
47
-
48
-
49
-
50
-
51
-
52
-
53
-
54
-
55
-
56
-
57
-
58
-
59
-
60
-
61
-
62
-
63
-
64
-
65
-
66
-
67
-
68
-
69
-
70
-
71
-
72
-
73
-
74
-
75
-
76
-
77
-
78
-
79
-
80
-
81
-
82
-
83
-
84
-
85
-
86
-
87
-
88
-
89
-
90
-
91
-
92
-
93
-
94
-
95
-
96
-
97
-
98
-
99
-
100
-
101
-
102
-
103
-
104
-
105
-
106
-
107
-
108
-
109
-
110
-
111
-
112
-
113
-
114
-
115
-
116
-
117
-
118
-
119
-
120
-
121
-
122
-
123
-
124
-
125
-
126
-
127
-
128
-
129
-
130
-
131
-
132
-
133
-
134
-
135
-
136
-
137
-
138
-
139
-
140
-
141
-
142
-
143
-
144
-
145
-
146
-
147
-
148
-
149
-
150
-
151
-
152
-
153
-
154
-
155
-
156
-
157
-
158
-
159
-
160
-
161
-
162
-
163
-
164
-
 165
165 -
 166
166 -
 167
167 -
 168
168 -
 169
169 -
 170
170 -
 171
171 -
 172
172 -
 173
173 -
 174
174 -
 175
175 -
176
-
177
-
178
-
179
-
180
-
181
-
182
-
183
-
184
-
185
-
186
-
187
-
188
-
189
-
190
-
191
-
192
-
193
-
194
-
195
-
196
-
197
-
198
-
199
-
200
-
201
-
202
-
203
-
204
-
205
-
206
-
207
-
208
-
209
-
210
-
211
-
212
-
213
-
214
-
215
-
216
-
217
-
218
-
219
-
220
-
221
-
222
-
223
-
224
-
225
-
226
-
227
-
228
-
229
-
230
-
231
-
232
-
233
-
234
-
235
-
236
-
237
-
238
-
239
-
240
-
241
-
242
-
243
-
244
 |
 |
