Brother International BM2800 Users Manual - English and Spanish - Page 36
The bar tacks of the buttonhole are sewn
 |
View all Brother International BM2800 manuals
Add to My Manuals
Save this manual to your list of manuals |
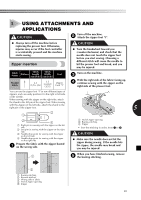
Page 36 highlights
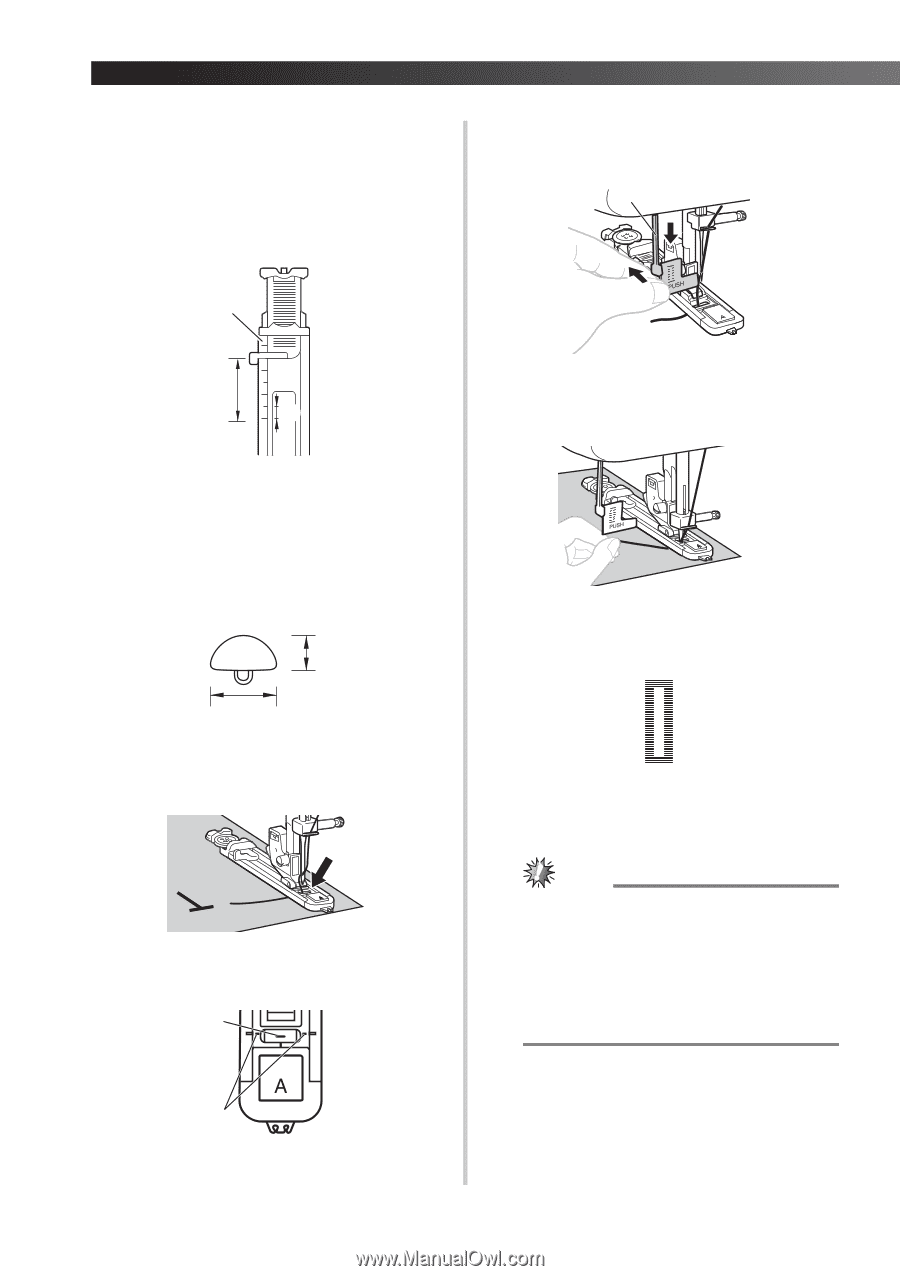
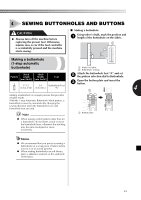
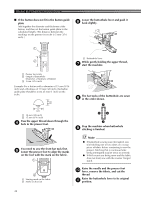
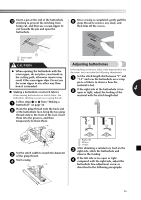
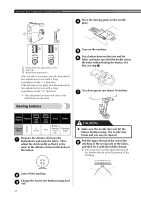
SEWING BUTTONHOLES AND BUTTONS ■ If the button does not fit in the button guide plate Add together the diameter and thickness of the button, and then set the button guide plate to the calculated length. (The distance between the markings on the presser foot scale is 5 mm (3/16 inch).) Lower the buttonhole lever and push it 6 back slightly. 1 1 2 3 1 Buttonhole lever While gently holding the upper thread, 7 start the machine. 1 Presser foot scale 2 Length of buttonhole (Diameter + thickness of button) 3 5 mm (3/16 inch) Example: For a button with a diameter of 15 mm (9/16 inch) and a thickness of 10 mm (3/8 inch), the button guide plate should be set to 25 mm (1 inch) on the scale. 1 2 1 10 mm (3/8 inch) 2 15 mm (9/16 inch) Pass the upper thread down through the 4 hole in the presser foot. The bar tacks of the buttonhole are sewn 8 in the order shown. 3 24 1 Stop the machine when buttonhole 9 stitching is finished. You need to sew the front bar tack first. 5 Lower the presser foot to align the marks on the foot with the mark on the fabric. 1 2 1 Starting mark on the fabric 2 Marks on the foot Note ● If buttonhole sewing was interrupted, sew trial stitching one or two times on a scrap piece of fabric before continuing to sew the project. Stitching that is continued after being interrupted may be sewn incorrectly. ● If thick seams are being sewn and the fabric does not feed, sew with the coarser (longer) stitch. Raise the needle and the presser foot 0 lever, remove the fabric, and cut the thread. Raise the buttonhole lever to its original a position. 35
-
 1
1 -
2
-
3
-
4
-
5
-
6
-
7
-
8
-
9
-
10
-
11
-
12
-
13
-
14
-
15
-
16
-
17
-
18
-
19
-
20
-
21
-
22
-
23
-
24
-
25
-
26
-
27
-
28
-
29
-
30
-
 31
31 -
 32
32 -
 33
33 -
 34
34 -
 35
35 -
 36
36 -
 37
37 -
 38
38 -
 39
39 -
 40
40 -
 41
41 -
42
-
43
-
44
-
45
-
46
-
47
-
48
-
49
-
50
-
51
-
52
-
53
-
54
-
55
-
56
-
57
-
58
-
59
-
60
-
61
-
62
-
63
-
64
-
65
-
66
-
67
-
68
-
69
-
70
-
71
-
72
-
73
-
74
-
75
-
76
-
77
-
78
-
79
-
80
-
81
-
82
-
83
-
84
-
85
-
86
-
87
-
88
-
89
-
90
-
91
-
92
-
93
-
94
-
95
-
96
-
97
-
98
-
99
-
100
-
101
-
102
-
103
-
104
 |
 |