Brother International FAX1860C Quick Setup Guide - English - Page 5
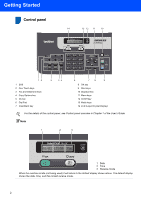
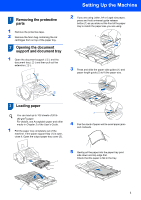
Setting Up the Machine, 1 Removing the protective parts
 |
View all Brother International FAX1860C manuals
Add to My Manuals
Save this manual to your list of manuals |
Page 5 highlights
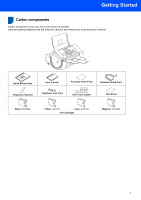
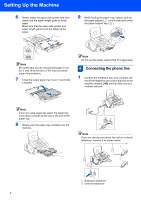
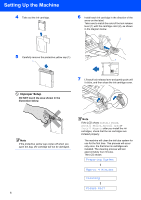
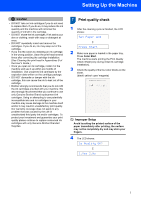
Setting Up the Machine 1 1 Removing the protective parts 1 Remove the protective tape. 2 Remove the foam bag containing the ink cartridges from on top of the paper tray. 2 Opening the document support and document tray 1 Open the document support ( ) and the document tray ( ) and then pull out the extension ( ). 1 2 3 2 If you are using Letter, A4 or Legal size paper, press and hold universal guide release button (1) as you slide out the front of the paper tray to match the paper size you are using. 1 3 Press and slide the paper side guides (1) and paper length guide (2) to fit the paper size. 1 3 Loading paper You can load up to 100 sheets of 20 lb (80 g/m2) paper. For details, see Acceptable paper and other media in Chapter 2 of the User's Guide. 1 Pull the paper tray completely out of the machine. If the paper support flap (1) is open, close it. Open the output paper tray cover (2). 2 4 Fan the stack of paper well to avoid paper jams and misfeeds. 5 Gently put the paper into the paper tray print side down and top edge first. Check that the paper is flat in the tray. 1 2 3
-
 1
1 -
 2
2 -
 3
3 -
 4
4 -
 5
5 -
 6
6 -
 7
7 -
 8
8 -
 9
9 -
 10
10 -
 11
11 -
12
-
13
-
14
-
15
-
16
 |
 |
