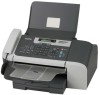
Brother International FAX1860C Quick Setup Guide - English - Page 7
Connecting the power cord, 6 Installing the ink cartridges, No Cartridge
 |
View all Brother International FAX1860C manuals
Add to My Manuals
Save this manual to your list of manuals |
Page 7 highlights
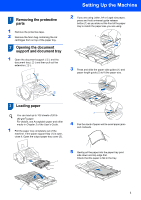
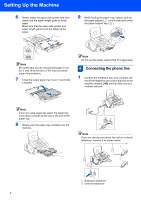
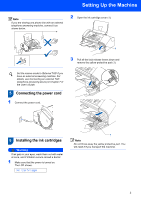
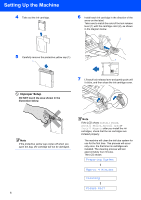
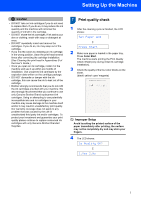
Setting Up the Machine Note If you are sharing one phone line with an external telephone answering machine, connect it as shown below. 2 Open the ink cartridge cover (1). 1 3 Pull all the lock release levers down and remove the yellow protective part (1). Set the receive mode to 'External TAD' if you have an external answering machine. For details, see Connecting an external TAD (telephone answering device) in Chapter 7 of the User's Guide. 5 Connecting the power cord 1 Connect the power cord. 6 Installing the ink cartridges Warning If ink gets in your eyes, wash them out with water at once, and if irritation occurs consult a doctor. 1 Make sure that the power is turned on. The LCD shows: No Cartridge 1 Note Do not throw away the yellow protective part. You will need it if you transport the machine. 5
-
 1
1 -
 2
2 -
 3
3 -
 4
4 -
 5
5 -
 6
6 -
 7
7 -
 8
8 -
 9
9 -
 10
10 -
 11
11 -
 12
12 -
13
-
14
-
15
-
16
 |
 |
