Brother International HL-720 Users Manual - English - Page 2
Shipment of the Printer, Warning - toner
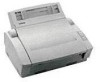 |
View all Brother International HL-720 manuals
Add to My Manuals
Save this manual to your list of manuals |
Page 2 highlights
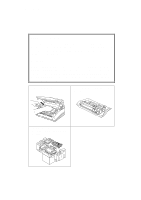
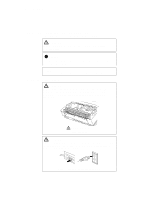
English: HL-YL User's Guide, Cover Shipment of the Printer If for any reason you must ship your Printer, carefully package the Printer to avoid any damage during transit. It is recommended that you save and use the original packaging. The Printer should also be adequately insured with the carrier. Warning When shipping the Printer, the DRUM UNIT assembly including the TONER CARTRIDGE must be removed from the Printer and placed in the plastic bag. Failure to remove and place it in the plastic bag during shipping will cause severe damage to the Printer and will VOID THE WARRANTY. 1 Remove the drum unit. 2 Place it in the plastic bag and seal the bag completely. 3 Re-pack the printer. See "REPACKING THE PRINTER" in Chapter 5. II
-
 1
1 -
 2
2 -
 3
3 -
 4
4 -
 5
5 -
 6
6 -
 7
7 -
 8
8 -
9
-
10
-
11
-
12
-
13
-
14
-
15
-
16
-
17
-
18
-
19
-
20
-
21
-
22
-
23
-
24
-
25
-
26
-
27
-
28
-
29
-
30
-
31
-
32
-
33
-
34
-
35
-
36
-
37
-
38
-
39
-
40
-
41
-
42
-
43
-
44
-
45
-
46
-
47
-
48
-
49
-
50
-
51
-
52
-
53
-
54
-
55
-
56
-
57
-
58
-
59
-
60
-
61
-
62
-
63
-
64
-
65
-
66
-
67
-
68
-
69
-
70
-
71
-
72
-
73
-
74
-
75
-
76
-
77
-
78
-
79
-
80
-
81
-
82
-
83
-
84
 |
 |

II
English: HL-YL User’s Guide, Cover
Shipment of the Printer
If for any reason you must ship your Printer, carefully package the
Printer to avoid any damage during transit. It is recommended that you
save and use the original packaging. The Printer should also be
adequately insured with the carrier.
Warning
When shipping the Printer, the DRUM UNIT assembly including the
TONER CARTRIDGE must be removed from the Printer and placed in
the plastic bag.
Failure to remove and place it in the plastic bag
during shipping will cause severe damage to the Printer and will
VOID THE WARRANTY.
1
Remove the drum unit.
2
Place it in the plastic bag and seal the
bag completely.
3
Re-pack the printer.
See “REPACKING THE PRINTER”
in Chapter 5.