Brother International PE770 Users Manual - English
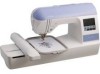
Brother International PE770 - Computerized Embroidery Machine Manual
 |
UPC - 012502623489
View all Brother International PE770 manuals
Add to My Manuals
Save this manual to your list of manuals |
Brother International PE770 manual content summary:
- Brother International PE770 | Users Manual - English - Page 1
GETTING READY EMBROIDERY APPENDIX Computerized Embroidery Machine Operation Manual - Brother International PE770 | Users Manual - English - Page 2
persons. 2 Always unplug the machine from the electrical outlet when removing covers, lubricating, or when making any adjustments mentioned in the instruction manual. • To unplug the machine, switch the machine moving parts. Special care is required around the machine needle. • Switch the machine to - Brother International PE770 | Users Manual - English - Page 3
follow the troubleshooting table in the back of the operation manual to inspect and adjust the machine yourself. If the problem persists, please consult your local authorized Brother dealer. Use this machine only for its intended use as described in the manual. Use accessories recommended by the - Brother International PE770 | Users Manual - English - Page 4
reduced physical, sensory or mental capabilities, or lack of experience and knowledge, unless they have been given supervision or instruction concerning use of the appliance by a person responsible for their safety. Children should be supervised to ensure that they do not play with the appliance. 2 - Brother International PE770 | Users Manual - English - Page 5
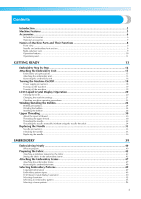
...5 Machine Features ...5 Accessories ...6 Included accessories ...6 Optional accessories ...7 Names of Machine Parts and Their Functions 8 Front view ...8 Needle and embroidery foot section ...9 Right-side/rear view ...9 Operation buttons ...10 Operation panel ...11 GETTING READY 13 Embroidery - Brother International PE770 | Users Manual - English - Page 6
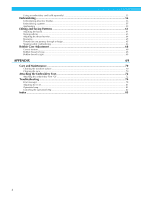
66 Bobbin Case Adjustment 68 Correct tension...68 Bobbin thread is loose...68 Bobbin thread is tight ...68 APPENDIX 69 Care and Maintenance ...70 Cleaning the machine surface ...70 Cleaning the race ...70 Attaching the Embroidery Foot 72 Attaching the embroidery Foot "Q" ...72 Troubleshooting - Brother International PE770 | Users Manual - English - Page 7
Introduction Thank you for purchasing this embroidery machine. Before using the machine, carefully read the "IMPORTANT SAFETY INSTRUCTIONS", and then study this manual for the correct operation of the various functions. In addition, after you have finished reading this manual, store it where it can - Brother International PE770 | Users Manual - English - Page 8
XE1372-001 130013-124 No. Part Name 10 Spool net 11 Operation manual 12 Quick reference guide 13 Embroidery foot "Q" (on machine) Embroidery set (large) 14 H 18cm X W 13 cm (H 7 inches X W 5 inches) 15 Scissors 16 Dust cover 17 Accessory bag Part Code U.S.A. / Canada Others XA5523-020 - Brother International PE770 | Users Manual - English - Page 9
accessories. 1. 2. 3. 4. 5. 6. No. Part Name 1 Brother poly #90 bobbin thread Water solude stabilizer 2 Stabilizer material for embroidery 3 Embroidery card Embroidery set (small) 4 H 2 cm X W 6 cm (H 1 inch X W 2-1/2 inches) Part Code U.S.A. / Canada Other No. Part Name Part - Brother International PE770 | Users Manual - English - Page 10
spool of thread on the spool pin. f Bobbin winder Use the bobbin winder when winding the bobbin. g Operation panel From the operation panel, patterns can be selected and edited, and operations for using the machine can be displayed (page 11). 8 h Embroidery unit connector slot Plug in the connector - Brother International PE770 | Users Manual - English - Page 11
insert the bobbin into the bobbin case. f Embroidery foot "Q" This presser foot is used for embroidering. a Handle Carry the machine by its handle when transporting the machine. b Handwheel Turn the handwheel toward you (counterclockwise) to raise and lower the needle. c Embroidery card slot Insert - Brother International PE770 | Users Manual - English - Page 12
embroidering. Red: The machine can not embroider. Orange: The machine is winding the bobbin thread, or the bobbin winder shaft is moved to the right side. b Needle position button Press the needle position button to raise or lower the needle. Pressing the button twice sews one stitch. c Thread - Brother International PE770 | Users Manual - English - Page 13
selection screen. g Settings key Press to display the settings screen. h Help key Press to get help on using the machine. Displays simple explanations of setting upper thread / bobbin winding / setting bobbin thread / embroidery unit attachment / embroidery frame attachment / needle replacement. 11 - Brother International PE770 | Users Manual - English - Page 14
12 - Brother International PE770 | Users Manual - English - Page 15
21 Checking machine operating procedures 23 Winding/Installing the Bobbin 24 Bobbin precautions 24 Winding the bobbin 24 Installing the bobbin 28 Upper Threading ...30 About the spool of thread 30 Threading the upper thread 30 Threading the needle 32 Threading the needle manually (without - Brother International PE770 | Users Manual - English - Page 16
3 Setting up the bobbin thread For the bobbin thread, wind embroidery bobbin thread and set it in place. For details, refer to "Winding/Installing the Bobbin" (page 24). ↓ 4 Preparing the fabric Attach a stabilizer material to the fabric, and hoop it in an embroidery frame. For details, refer - Brother International PE770 | Users Manual - English - Page 17
describes how to attach the embroidery unit. Before turning on the machine, attach the embroidery unit to it. If the embroidery unit is not attached, the machine does not operate. 1 Embroidery unit precautions Attaching the embroidery unit Cautions for the embroidery unit will be explained - Brother International PE770 | Users Manual - English - Page 18
moves to its initial position. Make sure that the machine is completely stopped and follow the instructions below. Remove the embroidery frame. a • For details on removing the embroidery frame, refer to "Removing the embroidery frame" (page 48). Press , and then press . b a a Carriage X The - Brother International PE770 | Users Manual - English - Page 19
Hold the release button on the bottom left of d the embroidery unit, and slowly pull the embroidery unit to the left. 1 a a Release button X The embroidery unit separates from the machine. CAUTION ● Do not carry the embroidery unit by holding the release button compartment. Attaching the - Brother International PE770 | Users Manual - English - Page 20
plugged in to them. Fire or electric shock may result. ● Do not touch the plug with wet hands. Electric shock may result. ● When unplugging the machine, always turn off the main power first. Always grasp the plug to remove it from the outlet. Pulling on the cord may damage the cord - Brother International PE770 | Users Manual - English - Page 21
be sure to attach the When you are finished using the machine, turn it off. embroidery unit to it. If the embroidery unit is not attached, the machine does not operate. (For details, In addition, before transporting the machine to another location, be sure to turn it off. 1 refer to "Attaching - Brother International PE770 | Users Manual - English - Page 22
c Alphabet patterns d Frame patterns e Embroidery card f Patterns stored in the machine's memory g Moves the embroidery unit carriage to its storage position Memo z Refer to "Error messages" (page 78) for messages displayed on the LCD. z Depending on the model, a different screen may be displayed - Brother International PE770 | Users Manual - English - Page 23
Adjusts the brightness of the LCD. Lighter Darker Display the service count and the total Stitch counter number of embroidery stitches. The service count is a reminder to take your machine in for regular servicing. (Contact your - authorized dealer for details.) Product number NO.: The - Brother International PE770 | Users Manual - English - Page 24
GETTING READY Turn on the machine. a X The LCD comes on. Press b panel. (Settings key) on the operation X The settings screen appears. Press the item to be set. c Switch screens using (Previous - Brother International PE770 | Users Manual - English - Page 25
thread / bobbin winding / setting bobbin thread / embroidery † Example: Upper threading 1 unit attachment / embroidery frame attachment / needle replacement on the LCD. Turn on the machine. a , refer to the corresponding page in this Operation Manual. LCD (Liquid Crystal Display) Operation 23 - Brother International PE770 | Users Manual - English - Page 26
this machine. Use of any other bobbin may result in injuries or damage to the machine. ● The included bobbin was designed specifically for this machine. If bobbins from other models are used, the machine will not operate correctly. Use only the included bobbin or bobbins of the same type (part code - Brother International PE770 | Users Manual - English - Page 27
Place the spool of thread for the bobbin onto f the spool pin. Slide the spool onto the pin so the needle to break. ● Three spool cap sizes are available, allowing you to choose a spool cap that best fits the size of spool being used. If the spool cap is too small for the spool being used, the - Brother International PE770 | Users Manual - English - Page 28
, i and then pull it to the right. 1 a Thread guide plate a Thread guide Note z Make sure that the thread passes under the pretension disk. While holding the thread with your left hand, k wind the thread that was pulled out clockwise around the bobbin five or six times with your right hand. Note - Brother International PE770 | Users Manual - English - Page 29
right to cut it. Use scissors to cut the end of the thread n wound around the bobbin. 1 1 a Guide slit in bobbin winder seat (with built-in cutter) CAUTION ● Be sure to cut the thread as described. If the bobbin is wound without cutting the thread using the cutter built into the slit in the - Brother International PE770 | Users Manual - English - Page 30
thread should be passed through the bobbin case is indicated by marks around the bobbin case. Be sure to thread the machine as indicated. Slide the bobbin cover latch to the right. a 1 2 Lightly hold down the bobbin with your right e hand, and then guide the thread as shown with your left - Brother International PE770 | Users Manual - English - Page 31
is correctly inserted through the tension-adjusting spring of the bobbin case. If it is not inserted correctly, reinsert the thread. 1 a Tension-adjusting spring Reattach the bobbin cover. g Insert the tab in the lower-left corner of the bobbin cover, and then lightly press down on the right side - Brother International PE770 | Users Manual - English - Page 32
threading the upper thread, carefully follow the instructions. If the upper threading is not correct, , allowing you to choose a spool cap that best fits the size of spool being used. If the on the spool pin, and then thread the machine. Turn on the machine. a 1 a Needle position button X The - Brother International PE770 | Users Manual - English - Page 33
bottom. While holding the thread lightly with your h right hand, pull the thread with your left hand, and then pass the thread behind the thread guide cover and to the front. 1 CAUTION ● If the spool or the spool cap is not positioned correctly, the thread may become tangled around the spool - Brother International PE770 | Users Manual - English - Page 34
guide plate, pass the thread through the guides in the order shown below. 1 a Shutter Note z If the embroidery foot has been lowered and the shutter is closed, the machine cannot be threaded. Be sure to raise the embroidery needle threader can be used with sewing machine needles 75/11 through 100/16 - Brother International PE770 | Users Manual - English - Page 35
machine until it clicks, and then slowly return the lever to its original position. 1 1 1 a Cutter Note z If the thread is pulled through and cannot be cut correctly, lower the embroidery inches) of thread after passing it through the thread guide disks (marked "7"). a Needle threader lever X The - Brother International PE770 | Users Manual - English - Page 36
the end of the e thread through the embroidery foot hole. Threading the needle manually (without using the needle threader) X The the needle threader, thread the needle as described below. Thread the machine to the needle bar thread a guide. • For details, refer to "Threading the upper thread" ( - Brother International PE770 | Users Manual - English - Page 37
breaks and fragments are dispersed. Be sure to read and carefully follow the instructions below. CAUTION ● Only use home sewing machine needles. Use of any other needle may bend the needle or damage the machine. ● Never use bent needles. Bent needles can easily break, possibly resulting in injuries - Brother International PE770 | Users Manual - English - Page 38
the needle Place fabric or paper under the embroidery d foot to cover the hole in the needle plate. Replace the needle as described below. Use the screwdriver and a needle that has been determined to be straight according to the instructions in "Checking the needle" (page 35). Press (Needle - Brother International PE770 | Users Manual - English - Page 39
With the flat side of the needle toward the rear f of the machine, insert the needle until it touches the needle stopper. 1 1 a Needle stopper While holding the needle with your left hand, g use the screwdriver to tighten the - Brother International PE770 | Users Manual - English - Page 40
GETTING READY 38 - Brother International PE770 | Users Manual - English - Page 41
57 Appliquéing 59 Editing and Saving Patterns 61 Adjusting the layout 61 Storing patterns 63 Adjusting the thread tension...........64 Resewing 65 Thread runs out partway through a design 65 Stopping while embroidering .........66 Bobbin Case Adjustment 68 Correct tension 68 Bobbin thread - Brother International PE770 | Users Manual - English - Page 42
, causing the needle to break. For the bobbin thread, use the embroidery bobbin thread. For details, refer to "Optional accessories" (page 7). Note z For good quality embroidery designs be sure to use embroidery thread designed for embroidery machines. z Before starting to embroider, be sure there - Brother International PE770 | Users Manual - English - Page 43
thick fabrics such as denim, use a 90/14 home sewing machine needle. Memo z A 75/11 needle is already installed when the machine is purchased. z When replacing the needle, refer to "Replacing the needle" (page 36). 2 ■ Other Embroidery frames "small", "medium" and "extra large (multi-position - Brother International PE770 | Users Manual - English - Page 44
towels. For details, refer to "Optional accessories" (page 7). 1 3 2 a Fabric b Size of embroidery frame c Stabilizer material If you are side) c Attached surface † When it cannot be ironed or placed in the hoop. For fabrics, such as towels, which cannot be ironed or for embroidering in places - Brother International PE770 | Users Manual - English - Page 45
(medium)[option] Patterns with a height of up to 10 cm (4 inches) and a width of up to 10 cm (4 inches) can be embroidered. Loosen the embroidery frame adjustment a screw and remove the inner and outer frames, placing the outer frame on a flat surface. Separate the inner and outer frame by removing - Brother International PE770 | Users Manual - English - Page 46
EMBROIDERY Press the inner frame in from the top of the c fabric. Line up on the inner frame and on outer frame. Press the inner frame - Brother International PE770 | Users Manual - English - Page 47
pattern can be embroidered in exactly the right position on the fabric. Line the mark on the fabric up with the base c line on the embroidery sheet. 2 Make a mark with a chalk pen at the center of a the position for the pattern to be embroidered. Place the inner frame with the fabric - Brother International PE770 | Users Manual - English - Page 48
pieces of fabric that cannot be stretched on an embroidery frame or thin pieces like ribbon are being embroidered, use stabilizer material as a base to stretch on the frame. We recommend stabilizer material for all embroidery. 1 2 3 1 3 2 1 3 a Stabilizer material b Tack or spray glue c Fabric After - Brother International PE770 | Users Manual - English - Page 49
Frame This section describes how to attach the embroidery frame. Attaching the embroidery frame Wind the embroidery bobbin thread onto the a bobbin and set it into the bobbin case. • For details, refer to "Winding/Installing the Bobbin" (page 24). Raise the presser foot lever. b 1 1 a Lever - Brother International PE770 | Users Manual - English - Page 50
foot lever even further. Make sure that the machine is completely stopped and follow the instructions below. Raise the presser foot lever. a a a Presser foot lever While pushing the lever of the embroidery b frame holder to the left, lift the embroidery frame up to remove it. Remove the back - Brother International PE770 | Users Manual - English - Page 51
patterns d Frame patterns e Embroidery card f Patterns stored in the machine's memory ■ Embroidery patterns (Embroidery patterns/ Additional embroidery patterns) There are total 136 patterns. The patterns are completed by changing the upper thread according to the instructions displayed on the - Brother International PE770 | Users Manual - English - Page 52
crystal display) operation The LCD (liquid crystal display) is operated using the operation keys on the operation panel. The use of the keys for embroidery will be explained below. ■ Operation keys Press Returns to the previous screen. When there are patterns that are not displayed on the screen - Brother International PE770 | Users Manual - English - Page 53
. Press this key to change the thread settings. Press this key when you want to change the color character by character in character embroidery. Since the machine stops at the end of each character, the upper thread is changed as you embroider. Press this key again to cancel multicolor. 2 The - Brother International PE770 | Users Manual - English - Page 54
. Memo z When "The pattern is too large for the embroidery frame." is displayed, no more characters can be entered. z Characters of different styles (sans serif, serif, and outline, etc.) cannot be combined. Select the alphabet - Brother International PE770 | Users Manual - English - Page 55
pattern There are total of 136 embroidery patterns, such as fruits and animals, stored in the machine's memory. 70 Embroidery patterns 66 Embroidery patterns Memo z Refer to "Embroidery Pattern Color Change Table" in the Quick reference guide for samples of completed patterns and the thread - Brother International PE770 | Users Manual - English - Page 56
EMBROIDERY Selecting a frame pattern 10 shapes, such as squares and circles, can be combined with 12 stitch types. Select the stitch. c Switch the screen using (Previous page key) (Next page key), and select from the 12 stitches. Memo z Refer to "Frame patterns" in the Quick reference guide - Brother International PE770 | Users Manual - English - Page 57
other than an embroidery card in the embroidery card slot. z When embroidery cards are not in use, keep them in their storage cases. z Use only embroidery cards manufactured for this machine. Using unauthorized cards may cause your machine to operate incorrectly. z Embroidery cards purchased in - Brother International PE770 | Users Manual - English - Page 58
Upper thread Bobbin thread Use embroidery thread, or country embroidery thread intended for use with this machine. Other embroidery threads may not yield optimum results. Use embroidery bobbin thread intended for use with this machine. For details, refer to "Optional accessories" (page 7). Memo - Brother International PE770 | Users Manual - English - Page 59
thread of the color shown a on the screen. c a 2 b d e a Embroidery frames that can be used for embroidering b Current color step/Number of colors in design c Current name of color d Current color part e Next color part • The thread color number set displayed for the thread colors can be - Brother International PE770 | Users Manual - English - Page 60
if there is no fabric under the embroidery foot or while the machine is embroidering, otherwise damage to the machine may occur. • If the thread is embroidery thread for the next color, i and repeat steps a through h. Cut the excess thread. j X When the last color is embroidered, "Finished sewing - Brother International PE770 | Users Manual - English - Page 61
-on stabilizer to the back of the appliqué piece fabric, and stretch it on the embroidery frame. Set up the thread for appliquéing. f Lower the presser foot lever, and press g (Start/stop button). X The position for the appliqué is stitched, and the machine stops. Lower the presser foot lever, and - Brother International PE770 | Users Manual - English - Page 62
EMBROIDERY Lower the presser foot lever, and press i (Start/stop button). Note z When "APPLIQUE MATERIAL", "APPLIQUE POSITION" and "APPLIQUE" are displayed, a specific color thread does not appear. Use a proper color thread to match the appliqué piece. Follow the instructions on the screen, and j - Brother International PE770 | Users Manual - English - Page 63
the layout Check and adjust the layout. c a bc d e f The pattern is normally positioned in the center of the embroidery frame. You can check the layout before starting embroidery and change the position and the size. Memo z Keys that appear surrounded with a dotted line cannot be used. After - Brother International PE770 | Users Manual - English - Page 64
EMBROIDERY Memo z If you make a note of the values in the lower part of screen when you change the you have revised the pattern, check the display of available embroidery frames and use an appropriate frame. If you use an embroidery frame not displayed as available for use, the presser foot may - Brother International PE770 | Users Manual - English - Page 65
patterns and the alphabet patterns you have customized can be stored in the machine's memory. Since the stored patterns will not be erased when the machine is turned off, you can always recall them for embroidery. This is convenient for storing names and the like. You can store up to - Brother International PE770 | Users Manual - English - Page 66
In this instance, decrease the upper thread tension. Note z Characters saved from an embroidery card must have the embroidery card inserted in the machine in order to retrieve the memory saved from the embroidery card. 1 2 a Right side b Wrong side ■ Upper thread is too loose The upper thread - Brother International PE770 | Users Manual - English - Page 67
/stop button) to stop the a machine. Thread runs out partway through a design When the upper thread or the bobbin thread runs out while embroidering, the machine stops. Move the needle back about Start/stop button) to continue the f design. Restart the embroidery. e Editing and Saving Patterns 65 - Brother International PE770 | Users Manual - English - Page 68
screen. X The selected pattern is deleted, and the screen for selecting the embroidery pattern type is displayed. Turn off the machine. e • Always remove the embroidery unit when you move the machine. Turn on the machine and select the pattern. f Press . g • Press (Back key) to return to the - Brother International PE770 | Users Manual - English - Page 69
. If is pressed continuously, it moves forward 1 -> 9 -> 30 stitches. Move forward to about 10 stitches before the total number of stitches confirmed in b. Restart the embroidery. k Editing and Saving Patterns 67 - Brother International PE770 | Users Manual - English - Page 70
EMBROIDERY Bobbin Case Adjustment The bobbin case installed in this machine can be adjusted, if necessary, to accommodate the bobbin tension for embroidering. The insertion below describes how to adjust the bobbin tension for embroidery use. Using a small slotted screwdriver, turn the slotted- - Brother International PE770 | Users Manual - English - Page 71
procedures are described in this chapter. Care and Maintenance 70 Cleaning the machine surface 70 Cleaning the race 70 Attaching the Embroidery Foot 72 Attaching the embroidery Foot "Q 72 Troubleshooting ...74 Error messages 78 Adjusting the LCD 81 Operation beep 81 Canceling the - Brother International PE770 | Users Manual - English - Page 72
● Unplug the power supply cord before cleaning the machine, otherwise injuries or an electric shock may occur. Embroidery performance will suffer if dust collects in the bobbin case, therefore, it should be cleaned periodically. Turn off the machine. a Unplug the power cord from the power supply - Brother International PE770 | Users Manual - English - Page 73
performance may suffer. For a new bobbin case (part code: XD1855- Note ! If lint or dust collects on the bobbin thread sensor, the sensor may not operate correctly. 251), contact your nearest authorized service center. ● Be sure that the bobbin case is correctly installed, otherwise the needle - Brother International PE770 | Users Manual - English - Page 74
foot with your index finger wrapped around the lever at the back of the foot. a 1 a Needle position button Turn off the machine. b CAUTION ● Before attaching the embroidery foot, be sure to turn off the machine, otherwise injuries may occur if (Start/stop button) is accidentally pressed and the - Brother International PE770 | Users Manual - English - Page 75
may break or cause injury. ● Be sure to tighten the screw with the included screwdriver. If the screw is loose, the needle may hit the embroidery foot and break or bend. ● Before embroidering, always turn the handwheel toward you (counterclockwise) slowly to make sure that the needle does not hit - Brother International PE770 | Users Manual - English - Page 76
it. Replace the embroidery foot. Contact your retailer or the nearest authorized service center. The bobbin case is scratched, or has a burr on it. Replace the bobbin case. Contact your retailer or the nearest authorized service center. A bobbin designed specifically for this machine is not used - Brother International PE770 | Users Manual - English - Page 77
around the hole in the Replace the embroidery foot. Contact embroidery foot is scratched, or your retailer or the nearest authorized - has a burr on it. service center. The bobbin case is scratched, or has a burr on it. Replace the bobbin case. Contact your retailer or the nearest authorized - Brother International PE770 | Users Manual - English - Page 78
the upper threading. Replace the bobbin case. Contact your retailer or the nearest authorized service center. A bobbin designed specifically for this machine is not used. Incorrect bobbins will not work properly. Only use a bobbin designed specifically for this machine. The thread does not pass - Brother International PE770 | Users Manual - English - Page 79
., is plugged up. Remove the tangled thread. When the bobbin case is plugged up, clean the race. page 70 The thread tension is incorrect. Adjust the tension of the upper thread. page 64 If the embroidery unit carriage or 3 Embroidery not neatly done. Objects are placed near the carriage or - Brother International PE770 | Users Manual - English - Page 80
may be wrong or the needle may break and cause injury. The machine is deleting a previously saved pattern. on the LCD was pressed when no card was inserted. The start/stop button or thread cutter button was pressed while the embroidery foot was raised. The memory is full and the pattern cannot be - Brother International PE770 | Users Manual - English - Page 81
around the bobbin case, and the needle is bent and hitting the needle plate, etc., so the machine stops (refer to page 74). A card that cannot be used with this machine has been inserted, and you tried to select a pattern from the card. An embroidery card incompatible with this machine was inserted - Brother International PE770 | Users Manual - English - Page 82
APPENDIX Error Message Probable Cause The machine was turned on before the embroidery unit was attached. The bobbin winder is winding the bobbin. 80 - Brother International PE770 | Users Manual - English - Page 83
seconds and the Turn on the machine while pressing any of the b display panel buttons. machine automatically stops. Be sure to check for the cause of the error, and 3 correct it before continuing to embroider. Press c or . Turn off the machine, then turn it on again. d Troubleshooting 81 - Brother International PE770 | Users Manual - English - Page 84
, it is set to beep each time an operation panel key is pressed. This setting can be changed so that the machine does not beep. Turn on the machine. a Press e (Back key). X The LCD comes on. Press b panel. (Settings key) on the operation X The initial screen appears again. X The settings - Brother International PE770 | Users Manual - English - Page 85
thread guide 8 M Brother poly #90 bobbin thread 7 buzzer 82 machine settings 21 , main power switch 9 19 C characters 52 maintenance 70 manual needle threading 34 , memory key 11 63 cleaning 70 cleaning brush 6 N D dust cover 6 E , embroidery card 7 55 embroidery card slot - Brother International PE770 | Users Manual - English - Page 86
10 storing pattern 63 T thread cutter 8 thread cutter button 10 thread guide cover 8 thread guide disk 9 thread guide plate 8 thread take-up lever check window 8 thread tension adjustment 64 top cover 8 touch panel 11 troubleshooting 74 turning machine on/off 19 U upper threading 30 84 - Brother International PE770 | Users Manual - English - Page 87
- Brother International PE770 | Users Manual - English - Page 88
English 885-U30/U31/U32/U33/U40/U41/U42 XD1628-1212 Printed in China
-
 1
1 -
 2
2 -
 3
3 -
 4
4 -
 5
5 -
 6
6 -
 7
7 -
8
-
9
-
10
-
11
-
12
-
13
-
14
-
15
-
16
-
17
-
18
-
19
-
20
-
21
-
22
-
23
-
24
-
25
-
26
-
27
-
28
-
29
-
30
-
31
-
32
-
33
-
34
-
35
-
36
-
37
-
38
-
39
-
40
-
41
-
42
-
43
-
44
-
45
-
46
-
47
-
48
-
49
-
50
-
51
-
52
-
53
-
54
-
55
-
56
-
57
-
58
-
59
-
60
-
61
-
62
-
63
-
64
-
65
-
66
-
67
-
68
-
69
-
70
-
71
-
72
-
73
-
74
-
75
-
76
-
77
-
78
-
79
-
80
-
81
-
82
-
83
-
84
-
85
-
86
-
87
-
88
 |
 |
Computerized Embroidery Machine
Operation Manual
GETTING READY
EMBROIDERY
APPENDIX