Brother International S-7220B Instruction Manual - English - Page 13
Machine head, Operation panel, Sticker Remove, Washers [2 pcs.]
 |
View all Brother International S-7220B manuals
Add to My Manuals
Save this manual to your list of manuals |
Page 13 highlights
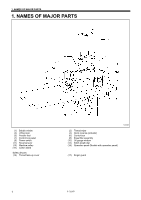
3. INSTALLATION 7. Machine head (1) Hinges [2 pcs] (2) Machine head (3) Head rest NOTE: Tap the head rest (3) securely into the table hole. If the head rest (3) is not pushed in as far as it will go, the machine head will not be sufficiently stable when it is tilted back. 3724M 8. Operation panel (1) Rubber cushion (Remove the seal (2), and then attach the rubber cushion (1) to the panel setting plate (3).) (4) Operation panel (5) Washers [2 pcs.] (6) Spring washers [2 pcs.] (7) Screws [2 pcs.] (The washers (5), spring washers (6) and screws (7) are used to secure the side plate) 3725M 9. Sticker (Remove) (1) Sticker 2097M S-7220B 6
-
 1
1 -
2
-
3
-
4
-
5
-
6
-
7
-
 8
8 -
 9
9 -
 10
10 -
 11
11 -
 12
12 -
 13
13 -
 14
14 -
 15
15 -
 16
16 -
 17
17 -
 18
18 -
19
-
20
-
21
-
22
-
23
-
24
-
25
-
26
-
27
-
28
-
29
-
30
-
31
-
32
-
33
-
34
-
35
-
36
-
37
-
38
-
39
-
40
-
41
-
42
-
43
-
44
-
45
-
46
-
47
-
48
-
49
-
50
-
51
-
52
-
53
-
54
-
55
-
56
-
57
-
58
-
59
-
60
-
61
-
62
-
63
-
64
-
65
-
66
-
67
-
68
-
69
-
70
-
71
-
72
-
73
-
74
 |
 |
S-7220B
3. INSTALLATION
6
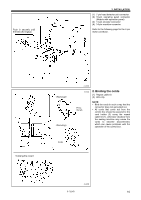
7. Machine head
(1) Hinges [2 pcs]
(2) Machine head
(3) Head rest
NOTE:
Tap the head rest (3) securely into
the table hole. If the head rest (3) is
not pushed in as far as it will go, the
machine head will not be sufficiently
stable when it is tilted back.
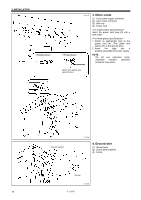
8. Operation panel
(1) Rubber cushion
(Remove the seal (2), and then
attach the rubber cushion (1) to the
panel setting plate (3).)
(4) Operation panel
(5) Washers [2 pcs.]
(6) Spring washers [2 pcs.]
(7) Screws [2 pcs.]
(The washers (5), spring washers
(6) and screws (7) are used to
secure the side plate)
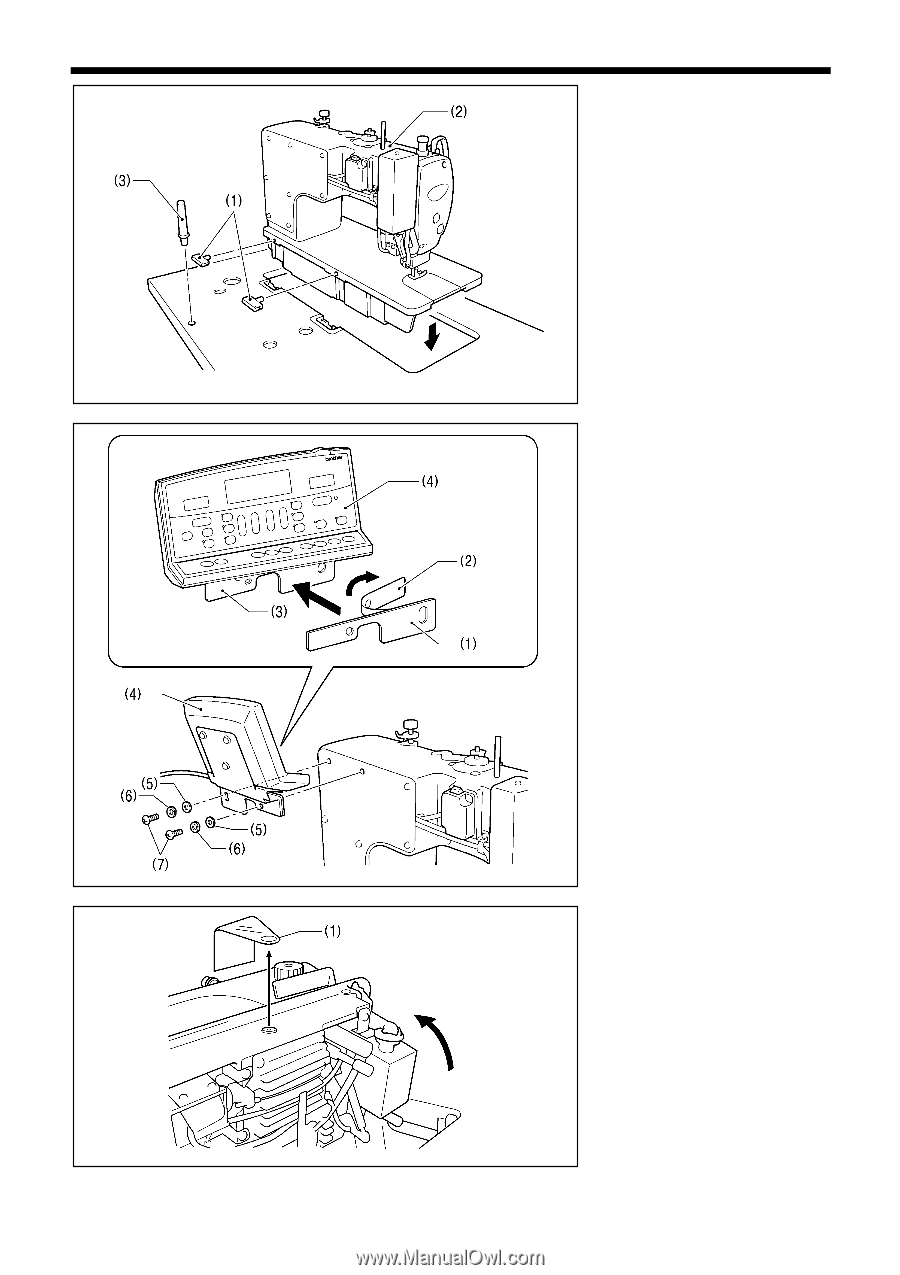
9. Sticker (Remove)
(1) Sticker
3725M
3724M
2097M