Brother International S-7220B Instruction Manual - English - Page 61
Adjusting the needle and feed mechanism timing
 |
View all Brother International S-7220B manuals
Add to My Manuals
Save this manual to your list of manuals |
Page 61 highlights
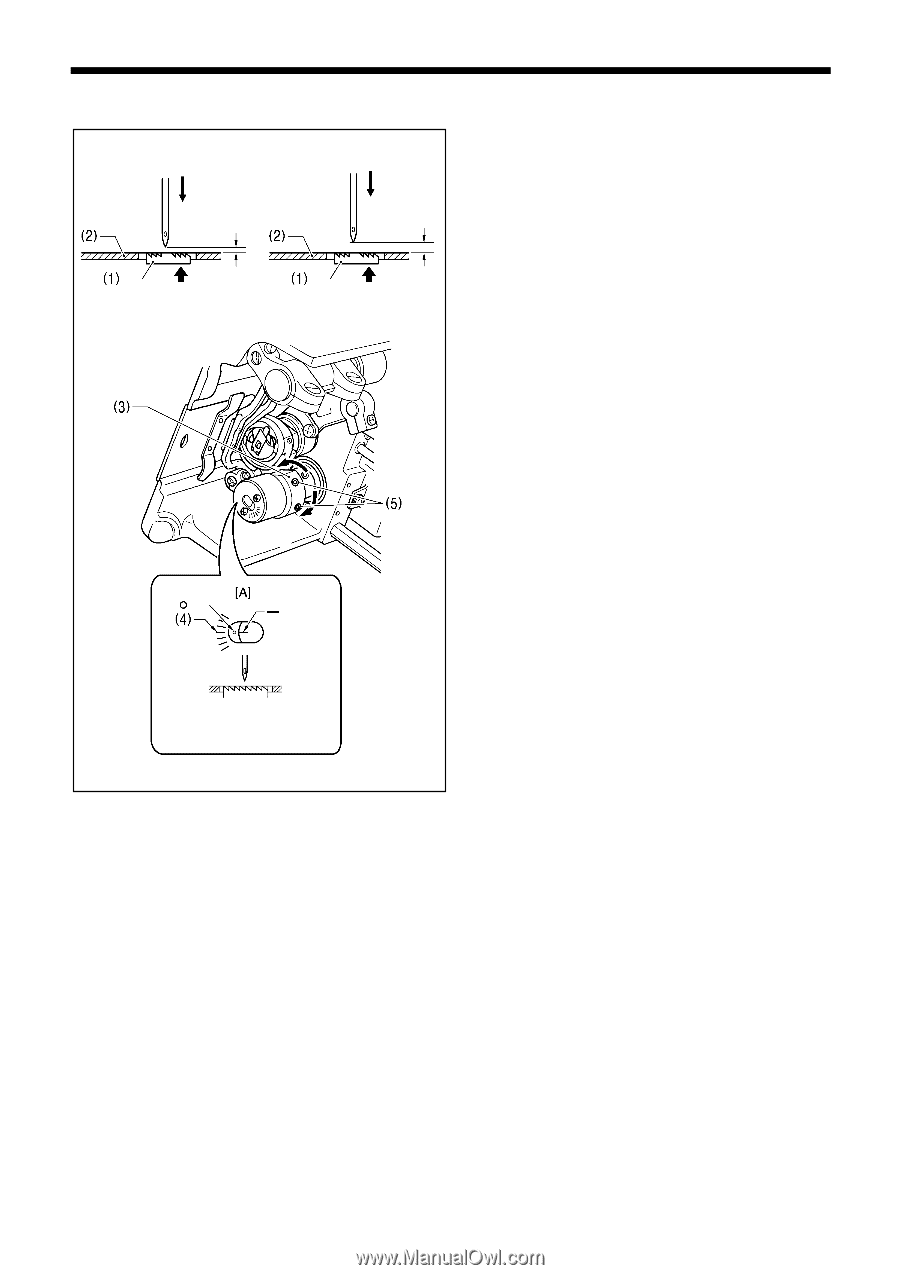
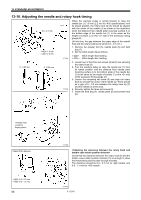
13. STANDARD ADJUSTMENTS 13-9. Adjusting the needle and feed mechanism timing Approx. 2 mm 3773M Approx. 4 mm The standard timing is for the tip of the needle to be in the position given below when the machine pulley is turned forward to raise the feed dog (1) from its lowest position until it is flush with the top of the needle plate (2). (At this time, the "-" mark on the lower shaft will be aligned with the center of the scale (4) ("O" mark) on the vertical cam (3).) ... There is a gap of approximately 2 mm between the tip of the needle and the top of the needle plate (2). ... There is a gap of approximately 4 mm between the tip of the needle and the top of the needle plate (2). 1. Set the stitch length dial to the maximum setting. 2. Tilt back the machine head. 3. Loosen the two set screws (5), and then turn the vertical cam (3) sligtly to adjust the timing. NOTE: Use the standard needle and feed mechanism timing. If the timing is changed, broken needles may occur. 4. After adjustment is completed, securely tighten the two screws (5). (Standard) 3774M S-7220B 54
-
 1
1 -
2
-
3
-
4
-
5
-
6
-
7
-
8
-
9
-
10
-
11
-
12
-
13
-
14
-
15
-
16
-
17
-
18
-
19
-
20
-
21
-
22
-
23
-
24
-
25
-
26
-
27
-
28
-
29
-
30
-
31
-
32
-
33
-
34
-
35
-
36
-
37
-
38
-
39
-
40
-
41
-
42
-
43
-
44
-
45
-
46
-
47
-
48
-
49
-
50
-
51
-
52
-
53
-
54
-
55
-
 56
56 -
 57
57 -
 58
58 -
 59
59 -
 60
60 -
 61
61 -
 62
62 -
 63
63 -
 64
64 -
 65
65 -
 66
66 -
67
-
68
-
69
-
70
-
71
-
72
-
73
-
74
 |
 |