Canon 1234B002 Digital Photo Professional Instruction Manual Windows (EOS 30D) - Page 4
How to Use This Instruction Manual, Troubleshooting, Index, Shortcut Key List
 |
UPC - 013803065107
View all Canon 1234B002 manuals
Add to My Manuals
Save this manual to your list of manuals |
Page 4 highlights
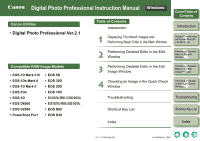
How to Use This Instruction Manual Click to move to the beginning of each chapter. : Marks information that should be read before use to prevent problems that would interfere with the functioning of software and computer. Reference page numbers are indicated in blue either in brackets ( ) or within text. Click on the page number to move to the corresponding page. Cover/Table of Contents Introduction Click to move to the previous page. Click to move to the next page. Click to return to previously displayed page. O In this manual, Windows XP Professional/Home Edition is referred to as "Windows XP", and Windows 2000 Professional is referred to as "Windows 2000". O For more information on how to use Digital Photo Professional, refer also to the help displayed by selecting the [Help] menu ` [Digital Photo Professional Help]. O For more information on the restrictions of Digital Photo Professional, refer also to the "Readme" file. Readme: Click the [Start] button ` select [All Programs] ([Programs] in Windows 2000) ` [Canon Utilities] ` [Digital Photo Professional] ` [Digital Photo Professional Readme]. : Marks additional information that you will find helpful. Square brackets [ ] are used to indicate items such as menu names, button names and window names that appear on the computer screen. O In this manual, the screens used in the examples are from Windows XP. O Text inside < > in this document indicates the key on the keyboard and camera button names. O ` in this document indicates the sequence of operation as shown on the right. Example: [View] menu ` [Sort] ` [File name] 1 Displaying Thumbnail Images and Performing Basic Edits in the Main Window 2 Performing Detailed Edits in the Edit Window 3 Performing Detailed Edits in the Edit Image Window 4 Checking an Image in the Quick Check Window Troubleshooting Shortcut Key List Index 0-2
-
 1
1 -
 2
2 -
 3
3 -
 4
4 -
 5
5 -
 6
6 -
 7
7 -
 8
8 -
 9
9 -
 10
10 -
11
-
12
-
13
-
14
-
15
-
16
-
17
-
18
-
19
-
20
-
21
-
22
-
23
-
24
-
25
-
26
-
27
-
28
-
29
-
30
-
31
-
32
-
33
-
34
-
35
-
36
-
37
-
38
-
39
-
40
-
41
-
42
-
43
-
44
-
45
-
46
-
47
-
48
-
49
-
50
-
51
-
52
 |
 |
