Canon 2689B001 DC330 Instruction Manual - Page 64
Print Orders, Repeat steps 1-3 to mark
 |
UPC - 013803091687
View all Canon 2689B001 manuals
Add to My Manuals
Save this manual to your list of manuals |
Page 64 highlights
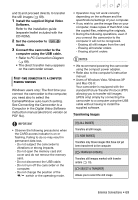
• If the message "BUSY" does not disappear, disconnect the USB cable and restore the connection after a short while. Print Orders You can mark in advance the still images you want to print and set the desired number of copies as a print order. Later, you can easily print out the print orders by connecting the camcorder to a PictBridge-compatible printer ( 61). You can set print orders for up to 998 still images. Selecting Still Images for Printing (Print Order) ( 22) POINTS TO CHECK Set the print orders before connecting the USB cable to the camcorder. FUNC. ( 23) FUNC. [ PRINT ORDER] Press : The image selection screen appears. FROM THE IMAGE SELECTION SCREEN 1 Select ( ) the still image you want to mark with a print order. 2 Press to set the print order. The number of copies appears in orange in the box next to the print order symbol . 3 Set ( ) the number of copies desired and press . To cancel the print order, set ( ) the number of copies to 0. 4 Repeat steps 1-3 to mark additional images with print orders or press FUNC. twice to close the menu. Printing the Still Images Marked with Print Orders ( 22) FUNC. ( 24) 1 Connect the camcorder to the printer using the supplied USB cable. Refer to PC Connection Diagram ( 68). 2 Open the print settings menu. FUNC. [ MENU] [ PRINT] The print settings menu appears. The error message "SET PRINT ORDER" appears if you connect a printer with direct print function and select [ PRINT] without having set any print orders beforehand. 3 Select ( , press . ) [PRINT] and Printing starts. The print settings menu disappears when the printing is completed. NOTES • Depending on the connected printer, you can change some print settings before step 3 ( 61). • Cancel Printing/Printing Errors ( 63). • Restarting Printing: Open the print settings menu as explained in step 2. In the print settings menu, select [RESUME]* and 64 • Photos
-
 1
1 -
2
-
3
-
4
-
5
-
6
-
7
-
8
-
9
-
10
-
11
-
12
-
13
-
14
-
15
-
16
-
17
-
18
-
19
-
20
-
21
-
22
-
23
-
24
-
25
-
26
-
27
-
28
-
29
-
30
-
31
-
32
-
33
-
34
-
35
-
36
-
37
-
38
-
39
-
40
-
41
-
42
-
43
-
44
-
45
-
46
-
47
-
48
-
49
-
50
-
51
-
52
-
53
-
54
-
55
-
56
-
57
-
58
-
 59
59 -
 60
60 -
 61
61 -
 62
62 -
 63
63 -
 64
64 -
 65
65 -
 66
66 -
 67
67 -
 68
68 -
 69
69 -
70
-
71
-
72
-
73
-
74
-
75
-
76
-
77
-
78
-
79
-
80
-
81
-
82
-
83
-
84
-
85
-
86
-
87
-
88
-
89
-
90
-
91
-
92
-
93
-
94
-
95
-
96
-
97
-
98
-
99
-
100
-
101
-
102
-
103
 |
 |
