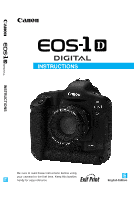
Canon EOS-1D EOS-1D Instructions
Canon EOS-1D - Digital Camera SLR Manual
 |
UPC - 013803005912
View all Canon EOS-1D manuals
Add to My Manuals
Save this manual to your list of manuals |
Canon EOS-1D manual content summary:
- Canon EOS-1D | EOS-1D Instructions - Page 1
INSTRUCTIONS INSTRUCTIONS Be sure to read these Instructions before using your camera for the first time. Keep this booklet E handy for easy reference. E English Edition - Canon EOS-1D | EOS-1D Instructions - Page 2
Thank you for purchasing a Canon product. The EOS-1D digital camera is a high-performance, single-lens reflex AF camera with a large, ultra-fine, 4.15-megapixel CCD sensor and high-precision Area AF. The camera is compatible with all Canon EF lenses. It has many features for all types of photography - Canon EOS-1D | EOS-1D Instructions - Page 3
camera functions. ¢ Warranty card ¢ Quick Operation Guide ¢ EOS-1D Accessories Introduces major accessories for the EOS-1D. ∗ No CF card is included. Please purchase it separately. CF cards made by Canon are recommended. This digital camera supports Exif 2.2 (also called "Exif Print"). Exif - Canon EOS-1D | EOS-1D Instructions - Page 4
Start Guide 12 Nomenclature 14 Conventions Used in these Instructions .......... Review 52 Changing the Review Time 53 Creating and Selecting a Folder 54 Creating a Folder with the Camera 54 Selecting a Folder 55 MENU File Numbering Methods 56 Auto Reset 56 Continuous Numbering 57 Manual - Canon EOS-1D | EOS-1D Instructions - Page 5
111 Wireless, Multi-Speedlite System 111 Metered Manual Flash Photography .......... 112 About TTL and A-TTL Autoflash Speedlites .. 113 Using Non-Canon and Aperture Display 159 5 Error Codes 160 Message 160 Troubleshooting Guide 162 Changing the Focusing Screen 164 6 Major Accessories ( - Canon EOS-1D | EOS-1D Instructions - Page 6
EOS-1D accordance with the instructions, may cause harmful manual. If such changes or modifications should be made, you could be required to stop operation of the equipment. Canon U.S.A. Inc. One Canon Plaza, Lake Success, NY 11042, U.S.A. Tel No. (516)328-5600 The Mark is a directive conformity mark - Canon EOS-1D | EOS-1D Instructions - Page 7
operated correctly. • The safety precautions noted as follows are intended to instruct you in the safe and correct operation of the camera and its and repairs should be conducted by qualified service personnel authorized by your camera distributor or Canon Customer Support. • To avoid the risk of - Canon EOS-1D | EOS-1D Instructions - Page 8
in use to avoid fires and other hazards. • The camera terminal of the DC Coupler Kit DCK-E1 is designed for exclusive use with the EOS-1D. Do not use it with other products or batteries. There is a risk of fire and other hazards. IMPORTANT • Do not remove the CF card from - Canon EOS-1D | EOS-1D Instructions - Page 9
Introduction CAUTIONS • Avoid using, placing or storing the equipment in places subject to strong sunlight or high temperatures, such as the dashboard or trunk (boot) of a car. Exposure to intense sunlight and heat may cause the batteries to leak, overheat or explode, resulting in fire, burns or - Canon EOS-1D | EOS-1D Instructions - Page 10
if the camera is to be used for an important event, check the operation of all the camera controls or take it to your nearest Canon Service Center. LCD Monitor and LCD Panels (1) The color LCD monitor is manufactured with very high precision technology. There may be a few dead pixels where a black - Canon EOS-1D | EOS-1D Instructions - Page 11
Introduction Handling Cautions (2) Do not use a pair of metal tweezers to pick up the lithium battery. Doing so can shortcircuit the battery. (3) Never disassemble or recharge the lithium battery. CF Cards (1) CF cards are precision appliances. Do not subject the card to physical shock or - Canon EOS-1D | EOS-1D Instructions - Page 12
Quick Start Guide For detailed instructions, see the reference page indicated in parentheses. 1 Recharge the battery. Connect the battery to the battery charger with the power cord. The CHARGE lamp remains - Canon EOS-1D | EOS-1D Instructions - Page 13
Quick Start Guide Introduction 3 Open the CF card slot cover. Flip up Set the camera to the default settings. (→34) Press the < > and < > buttons simultaneously for 2 sec. • To review previous images, see "Playback Images" on page 116. • To erase an image, see "Erasing an Image" on page 122. - Canon EOS-1D | EOS-1D Instructions - Page 14
button (→29) Strap mount (→36) Mirror (→104) White balance sensor Lens lock pin Lens release button (→26) Grip Depth-of-field preview button (→87,111) Vertical grip operation on/off switch (→31) 〈 〉 Vertical grip FE lock / Multi-spot metering button (→31,109/78) Vertical grip Main Dial (→31,30 - Canon EOS-1D | EOS-1D Instructions - Page 15
Flash-sync contacts Focal plane mark 〈 〉 Metering mode selection / Flash exposure compensation button (→76,110) 〈 〉 Shooting mode selection button (→82) 〈 〉 AF mode selection button (→60) 〈 〉 Drive mode selection button (→99) 〈 〉 ISO - Canon EOS-1D | EOS-1D Instructions - Page 16
Nomenclature 〈 〉 Protect / Sound recording button (→119/121) 〈 〉 Menu button (→33) 〈 〉 Select button (→33) LCD monitor (→32,34) Eyecup (→35) CF card slot (→27) CF card slot cover (→27) 〈 〉 Digital terminal 〈 〉 Display button (→54,116) 〈 〉 Erase button (→122) Rear LCD panel (→18) 〈 - Canon EOS-1D | EOS-1D Instructions - Page 17
Introduction Top LCD Panel Aperture ( - ) DEP point number ( , ) AEB amount ( - ) AF point selection mode (, , ) Shooting mode : Program AE : Manual exposure : Shutter-priority AE : Depth-of-field AE : Aperture-priority AE Metering modes Evaluative metering Partial metering Spot metering Center - Canon EOS-1D | EOS-1D Instructions - Page 18
display Four-image index display Nine-image index display Folder mode (Folder selection/creation) Selection mark White balance Auto Daylight Shade Cloudy Tungsten light Fluorescent light Flash Manual Color temperature CF card icon Recording image quality Large/Fine Large/Normal Small/Fine Raw - Canon EOS-1D | EOS-1D Instructions - Page 19
Laser matte screen Area AF ellipse AF point Nomenclature Introduction Manual exposure AE lock AEB in progress Multi-spot metering Flash compensation Exposure level indicator Maximum burst count during continuous shooting JPEG mark Focus confirmation light Shots remaining ( - ) ISO speed ( - Canon EOS-1D | EOS-1D Instructions - Page 20
markings found on the camera. See "Nomenclature" on page 14. • For more information, reference page numbers are provided in parentheses (→p.00). • The Canon camera. • These Instructions use the following alert symbols: : The Caution symbol indicates a warning to prevent shooting problems. : The Note - Canon EOS-1D | EOS-1D Instructions - Page 21
Before You Start 11 Before You Start This chapter explains a few preliminary steps and the basic operation of the EOS-1D camera. 21 - Canon EOS-1D | EOS-1D Instructions - Page 22
the Ni-MH Pack NP-E3. •• For details on how to recharge and discharge the battery, refer to the instructions for the Ni-MH Charger NC-E2. Connect the power cord. Connect the power cord to the charger. 1 •• Connect the power plug to an AC - Canon EOS-1D | EOS-1D Instructions - Page 23
Before You Start Installing and Removing the Battery Installing the Battery Detach the battery compartment cap. Grasp both sides of the cap and pull it off. 1 •• The battery's protective cover can be attached to the battery compartment cap. Keep the cap and cover in a safe place. 1 2 •Insert - Canon EOS-1D | EOS-1D Instructions - Page 24
of shots that can be taken with a fully-charged battery at the specified temperature. It is based on Canon's testing conditions (w/EF 50mm f/1.4 USM lens, review turned on, reviewing time of 2 sec., and " + " image quality). The actual number of shots will vary depending on your shooting conditions - Canon EOS-1D | EOS-1D Instructions - Page 25
Before You Start Using an AC Outlet With the DC Coupler Kit, you can connect the camera to an AC outlet to supply power. Then you do not have to worry about exhausting the battery. 1 •Insert the DC Coupler. Insert the coupler and while pushing it in, turn the release handle as shown by the arrow. 1 - Canon EOS-1D | EOS-1D Instructions - Page 26
lens attached to the camera will have a slight telephoto effect equivalent to 1.3 times the lens focal length. AF stands for autofocus. • MF or M stands for manual focus. •• Be careful not to lose the lens caps and body cap. EOS-1D's image size (28.7 x 19.1 mm) 35mm image size (36 x 24 mm) 26 - Canon EOS-1D | EOS-1D Instructions - Page 27
Start Installing and Removing the CF Card The pictures you take are recorded on the CF card. The camera is compatible with Type I and Type II CompactFlash (CF) cards having a capacity of 16 MB or more. If you want to capture images in the Large/Fine or higher quality mode, a 64 - Canon EOS-1D | EOS-1D Instructions - Page 28
large, the CF card may not be able to save it. • A microdrive is a recording medium using a hard disk. It has a large capacity and the price per megabyte is low. However, compared to a CF card equipped with a flash memory, it is vulnerable to vibration and physical shock. If you use a microdrive - Canon EOS-1D | EOS-1D Instructions - Page 29
as < > and it also enables the beeper to sound in the following cases: • Focus is achieved in One-Shot AF mode. • Focus is achieved with manual focus. • To save battery power, the camera turns off automatically after 1 minute of nonoperation. (→p.130) To turn on the camera again, just press the - Canon EOS-1D | EOS-1D Instructions - Page 30
Basic Operation Using the Electronic Dials Operating the < > Dial The < > dial is used to set various settings for taking pictures. There are three ways to operate this dial: (1) While pressing a button, you turn the < > dial until the desired setting appears on the top LCD panel. When the button is - Canon EOS-1D | EOS-1D Instructions - Page 31
, the selected setting takes effect. • In this way, you can set the review and select images on the LCD monitor. (2) After pressing and releasing a button top LCD panel. • In this way, you can set the aperture manually. Vertical Shooting For vertical shooting, the vertical grip (camera bottom) has - Canon EOS-1D | EOS-1D Instructions - Page 32
Menu Operations By setting various options with the on-screen menus, you can record an image simultaneously in both the RAW and JPEG formats, set the date and time, set Custom Functions, etc. While looking at the LCD monitor, you use the < > button, < > button, and < > dial as explained below. - Canon EOS-1D | EOS-1D Instructions - Page 33
Menu Operations 2 •Select a menu tag ( ). Hold down the < > button and turn the < > dial to select a tag, then let go of the button. s s 1 Before You Start 3 •Select a menu item. Hold down the < > button and turn the < > dial to select a menu item, then let go of the button. s s 4 • - Canon EOS-1D | EOS-1D Instructions - Page 34
Menu Operations About the LCD Monitor The color LCD monitor on the back of the camera enables you to review and select recorded images and set various menu settings. • With the LCD monitor, you can use the < > dial even while the < > switch is < >. • The LCD - Canon EOS-1D | EOS-1D Instructions - Page 35
Before You Start Dioptric Adjustment By adjusting the diopter to suit your eyesight (with or without eyeglasses), the viewfinder image will look clearer. The camera's adjustable dioptric range is -3 to +1 dpt. 1 •Remove the eyecup. While grasping both sides of the eyecup, slide it upward to remove. - Canon EOS-1D | EOS-1D Instructions - Page 36
Attaching the Neck Strap and Hand Strap Attaching the Hand Strap 1 4 2 5 Attaching the Neck Strap 3 6 After attaching the strap, pull it to make sure it does not loosen at the buckle. 36 - Canon EOS-1D | EOS-1D Instructions - Page 37
Settings for Images 22 Settings for Images This chapter explains the specific settings for shooting with a digital camera: Image-recording quality, white balance, ISO speed, and image-processing parameters. You will also learn how to review and organize the recorded images. 37 - Canon EOS-1D | EOS-1D Instructions - Page 38
MENU Image-Recording Quality Four image-recording quality settings are provided. Images recorded in the < >, < >, or < > mode do not require processing afterward. However, an image recorded in the < > mode will require processing with a personal computer. Select the image-recording quality. • - Canon EOS-1D | EOS-1D Instructions - Page 39
The image file size and CF card's maximum capacity are based on Canon's testing standards (at ISO 200). • The image file size and the CF driver software that came with the camera. For details, see "EOS-1D Software Instructions." • With higher ISO speeds (→p.49), the image will contain - Canon EOS-1D | EOS-1D Instructions - Page 40
MENU Simultaneous Capture in RAW and JPEG Formats In the < > image-recording quality mode, you can capture the an image in both the RAW and JPEG formats simultaneously. This is convenient when you want both RAW and JPEG versions of the same image. The RAW image can undergo optimal processing, while - Canon EOS-1D | EOS-1D Instructions - Page 41
Selecting the White Balance The following white balance settings are provided: Auto, daylight, shade, overcast, tungsten, fluorescent, flash, custom, color temperature, and personal white balance (set with the bundled driver software, →p.45). 1 •Select the white balance setting. While pressing the < - Canon EOS-1D | EOS-1D Instructions - Page 42
standard for the white balance setting. By using the white balance data from this image, you can set the optimum white balance. (→p.43) You can manually set white balance for 2800-10000 K (in 100 K increments). (→p.45) You can set and register up to three personal white balance settings with the - Canon EOS-1D | EOS-1D Instructions - Page 43
image. While pressing the < > button, turn the < > dial to select an image. Then let go of the < > button. • Images not taken with the EOS-1D cannot be selected. 4 •Import the white balance data. While pressing the < > button, turn the < > dial to select "OK." Then let go of the < > button - Canon EOS-1D | EOS-1D Instructions - Page 44
MENU Custom White Balance / MENU Setting the Color Temperature 5 •Select the custom white balance. While pressing the < > button, turn the < > dial to select < >. Then let go of the < > button. s The custom white balance will be set. For the standard white object, a sheet of plain, white paper is - Canon EOS-1D | EOS-1D Instructions - Page 45
when you have to take many pictures under the same lighting conditions such as in a photo studio. For details, see the "EOS-1D Software Instructions." Select a registerd personal white balance setting. • While pressing the < > button, turn the < > dial to select " ", " " or " ". Then let go of the - Canon EOS-1D | EOS-1D Instructions - Page 46
White Balance Auto Bracketing You can bracket the white balance of three consecutive shots automatically within +/-3 stops in full-stop increments. For each shot, the camera changes the color temperature automatically vis-à-vis the current white balance setting. One stop is equivalent to 5 mired as - Canon EOS-1D | EOS-1D Instructions - Page 47
White Balance Auto Bracketing Indicator for the standard shot Bluish (minus) compensation Reddish (plus) compensation 3 Take the pictures. s The bracketed shots will be taken in the following sequence: standard color temperature, bluish (minus), and reddish (plus). The bracketing indicator for - Canon EOS-1D | EOS-1D Instructions - Page 48
MENU Selecting the Color Matrix The color matrix enables you to select the preferred hue, chroma, and color gamut (range of reproducible colors). These are equivalent to color film characteristics. The camera provides five color matrixes to suit the required application. On the menu, select "Color - Canon EOS-1D | EOS-1D Instructions - Page 49
Setting the ISO Speed The ISO speed is a numeric indication of the sensitivity to light. (→p.154) A higher ISO speed number indicates a higher sensitivity to light. Therefore, a high ISO speed is suited for moving subjects or taking pictures in low-light conditions. However, the image will contain - Canon EOS-1D | EOS-1D Instructions - Page 50
you specify with the driver software. You can set and register up to three sets of processing parameters. (For details, see the separate "EOS-1D Software Instructions") The procedure below describes how you can select one of the processing parameters to be used by the camera. If you have not - Canon EOS-1D | EOS-1D Instructions - Page 51
a custom set of processing parameters. You can set and register up to three custom sets of processing parameters. For details, see the separate "EOS-1D Software Instructions." Up to three parameter sets can be registered. 2 The tone curve can be set. The sharpness level and pattern sharpness can be - Canon EOS-1D | EOS-1D Instructions - Page 52
To exit the menu and turn off the LCD monitor, press the < > button. 3 Take a picture. s The picture will be displayed on the LCD monitor. Review "On" setting Review "On (Info)" setting (→p.118) Shooting information Histogram • You can also change the number of seconds the image is displayed - Canon EOS-1D | EOS-1D Instructions - Page 53
You can change the number of seconds the image is displayed on the LCD monitor after it is captured. On the menu, select "Review time". Press the < > button. 1 •• While pressing the < > button, turn the < > dial to select < >. • While pressing the < > button, turn the < > 2 dial to select - Canon EOS-1D | EOS-1D Instructions - Page 54
on the rear LCD panel. s The LCD monitor will switch to the folder mode. Folder name Shot count Folder mode Image display formats Selection mark 2 •Display the "Create folder" screen. While pressing the < > button, turn the < > dial to select "Create folder." Then let go of the < > button - Canon EOS-1D | EOS-1D Instructions - Page 55
Settings for Images Creating and Selecting a Folder 3 •Create a new folder. While pressing the < > button, turn the < > dial to select "OK." Then let go of the < > button. s A new folder will be created. • To exit the folder mode and turn off the LCD monitor, press the < > button. A - Canon EOS-1D | EOS-1D Instructions - Page 56
MENU File Numbering Methods The pictures you take are automatically assigned a file number from 0001 to 9999. The images are saved in the folder you selected. Auto reset and continuous numbering are two automatic file numbering methods that you can use. The initial setting is continuous numbering. - Canon EOS-1D | EOS-1D Instructions - Page 57
in the new folder. To avoid this disruption in picture-taking, create a new folder and select it from the start (→p.54) or do a manual reset of the file numbering (→p.58) and select another folder to store subsequent images. 2 Settings for Images Continuous Numbering This method enables the - Canon EOS-1D | EOS-1D Instructions - Page 58
0001. Subsequent images you capture are stored in this new folder. File numbering method (auto reset / continuous numbering) is the one you set before manual reset. The file numbers are like the frame numbers on a roll of film. •• For details on file names, see "Basic Terminology." (→p.155) Creating - Canon EOS-1D | EOS-1D Instructions - Page 59
3Using Autofocus 3 (AF) The Area AF ellipse has 45 AF points. By selecting the optimum AF point, autofocusing can be executed while you maintain the desired subject framing. You can also set the AF mode to suit the subject or intended effect. Using Autofocus (AF) First set the < > switch and < - Canon EOS-1D | EOS-1D Instructions - Page 60
AF Mode Selection AF stands for 'autofocus'. The camera has two AF modes: One-Shot AF for still subjects, and AI Servo AF for moving subjects. (AI is an abbreviation for Artificial Intelligence.) Select the AF mode that suits the subject. 1 Set the lens focus mode switch to < >. 2 •Set the AF mode. - Canon EOS-1D | EOS-1D Instructions - Page 61
this occurs, a picture cannot be taken even if the shutter button is pressed fully. Reframe the shot and focus again. Also see "When Autofocus Fails (Manual Focusing)" on page 73. 61 - Canon EOS-1D | EOS-1D Instructions - Page 62
subject and predicts the focusing distance immediately before the picture is taken. This is for obtaining correct focus at the moment of exposure. With a manually selected AF point, the AF point will flash in red and focus track the subject. When the AF point selection is automatic, the camera first - Canon EOS-1D | EOS-1D Instructions - Page 63
Area AF Ellipse and AF Points The Area AF ellipse is the area where the camera can focus the subject. The Area AF ellipse has 45 AF points, making autofocus possible over a wide area in the viewfinder. You can concentrate on composing the picture without worrying about whether an AF point is - Canon EOS-1D | EOS-1D Instructions - Page 64
(One of three groups of selectable AF points can be used) (1) You can select one of the 45 AF points manually. (2) You can select one of eleven AF points (C.Fn-13-1/2) (3) You can select one of nine AF points (C.Fn-13-3) ∗ C.Fn-13 enables (2) and (3). To - Canon EOS-1D | EOS-1D Instructions - Page 65
dial. s Turn the < > dial until the viewfinder display is as shown on the left. You can also turn the < > dial instead. • While in the manual selection mode, shifting the AF point beyond the peripheral AF point will set the automatic selection mode. The automatic selection mode can also be set - Canon EOS-1D | EOS-1D Instructions - Page 66
point as described in "Basic Procedure for AF Point Selection." C.Fn-13-1 enables spot metering linked to the selected AF point. (→p.77, 136) (3) Manual selection limited to 9 AF points C.Fn-13-3 (→p.136) The center AF point and 8 peripheral AF points are selectable. Turning the Quick Control Dial - Canon EOS-1D | EOS-1D Instructions - Page 67
With C.Fn-18, you can select the center AF point by pressing or during holding down the < > button. (→p.138) 3 Using Autofocus (AF) The manual selection method can be altered as follows: (→p.136) (1) C.Fn-11-1 gives the < > button the function of the < > button. (2) C.Fn-11-2 gives the < > button - Canon EOS-1D | EOS-1D Instructions - Page 68
AF Point Registration and Switching By registering the AF point you often use, you can switch to it instantly. You can register an offcenter AF point which suits your preferred framing or automatic selection for the picture-taking moment priority. Any of the 45 AF points can be registered. Only one - Canon EOS-1D | EOS-1D Instructions - Page 69
AF Point Registration and Switching Switching to the Registered AF Point Normally, you press the < > button and < > button simultaneously to switch to the registered AF point. However, with C.Fn-18-1/2 (→p.138), you can just press the < > button to switch to the registered AF point. See "Setting a - Canon EOS-1D | EOS-1D Instructions - Page 70
AF Point Activation Area C.Fn-17 C.Fn-17 can be set to expand the AF point's activation area to include more than one active AF point. (→p.137) • C.Fn-17-1 Expanding the activation area to 7 points C.Fn-17-1 (→p.137) This larger activation area makes it easier to focus subjects moving irregularly. • - Canon EOS-1D | EOS-1D Instructions - Page 71
(AF) AF Sensitivity and the Lens' Maximum Aperture The EOS-1D's AF points are all horizontal-line sensitive. However, bright EF 70-200mm f/4L USM • With Extender EF 1.4x or EF 1.4x II: EF 200mm f/2.8L USM EF 200mm f/2.8L II USM EF 300mm f/2.8L USM EF 300mm f/2.8L IS USM EF 400mm f/2.8L USM - Canon EOS-1D | EOS-1D Instructions - Page 72
be used for AF. • With Extender EF 1.4x or EF 1.4x II: EF 400mm f/5.6L USM EF 500mm f/4.5L USM EF 100-400mm f/4.5-5.6L IS USM • With 200mm f/2.8L USM lens (without IS) used together with Extender EF 1.4x or EF 1.4x II will enable the center AF point to work as a cross-type sensor. However, do not - Canon EOS-1D | EOS-1D Instructions - Page 73
Using Autofocus (AF) When Autofocus Fails (Manual Focusing) Autofocus can fail to achieve focus (the focus recomposing. 2. Set the lens focus mode switch to < > (or < > on older lenses) and focus manually. (→p.26) If focus cannot be achieved with the AF-assist light of a Speedlite or ST-E2, select - Canon EOS-1D | EOS-1D Instructions - Page 74
• Select the desired AF point and press the shutter button halfway while manual focusing. When focus is achieved, the selected AF point will flash and fine focus after focus is achieved in the OneShot AF mode (full-time manual focusing). For USM lenses with an electronic focusing ring (such as the EF - Canon EOS-1D | EOS-1D Instructions - Page 75
4Evaluative metering Partial metering Spot metering Centerweighted average metering 4 Metering Modes Evaluative, partial, spot, and centerweighted average metering modes are provided. Center spot metering, AF point-linked spot metering, and multi-spot metering can also be set. Select the metering - Canon EOS-1D | EOS-1D Instructions - Page 76
. After detecting the main subject's size, position, brightness, background, front and back lighting, etc., the camera sets the proper exposure. • During manual focusing, evaluative metering is based on the center AF point. • If the subject brightness and background light level are very different - Canon EOS-1D | EOS-1D Instructions - Page 77
, the selectable AF points can be limited to 11 (C.Fn-13-1) or 9 (C.Fn-133). When C.Fn-13-1 or C.Fn-13-3 has been set, the manually-selected AF point is linked to 3.8% spot metering. (→p.66, 136) Metering Modes During continuous shooting in the spot metering mode, AE lock is set automatically - Canon EOS-1D | EOS-1D Instructions - Page 78
Metering Modes Multi-Spot Metering With multiple spot meter readings, you can see the relative exposure levels of multiple areas in the picture and set the exposure to obtain the desired result. 1 Set the metering mode to spot metering. (→p.76) 2 Aim the AF point over the midtone area (the ceiling - Canon EOS-1D | EOS-1D Instructions - Page 79
level indicator after taking three spot meter readings 1 32 2 Window 1 Ceiling 3 Wall 4 • While referring to the exposure level indicator's three spot metering marks, you can set exposure compensation to obtain the desired result. Metering Modes You can take up to eight spot meter readings for - Canon EOS-1D | EOS-1D Instructions - Page 80
80 - Canon EOS-1D | EOS-1D Instructions - Page 81
: Program AE (→82) : Manual (→90) : Shutter-priority AE (→84) 5: Depth-of-field AE (→88) : Aperture-priority AE (→86) bulb (→102) AEB (→94) : Drive modes (→99) : self-timer (→100) Exposure - Canon EOS-1D | EOS-1D Instructions - Page 82
• If the focus confirmation light < > in the viewfinder blinks, the shutter will lock and a picture cannot be taken. See "When Autofocus Fails (Manual Focusing)" on page 73. Shutter speed Exposure setting Aperture 3 Make sure the exposure setting is not blinking, then press the shutter button - Canon EOS-1D | EOS-1D Instructions - Page 83
dark. For details, see "Exposure Warning List" on page 157. • The AF point which achieves focus flashes briefly. If the AF point has been selected manually (→p.65), it will light dimly while it is active for ( ). • If automatic AF point selection (→p.65) has been set, all the AF points that achieve - Canon EOS-1D | EOS-1D Instructions - Page 84
Shutter-Priority AE In this mode, you set the desired shutter speed and the camera sets the aperture automatically to suit the subject brightness. A fast shutter speed can freeze motion, and a slow shutter speed can blur it. ∗ Tv is an abbreviation for Time value. With a fast shutter speed With a - Canon EOS-1D | EOS-1D Instructions - Page 85
Shutter-Priority AE Exposure Warnings • If the lens' maximum aperture (lowest f/number like f/1.4) blinks, it indicates underexposure. Turn the < > dial to set a slower shutter speed until the aperture display stops blinking. • If the lens' minimum aperture (highest f/number like f/22) blinks, it - Canon EOS-1D | EOS-1D Instructions - Page 86
Aperture-Priority AE In this mode, you set the desired aperture and the camera sets the shutter speed automatically to suit the subject brightness. The larger or brighter the aperture (lower f/number) the more blurred the background will become. This effect is ideal for portraits. The smaller or - Canon EOS-1D | EOS-1D Instructions - Page 87
Aperture-Priority AE / Depth-of-field Preview Exposure Warnings • If the 30" shutter speed blinks, it indicates underexposure. Turn the < > dial to set a larger aperture (lower f/number) until the shutter speed stops blinking. • If the 16000 shutter speed blinks, it indicates overexposure. Turn the - Canon EOS-1D | EOS-1D Instructions - Page 88
Depth-of-field AE This mode is effective when you want a wide depth of field to keep everything in focus near and far. ∗ DEP stands for "depth of field." • This mode will not work if the lens focus mode switch is set to < > (or < >). First set the lens focus mode switch to < >. 1 •Select < > on the - Canon EOS-1D | EOS-1D Instructions - Page 89
Depth-of-field AE Exposure Warnings • If the aperture blinks, the desired depth of field cannot be obtained. (However, you can still take the picture and obtain a proper exposure.) Use a wide-angle lens or move away from the subject and repeat steps 2 to 4. • If both the shutter speed and - Canon EOS-1D | EOS-1D Instructions - Page 90
Manual Exposure In this mode, you set both the shutter speed and aperture for total exposure control. You can refer to the exposure level indicator in - Canon EOS-1D | EOS-1D Instructions - Page 91
Manual Exposure Exposure level indicator 5 Refer to the exposure level indicator and set the shutter speed and aperture to obtain the desired exposure level. Standard exposure index Exposure level mark 6 Take the picture. 5 Exposure Control C.Fn-05 can reverse the functions of the < > dial - Canon EOS-1D | EOS-1D Instructions - Page 92
Setting Exposure Compensation The exposure compensation amount you set will be effective until it is canceled manually. To cancel the exposure compensation amount, turn the < > to set the exposure compensation amount to 0, according to procedure 3 on this page. Exposure compensation is used - Canon EOS-1D | EOS-1D Instructions - Page 93
Setting Exposure Compensation 4 Take the picture. Custom Function C.Fn-06-2 enables the exposure compensation amount to be set in 1/2-stop increments. (→p.134) The exposure compensation amount's 1/2-stop increments enabled with C.Fn-06 are indicated in the viewfinder and on the LCD panel as shown - Canon EOS-1D | EOS-1D Instructions - Page 94
Auto Exposure Bracketing With auto exposure bracketing, the camera brackets the exposure automatically up to +/-3 stops in 1/3-stop increments for three successive frames. You can bracket the exposures by changing the shutter speed or aperture. Or you can use a fixed shutter speed and aperture and - Canon EOS-1D | EOS-1D Instructions - Page 95
Auto Exposure Bracketing Standard Decreased Increased exposure exposure exposure 3 Take the pictures. s The AEB sequence will be standard exposure, decreased exposure, and increased exposure. s The viewfinder's exposure level indicator will indicate the respective bracketing amount as each shot is - Canon EOS-1D | EOS-1D Instructions - Page 96
Auto Exposure Bracketing Standard Decreased Increased exposure exposure exposure 3 Take the pictures. s The AEB sequence will be standard exposure, decreased exposure, and increased exposure. s The viewfinder's exposure level indicator will indicate the respective bracketing amount as each shot is - Canon EOS-1D | EOS-1D Instructions - Page 97
AEB amount to be set in 1/2-stop increments. (→p.134) •• C.Fn-05-1 enables a fixed shutter speed and a changing aperture during AEB in the manual exposure mode. (→p.134) • C.Fn-09-2/3 changes the bracketing sequence to decreased exposure, standard exposure, and increased exposure. (→p.135) • C.Fn-09 - Canon EOS-1D | EOS-1D Instructions - Page 98
AE Lock AE lock enables you to lock the exposure at a different place from the point of focus. After locking the exposure, you can recompose the shot while maintaining the desired exposure level. This feature is useful for backlit and spotlighted subjects. 1 Focus at the point where you want to lock - Canon EOS-1D | EOS-1D Instructions - Page 99
Approx. 3 fps (Fine) + 16 shots (Normal) + (Fine) • The continuous shooting speeds and maximum shots per burst in the above table are based on Canon's testing standards (1/500 sec. or faster shutter speed, at ISO 200). • The maximum shots per burst depends on the subject, shooting mode, and - Canon EOS-1D | EOS-1D Instructions - Page 100
Drive Modes / Self-timer Operation • When you take a picture, the image is first stored in the camera's internal memory and then transferred to the CF card. When the internal memory becomes full during continuous shooting, the camera cannot continue to take more pictures until the images are - Canon EOS-1D | EOS-1D Instructions - Page 101
Self-timer Operation / Using the Eyepiece Shutter 3 •Press the shutter button fully. The self-timer lamp will start blinking to indicate that the self-timer has started. The lamp blinks faster during the last two seconds before the picture is taken. • To cancel the self-timer after it starts, set - Canon EOS-1D | EOS-1D Instructions - Page 102
Bulb Exposures When bulb is set, the shutter is open during the time you keep pressing the shutter button completely. Bulb is useful when a long exposure is necessary for capturing night scenes, fireworks, the night sky, etc. 1 While pressing the < the < > dial until " Then release the < > button, - Canon EOS-1D | EOS-1D Instructions - Page 103
." Then let go of the < > button. Exposure Control 2 •Set noise reduction. While pressing the < > button, turn the < > dial to select the desired review time. Then go of the < > button. s The menu will reappear. • To exit the menu and turn off the LCD monitor, press the < > button - Canon EOS-1D | EOS-1D Instructions - Page 104
Mirror Lockup Mirror lockup is enabled with C.Fn-12. (→p.136) This prevents mirror-caused vibrations which may blur the image during close-ups or when a super telephoto lens is used. To set this Custom Function, see "Setting a Custom Function" on page 132. When mirror lockup is set, the camera - Canon EOS-1D | EOS-1D Instructions - Page 105
photog- raphy with multiple Speedlites. Speedlite 550EX will be used to explain the flash photography features possible with the EOS-1D. For details on Speedlite 550EX, see the instructions booklet that came with it. Flash Photography First set the < > switch to < >. If necessary, also set the - Canon EOS-1D | EOS-1D Instructions - Page 106
. E-TTL is an abbreviation for Evaluative-Through-The-Lens. •• With autofocus, the flash exposure is always based on the aperture (set automatically or manually) and autoflash metering is weighted at the current AF point. • When it is difficult to autofocus, the 550EX's built-in AF-assist beam is - Canon EOS-1D | EOS-1D Instructions - Page 107
AE mode is described below. For details on using Speedlite 550EX, see the instructions booklet that came with it. 1 Set the camera's shooting mode to < Manual (30 sec. - 1/500 sec.) Auto (Aperture-priority AE) Auto (30 sec. - 1/500 sec.) Manual (Manual) Manual (30 sec. - 1/500 sec.) Manual - Canon EOS-1D | EOS-1D Instructions - Page 108
use daylight sync to eliminate shadows FEB (Flash Exposure Bracketing) With the Canon Speedlite 550EX, three successive flash shots can be bracketed automatically up to is set with the 550EX. For details, see the 550EX's Instructions booklet. • The flash exposure bracketing amount set with the 550EX - Canon EOS-1D | EOS-1D Instructions - Page 109
blink. In such a case, increase the ISO speed or get closer to the subject and repeat steps 3 and 4. C.Fn-13-1/3 enables FE lock with the manually-selected AF point. (→p.136) 109 - Canon EOS-1D | EOS-1D Instructions - Page 110
compensation amount will be retained even after the < > switch is set to < >. • You can also set flash exposure compensation with certain EOS-dedicated Speedlites. If you set flash exposure compensation with both the Speedlite and camera, the flash exposure compensation set with the Speedlite will - Canon EOS-1D | EOS-1D Instructions - Page 111
up to three Speedlites grouped as main and sub Speedlites to create the desired flash lighting effect. 6 • For details, see the 550EX and ST-E2's Instructions booklet. Flash Photography 111 - Canon EOS-1D | EOS-1D Instructions - Page 112
useful for close-up flash photography. You will need a standard 18% gray card and an E-TTL autoflash Speedlite (such as the MR14EX) capable of manual flash exposures. Spot metering circle 1 •Set the camera and Speedlite settings. Set the shooting mode to < > or < > and select the center AF point - Canon EOS-1D | EOS-1D Instructions - Page 113
5 •Set the correct flash exposure level. Adjust the Speedlite's manual flash output and the camera aperture so that the flash exposure level be fired only at full output. If you set the camera's shooting mode to manual or aperture-priority AE, you can adjust the aperture and fire the flash at full - Canon EOS-1D | EOS-1D Instructions - Page 114
Units Sync Speed The EOS-1D can synchronize with compact, non-Canon flash units at 1/500 sec. or slower shutter speeds. With large studio flash, the sync speed is 1/125 sec. or slower. Be sure to test - Canon EOS-1D | EOS-1D Instructions - Page 115
7 Playback Images You can view or erase the images you capture with the camera. You can even make a sound recording for an image. 7 When playback images not taken with the camera: The camera might not be able to properly display images captured with a different camera or edited with a personal - Canon EOS-1D | EOS-1D Instructions - Page 116
turn the < > dial clockwise. 3 •Change the display format. While pressing the < > button, turn the < > dial. s On the rear LCD panel, the selection mark will move under the display format icons and the LCD monitor's display format will change accordingly. • When the desired display format - Canon EOS-1D | EOS-1D Instructions - Page 117
lamp blinks. Be sure not to open the CF card slot cover or remove the battery while the access lamp is blinking. • If the selection mark is positioned under the < > icon on the rear LCD panel, automatic playback is not possible. 7 Playback Images 117 - Canon EOS-1D | EOS-1D Instructions - Page 118
AI Servo AF was used, the selected AF point will be shown. The AF point(s) which achieved focus will also be shown if the < > menu's "Review" is set to "On (Info)." 118 - Canon EOS-1D | EOS-1D Instructions - Page 119
Image Protection Protecting a Single Image This prevents the image from being erased accidentally. 1 •Select the image to be protected. Press the < > button to turn on the image display. (→p.116) • The image can be protected regardless of the display format. • While pressing the < > button, - Canon EOS-1D | EOS-1D Instructions - Page 120
Image Protection MENU Protecting All Images in a Folder or CF Card You can protect all the images in a folder or CF card all at once. In the case of a folder, first select it. (→p.55) On the menu, select "Protect images." Press the < > button. 1 •• While pressing the < > button, turn the < > - Canon EOS-1D | EOS-1D Instructions - Page 121
Sound Recording for an Image With the camera's built-in microphone, you can record your voice for any image. The sound data is attached to the image file and can be played with the driver software. 1 •Select the image to have a sound re- cording. Press the < > button to playback the image. (→p. - Canon EOS-1D | EOS-1D Instructions - Page 122
Sound Recording for an Image / Erasing an Image A sound recording is not possible on a protected image. •• The EOS-1D camera itself cannot play back the sound recording. You must transfer the image to a personal computer and use the bundled driver software to play the - Canon EOS-1D | EOS-1D Instructions - Page 123
Erasing an Image 4 •Erase the image. While pressing the < > button, turn the < > dial to select "OK." Then let go of the < > button. s The access lamp will blink while the image is erased. • To erase another image, repeat steps 2 to 4. • To turn off the LCD monitor, press the < > button. - Canon EOS-1D | EOS-1D Instructions - Page 124
Erasing an Image 4 •On the erase menu, select "ALL." While pressing the < > button, turn the < > dial to select "ALL." Then let go of the < > button. s A confirmation dialog will appear. 5 •Erase the images. While pressing the < > button, turn the < > dial to select "OK." Then let go of the < > - Canon EOS-1D | EOS-1D Instructions - Page 125
Erasing an Image MENU Erasing All Images on the CF Card 1 On the menu, select "Erase all on CF card." Press the < > button. •• While pressing the < > button, turn the < > dial to select < >. • While pressing the < > button, turn the < > dial to select "Erase all on CF card." Then let go of - Canon EOS-1D | EOS-1D Instructions - Page 126
be erased. Before formatting a CF card, be sure it is okay to erase the contents. • A non-Canon CF card or a CF card formatted with another camera or personal computer might not work with the EOS-1D camera. In such a case, format the CF card with the camera first. Then it might work with - Canon EOS-1D | EOS-1D Instructions - Page 127
8 Menu Settings On-screen menus enable you to customize the camera's various settings and functions. The mark you see in these Instructions gives just a brief description of the relevant Custom Function. This section explains all of the camera's menu settings, Custom Func- tions, and Personal - Canon EOS-1D | EOS-1D Instructions - Page 128
reproduction range). (→p.48) RAW+JPEG rec. You can record the image in both the RAW and JPEG formats simultaneously. Select from or " only". (→p.40) Review You can display the picture on the LCD monitor immediately after you take it. Set it to "On," "On (Info)," or "Off." (→p.52) The number - Canon EOS-1D | EOS-1D Instructions - Page 129
MENU Menu Settings Review time When "Review" is set to "On" or "On (Info)," you can set the number of seconds the image is displayed on the LCD monitor. (→p.53) Noise reduction - Canon EOS-1D | EOS-1D Instructions - Page 130
MENU Menu Settings Auto power off To avoid exhausting the battery, "Auto power off" turns off the camera automatically after the camera is left unused for a set time period. You can set this time to 1, 2, 4, 8, 15, or 30 min. "Off" will disable this feature. File numbering Each picture you take is - Canon EOS-1D | EOS-1D Instructions - Page 131
to update." message will appear. Press the < > button to return to the menu. To obtain the latest firmware update and installation instructions, see Canon's Web site. Language Select your preferred language for the menu. It can be displayed in English, German, French, Spanish, or Japanese - Canon EOS-1D | EOS-1D Instructions - Page 132
MENU Setting a Custom Function Custom Function Setting 1 On the menu, select "Custom Function (C.Fn)." Press the < > button. •• While pressing the < > button, turn the < > dial to select < >. • While pressing the < > button, turn the < > dial to select "Custom Function (C.Fn)." Then let go - Canon EOS-1D | EOS-1D Instructions - Page 133
MENU Custom Function Settings C.Fn-01 Finder display during exposure 1: Displays the exposure information and number of remaining shots during continuous shooting. C.Fn-02 C.Fn-03 Shutter release without CF card 1: With C.Fn-02-1, the shutter button will not work if there is no CF card in the - Canon EOS-1D | EOS-1D Instructions - Page 134
especially if you want to use a super telephoto lens with more than one EOS-1D body. 3: You set the shutter speed and aperture in the same way as II USM, EF 500mm f/4.5L USM, EF 600mm f/4L USM, EF 1200mm f/5.6L USM, EF 28-80mm f/2.8-4L USM. When both C.Fn-04 and C.Fn-07 are set, electronic manual - Canon EOS-1D | EOS-1D Instructions - Page 135
MENU Custom Function Settings C.Fn-08 Top LCD panel / Back LCD pane 1: Displays the ISO speed at all times. It also displays the number of remaining shots on the top LCD panel with four digits. 2: Displays the ISO speed instead of the number of remaining shots. You can tell when the number of - Canon EOS-1D | EOS-1D Instructions - Page 136
> button. Mirror lockup 1: Effective for close-up and telephoto shots to prevent camera shake caused by the mirror's reflex action. See page 104 for instructions. C.Fn-13 Number of AF points/Spot metering 1: The selectable AF points are limited to 11. Spot metering is linked to the active AF point - Canon EOS-1D | EOS-1D Instructions - Page 137
AF point activation area expands by one point all around the manually-selected AF point. A total of 7 AF points become active. This setting is effective for when only one manually-selected AF point is unable to focus track a subject moving erratically. 2: - Canon EOS-1D | EOS-1D Instructions - Page 138
the button is pressed while metering is still active, AE lock takes effect. Convenient when you want to focus and meter separately. 3: In the manual AF point selection mode, holding down the button switches to automatic AF point selection (among 45 AF points). Holding down the button switches from - Canon EOS-1D | EOS-1D Instructions - Page 139
Custom Function Settings / MENU Clearing Custom Function Settings C.Fn-00 Focusing screen 0: For New Laser-matte screens. 1: For Laser-matte screens. Since the EOS-1D's standard focusing screen is the Ec-CIII, C.Fn-00-1 is already set upon factory shipment. For C.Fn-00 when you change the focusing - Canon EOS-1D | EOS-1D Instructions - Page 140
MENU Registering Custom Function Groups MENU Registering Custom Function Groups You can register up to three groups of Custom Function settings. A group of Custom Function settings can be used for a specific shooting situation such as sports, snapshooting, and landscapes. Note that C.Fn-00 " - Canon EOS-1D | EOS-1D Instructions - Page 141
MENU Registering Custom Function Groups 5 •Select the group number. While pressing the < > button, turn the < > dial to select a group number from "P.Fn-0-1" to "P.Fn-0-3." Then let go of the < > button. s When you select an unregistered group number, the "Not registered" message will appear - Canon EOS-1D | EOS-1D Instructions - Page 142
MENU Setting Custom Function Groups MENU Using a Custom Function Group After following the procedure on the preceding page to register a Custom Function group, follow the procedure below to apply the Custom Function group's settings to the camera. 1 On the menu, select "Personal Functions (P.Fn - Canon EOS-1D | EOS-1D Instructions - Page 143
MENU Setting Custom Function Groups 5 •Select "OK." While pressing the < > button, turn the < > dial to select "OK." Then let go of the < > button. 6 Check the registered group's Custom Function settings. s The group number of the Custom Functions that were applied is displayed in green, and - Canon EOS-1D | EOS-1D Instructions - Page 144
you to further customize your camera settings. They are set with the driver software (bundled) while the EOS-1D is connected to a personal computer. For details, see "EOS-1D Software Instructions." The P.Fn-0 group of Custom Functions can also be registered with the camera alone. (→p.140) Personal - Canon EOS-1D | EOS-1D Instructions - Page 145
with bundled driver software. The Personal Function settings can be modified only with the driver software. For details, see "EOS-1D Software Instructions." 1 On the menu, select "Personal Functions (P.Fn)." Press the < > button. •• While pressing the < > button, turn the < > dial to select - Canon EOS-1D | EOS-1D Instructions - Page 146
MENU Clearing All Personal Functions You can clear all the Personal Function settings set or registered with the bundled driver software at one time. 1 On the menu, select "Clear all Personal Functions." Press the < > button. •• While pressing the < > button, turn the < > dial to select < >. - Canon EOS-1D | EOS-1D Instructions - Page 147
9 Maintenance Learn how to set the camera's date and time, back-up battery and clean the CCD sensor. 9 147 Maintenance - Canon EOS-1D | EOS-1D Instructions - Page 148
MENU Setting the Date and Time To set or correct the camera's date and time, follow the procedure below. The date and time is recorded with each picture you take. On the menu, select "Date/time." Press the < > button. 1 •• While pressing the < > button, turn the < > dial to select < >. • - Canon EOS-1D | EOS-1D Instructions - Page 149
Replacing the Back-up Battery The back-up battery maintains the camera's date and time. The battery's service life is about 10 years. If the date/time is reset upon battery pack replacement, replace the back-up battery with a new CR2025 lithium battery - Canon EOS-1D | EOS-1D Instructions - Page 150
the procedure below to clean the CCD sensor. Note that the CCD sensor is a very delicate component. If possible, you should have it cleaned by a Canon Service Center. While you clean the CCD, the camera's power must remain on the whole time. To make sure the power will not turn off while - Canon EOS-1D | EOS-1D Instructions - Page 151
MENU Cleaning the CCD Sensor 5 •Clean the CCD sensor. Use a rubber blower to carefully blow away any dust, etc., adhering to the CCD sensor. 6 •After cleaning the CCD sensor. Set the < > switch to < >. s The camera will turn off and the shutter will close. The reflex mirror will also go down. • Set - Canon EOS-1D | EOS-1D Instructions - Page 152
152 - Canon EOS-1D | EOS-1D Instructions - Page 153
10 Reference This section will help you understand your camera better. It covers basic photography concepts, camera specifications, system accessories, and other reference information. 10 153 Reference - Canon EOS-1D | EOS-1D Instructions - Page 154
camera to focus the subject automatically. CF (CompactFlash) card CF card is the small, card-shaped storage media used to record images taken by the EOS-1D. ISO speed This indicates the film's sensitivity to light. It is expressed as a number following "ISO" such as "ISO 200." The higher the number - Canon EOS-1D | EOS-1D Instructions - Page 155
or "TIF" for RAW images. For sound files, the extension will be "WAV." Firmware This is software containing various camera control instructions. The EOS-1D uses the firmware for shooting and image processing. Although the firmware is preinstalled in the camera, you can later install the latest - Canon EOS-1D | EOS-1D Instructions - Page 156
Basic Terminology Depth of field This is the range where acceptable focus can be achieved in front of and behind the point of the subject. The smaller the aperture (the higher the f/number), the deeper the depth of field. And the larger the aperture (the lower the f/number), the shallower the depth - Canon EOS-1D | EOS-1D Instructions - Page 157
Exposure Warning List Mode Blinking Warning Indication The subject is too dark. Solution 1) Increase the ISO speed. 2) Use flash. The subject is too bright. 1) Decrease the ISO speed. 2) Attach a neutral density filter to the lens. The picture will be underexposed. 1) Turn the < > to set a - Canon EOS-1D | EOS-1D Instructions - Page 158
Aperture Program Line The program line below applies when the camera is used in the Program AE < > mode with an EF 50mm f/1.4 USM lens. Shutter speed Program Line Description The bottom horizontal axis represents the shutter speed and the right vertical axis represents the aperture. On the left - Canon EOS-1D | EOS-1D Instructions - Page 159
Shutter Speed and Aperture Readouts Shutter speed readout The shutter speed is normally displayed in 1/3-stop increments. Numbers from "4" to "16000" denote the denominator of the shutter speed fraction. For example, "125" is 1/125 sec. Also, 0"3 is 0.3 sec., and 15" is 15 sec. Aperture readout The - Canon EOS-1D | EOS-1D Instructions - Page 160
on the top LCD panel. Follow the instruction below according to the error code. If the same error occurs often, something is probably wrong with the camera. Jot down the "xx" error code and take your camera to the nearest Canon Service Center (see list of service centers on the back cover). If - Canon EOS-1D | EOS-1D Instructions - Page 161
On-screen Messages Message Description "CF card full" No more recording Since the CF card is full, a sound recording cannot be made. Erase unnecessary images from the CF card to make more room. Note that any erased images cannot be recovered. (→p.121) Cannot record The sound file (WAV) is - Canon EOS-1D | EOS-1D Instructions - Page 162
Troubleshooting Guide If there is a problem, first refer to this Troubleshooting Guide. Power Source The battery cannot The battery is not fully charged. s Recharge the battery fully. (→p.22) The battery's service life has expired. s Replace the battery with a new one. (→p.166) The camera turns - Canon EOS-1D | EOS-1D Instructions - Page 163
Troubleshooting Guide manually. (→p.74) The LCD monitor The LCD monitor screen is dirty. does not display a s Use a soft cloth to clean the screen. clear image. The LCD's service life has expired. s Contact your dealer or Canon Service CF card. (→p.2, 3) Image Review The image cannot The image - Canon EOS-1D | EOS-1D Instructions - Page 164
the focusing screen that came with the camera, you need not change C.Fn-00-1 factory setting. • To change the focusing screen, refer to the instructions that came with the focusing screen. • The Ec-A, Ec-B, Ec-I, and Ec-L focusing screens have a prism at the center. A correct exposure reading cannot - Canon EOS-1D | EOS-1D Instructions - Page 165
splits. Lenses with a maximum aperture smaller (higher f/number) than f/5.6 will cause the focusing screen's split portion to darken. Ec-CIII: Laser-matte EOS-1D and EOS-1V's standard focusing screen. The CIII logo is imprinted on the lug to distinguish it from the Ec-N. Ec-N: New Laser-matte - Canon EOS-1D | EOS-1D Instructions - Page 166
Major Accessories (optional) Ni-MH Pack NP-E3 EOS-1D-dedicated, high-performance power pack with a rated voltage of 12 V. It can be recharged up to 500 times. When fully charged, it enables the camera - Canon EOS-1D | EOS-1D Instructions - Page 167
also has a shutter release lock. Its quick-lock plug connects to the EOS-1D's remote control terminal. Timer Remote Controller TC-80N3 Attached with an 80-cm device where the captured images are recorded. CF cards made by Canon are recommended. PC card adapter Enables a CF card to be inserted into - Canon EOS-1D | EOS-1D Instructions - Page 168
MR-14EX Macro Twin Lite MT-24EX Rubber Frame Ec Ec-Series Dioptric Adjustment Lenses Anti-Fog Eyepiece Ec Bundled Accessories Strap L4 Eyecup Ec-II Hand Strap E1 Angle Finder C Focusing screen Ec DC Coupler Kit DCK-E1 CR2025 lithium battery Ni-MH Pack NP-E3 Ni-MH Charger NC - Canon EOS-1D | EOS-1D Instructions - Page 169
System Map Canon EF lenses Timer Remote Controller TC-80N3 Remote Switch RS-80N3 Wireless Controller LC-4 Interface Cable IFC-200D6 EOS Digital Solution Disk Photoshop LE Disk Card reader CF card PC card adapter IEEE 1394 port PC card slot Macintosh computer IEEE 1394 port PC/ - Canon EOS-1D | EOS-1D Instructions - Page 170
II CF card Image size 28.7 x 19.1 mm (1.13 x 0.75 in) Compatible lenses Canon EF lenses (Effective angle of view is approx. 1.3 x of indicated lens focal length.) Lens mount Canon 1) Consecutive numbering (2) Auto reset (3) Manual reset Processing parameters Standard parameters plus up - Canon EOS-1D | EOS-1D Instructions - Page 171
, ISO 100) Exposure control systems ........ Program AE (shiftable), shutter-priority AE, aperture-priority AE, depth-of-field AE, E-TTL flash AE, manual, flash metered manual 10 ISO speed range Equivalent to ISO 200-1600 (in 1/3-stop increments), ISO speed can be expanded to ISO 100 and 3200 - Canon EOS-1D | EOS-1D Instructions - Page 172
Operates in One-Shot AF mode with evaluative metering when focus is achieved. Manual: By AE lock button in all metering modes. • Shutter Type Electronic shutter Remote control Remote control with N3 type contact • Flash EOS-dedicated Speedlite ......... E-TTL autoflash with EX series Speedlite PC - Canon EOS-1D | EOS-1D Instructions - Page 173
• Working Conditions Working temperature range ..... 0 - 45˚C / 32 - 113˚F Working humidity 85% or lower 10 • All the specifications above are based on Canon's testing and measuring standards. • The camera's specifications and physical appearance are subject to change without notice. 173 Reference - Canon EOS-1D | EOS-1D Instructions - Page 174
109 flash exposure compensation 110 flash metered manual 112 flash photography 105 - with non-Canon flash unit 114 focusing screen 164 reset 56 - continuous numbering 57 - manual reset 58 image playback 52 - playback 115 - review 52 - review time 53 image protection 119 - canceling - Canon EOS-1D | EOS-1D Instructions - Page 175
manual focusing 73 menu 32 - description 32 - operation 32 - settings 128 metering modes 76 messages on-screen 160 mirror lockup 104 modeling flash 111 recording 121 specifications 170 strap 36 system map 168 T troubleshooting guide 162 Tv shutter speed-priority AE 84 W white balance - Canon EOS-1D | EOS-1D Instructions - Page 176
INC. 12-15 Mita, 3-Chome, Minato-ku, Tokyo 108-8011, Japan This Instructions booklet is current as of September 2001. For information on using the camera with system accessories introduced after this date, contact your nearest Canon Service Center. CT1-1229-003 © CANON INC. 2001 PRINTED IN JAPAN
-
 1
1 -
 2
2 -
 3
3 -
 4
4 -
 5
5 -
 6
6 -
 7
7 -
8
-
9
-
10
-
11
-
12
-
13
-
14
-
15
-
16
-
17
-
18
-
19
-
20
-
21
-
22
-
23
-
24
-
25
-
26
-
27
-
28
-
29
-
30
-
31
-
32
-
33
-
34
-
35
-
36
-
37
-
38
-
39
-
40
-
41
-
42
-
43
-
44
-
45
-
46
-
47
-
48
-
49
-
50
-
51
-
52
-
53
-
54
-
55
-
56
-
57
-
58
-
59
-
60
-
61
-
62
-
63
-
64
-
65
-
66
-
67
-
68
-
69
-
70
-
71
-
72
-
73
-
74
-
75
-
76
-
77
-
78
-
79
-
80
-
81
-
82
-
83
-
84
-
85
-
86
-
87
-
88
-
89
-
90
-
91
-
92
-
93
-
94
-
95
-
96
-
97
-
98
-
99
-
100
-
101
-
102
-
103
-
104
-
105
-
106
-
107
-
108
-
109
-
110
-
111
-
112
-
113
-
114
-
115
-
116
-
117
-
118
-
119
-
120
-
121
-
122
-
123
-
124
-
125
-
126
-
127
-
128
-
129
-
130
-
131
-
132
-
133
-
134
-
135
-
136
-
137
-
138
-
139
-
140
-
141
-
142
-
143
-
144
-
145
-
146
-
147
-
148
-
149
-
150
-
151
-
152
-
153
-
154
-
155
-
156
-
157
-
158
-
159
-
160
-
161
-
162
-
163
-
164
-
165
-
166
-
167
-
168
-
169
-
170
-
171
-
172
-
173
-
174
-
175
-
176
 |
 |

English Edition
INSTRUCTIONS
INSTRUCTIONS
E
E
Be sure to read these Instructions before using
your camera for the first time. Keep this booklet
handy for easy reference.