Canon MF7280 imageCLASS MF7280 Starter Guide - Page 11
Press [IP Address], then enter the IP, Press [Subnet Mask] and [Gateway
 |
UPC - 013803056129
View all Canon MF7280 manuals
Add to My Manuals
Save this manual to your list of manuals |
Page 11 highlights
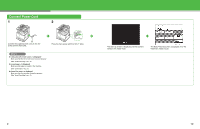
3 Press [Network Settings]. 4 Press [TCP/IP Settings]. 7 Press [Subnet Mask] and [Gateway Address] and specify the settings in the same way. 8 Press [OK]. If you specify an IP address using DHCP, BOOTP, or RARP, press [DHCP], [BOOTP], or [RARP]. One of the DHCP, BOOTP, or RARP settings can be selected at any one time. 5 Press [IP Address Settings]. 6 Press [IP Address], then enter the IP address using the numeric keys. 9 Turn off the main power on the right side of the machine, then turn on the power to restart the machine. 19 20
-
 1
1 -
2
-
3
-
4
-
5
-
 6
6 -
 7
7 -
 8
8 -
 9
9 -
 10
10 -
 11
11 -
 12
12 -
 13
13 -
 14
14 -
 15
15 -
 16
16
 |
 |

3
Press [Network Settings].
4
Press [TCP/IP Settings].
5
Press [IP Address Settings].
6
Press [IP Address], then enter the IP
address using the numeric keys.
7
Press [Subnet Mask] and [Gateway
Address] and specify the settings in the
same way.
If you specify an IP address using DHCP, BOOTP, or RARP,
press [DHCP], [BOOTP], or [RARP]. One of the DHCP,
BOOTP, or RARP settings can be selected at any one time.
8
Press [OK].
9
Turn off the main power on the right side of
the machine, then turn on the power to
restart the machine.
20
19