Canon PIXMA MX340 MX340 series Getting Started - Page 60
COPIA COPY, A continuación, lea Instalación del software 3 en la página 66., Next
 |
View all Canon PIXMA MX340 manuals
Add to My Manuals
Save this manual to your list of manuals |
Page 60 highlights
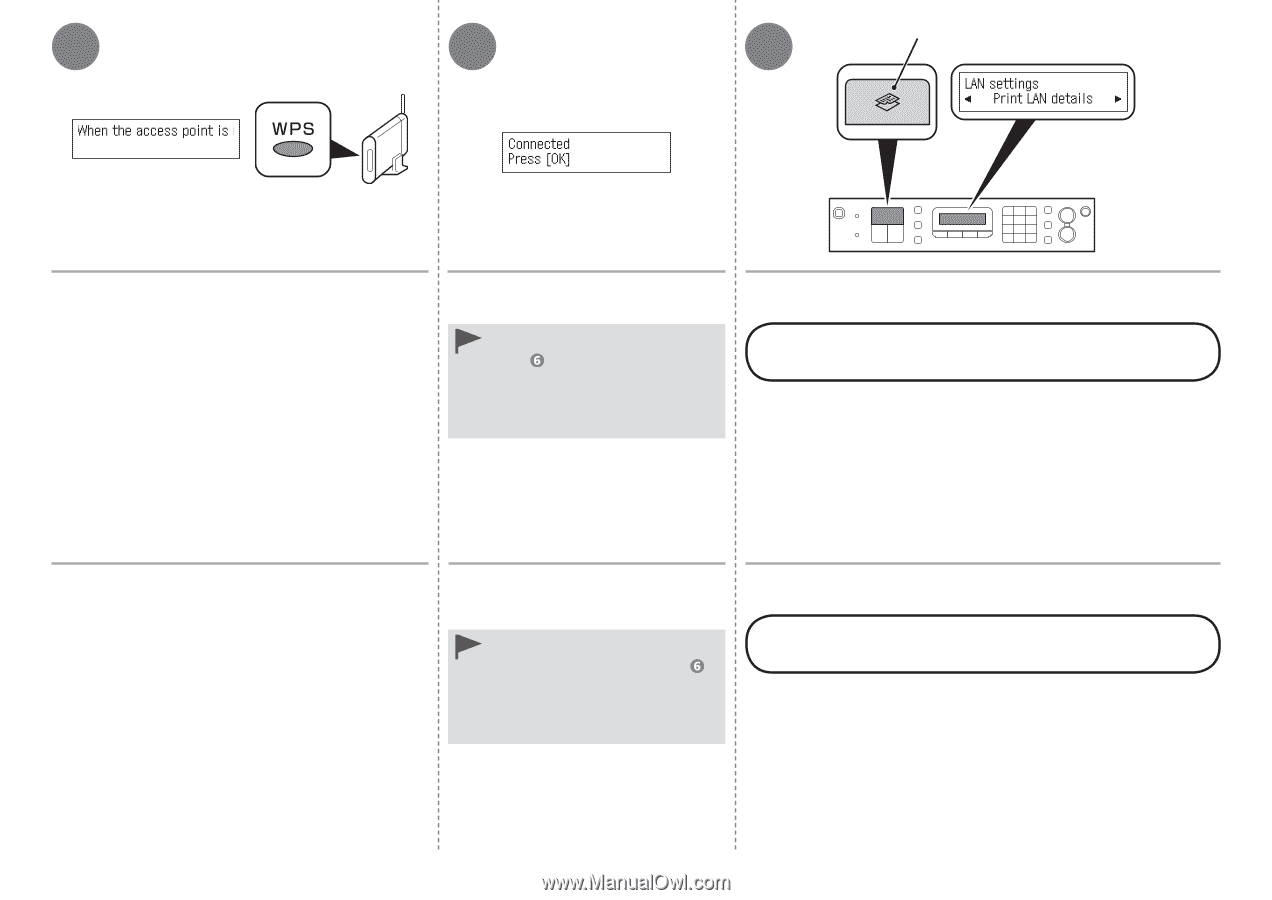
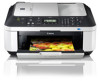
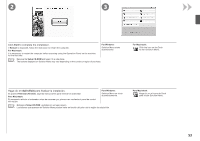
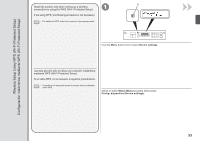
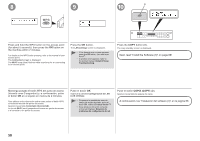
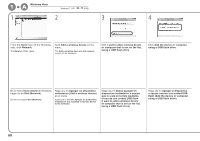
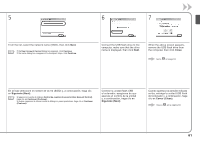
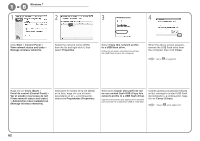
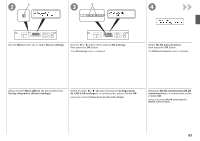
8 9 10 D Press and hold the WPS button on the access point (for about 5 seconds), then press the OK button on the machine within 2 minutes. For details on the WPS button pressing, refer to the manual of your access point. The Connected screen is displayed. The Wi-Fi lamp (blue) flashes while searching for or connecting to an access point. Press the OK button. The LAN settings screen is displayed. • If the timeout error screen appears, press the OK button, then start over from . • If another error appears, refer to the printed manual: Network Setup Troubleshooting. Press the COPY button (D). The copy standby screen is displayed. Next, read "Install the Software (3)" on page 66! Mantenga pulsado el botón WPS del punto de acceso (durante unos 5 segundos) y, a continuación, pulse el botón OK en el equipo en menos de 2 minutos. Para obtener más información sobre cómo pulsar el botón WPS, consulte el manual del punto de acceso. Aparece la pantalla Conectado (Connected). La luz de Wi-Fi (azul) parpadea al buscar un punto de acceso o al conectar a un punto de acceso. Pulse el botón OK. Aparece la pantalla Configuración de LAN (LAN settings). • Si aparece la pantalla de error de tiempo de espera agotado, pulse el botón OK, vuelva a empezar desde . • Si se produce otro error, consulte el manual impreso: Solución de problemas de configuración de red. Pulse el botón COPIA (COPY) (D). Aparece la pantalla de espera de copia. A continuación, lea "Instalación del software (3)" en la página 66. 58
-
 1
1 -
2
-
3
-
4
-
5
-
6
-
7
-
8
-
9
-
10
-
11
-
12
-
13
-
14
-
15
-
16
-
17
-
18
-
19
-
20
-
21
-
22
-
23
-
24
-
25
-
26
-
27
-
28
-
29
-
30
-
31
-
32
-
33
-
34
-
35
-
36
-
37
-
38
-
39
-
40
-
41
-
42
-
43
-
44
-
45
-
46
-
47
-
48
-
49
-
50
-
51
-
52
-
53
-
54
-
 55
55 -
 56
56 -
 57
57 -
 58
58 -
 59
59 -
 60
60 -
 61
61 -
 62
62 -
 63
63 -
 64
64 -
 65
65 -
66
-
67
-
68
-
69
-
70
-
71
-
72
-
73
-
74
-
75
-
76
-
77
-
78
-
79
-
80
-
81
-
82
-
83
-
84
-
85
-
86
-
87
-
88
-
89
-
90
-
91
-
92
-
93
-
94
-
95
-
96
-
97
-
98
 |
 |