Canon PIXMA MX472 Printing Guide - Page 148
Making Copies
 |
View all Canon PIXMA MX472 manuals
Add to My Manuals
Save this manual to your list of manuals |
Page 148 highlights
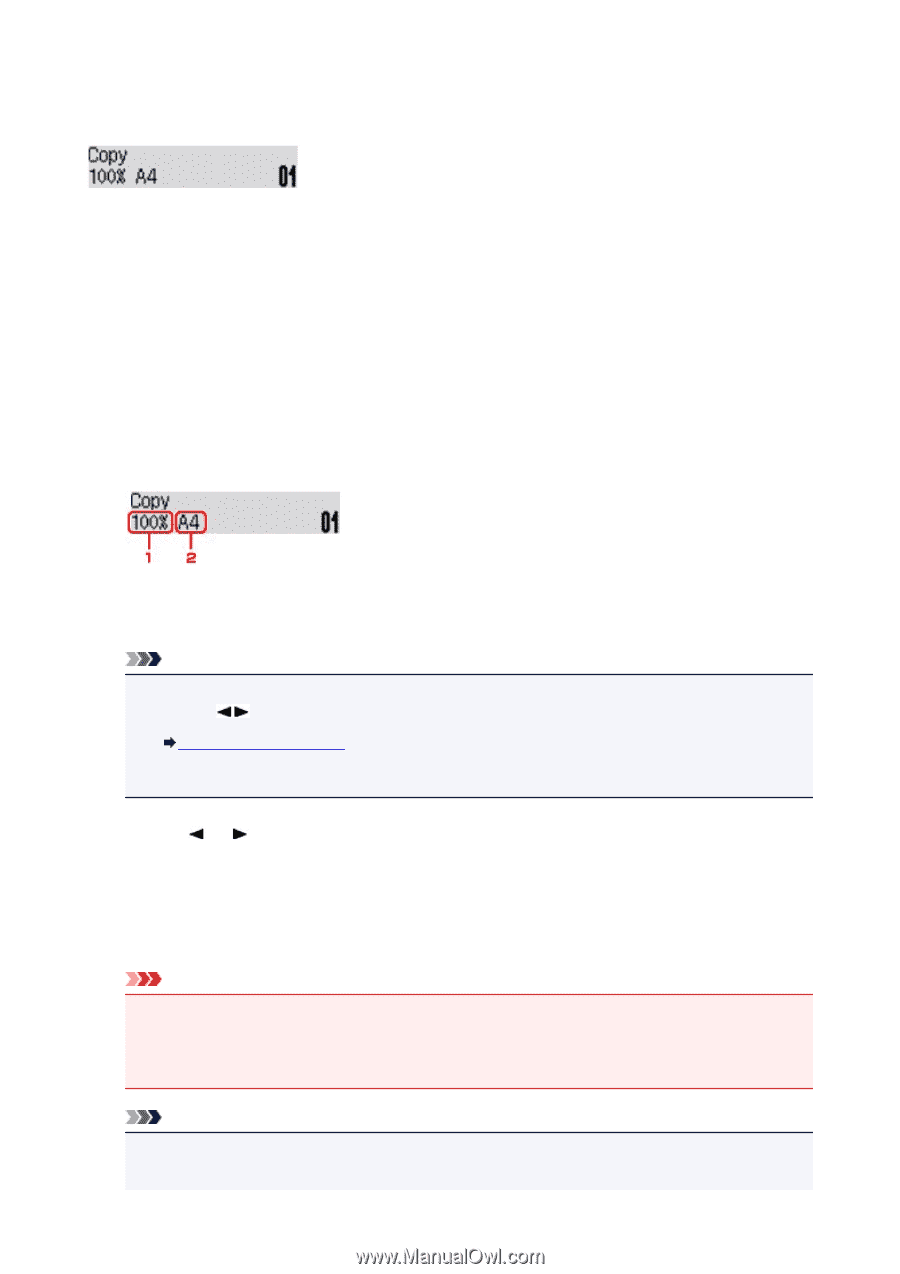
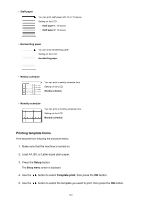
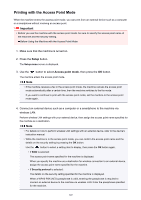
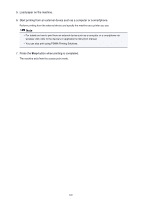
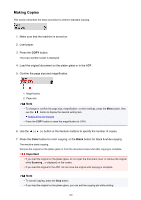
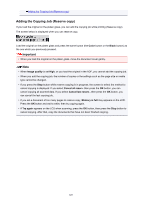
Making Copies This section describes the basic procedure to perform standard copying. 1. Make sure that the machine is turned on. 2. Load paper. 3. Press the COPY button. The Copy standby screen is displayed. 4. Load the original document on the platen glass or in the ADF. 5. Confirm the page size and magnification. 1. Magnification 2. Page size Note • To change or confirm the page size, magnification, or other settings, press the Menu button, then use the button to display the desired setting item. Setting Items for Copying • Press the COPY button to reset the magnification to 100%. 6. Use the (-) (+) button or the Numeric buttons to specify the number of copies. 7. Press the Color button for color copying, or the Black button for black & white copying. The machine starts copying. Remove the original on the platen glass or from the document output slot after copying is complete. Important • If you load the original on the platen glass, do not open the document cover or remove the original while Scanning... is displayed on the screen. • If you load the original in the ADF, do not move the original until copying is complete. Note • To cancel copying, press the Stop button. • If you load the original on the platen glass, you can add the copying job while printing. 148
-
 1
1 -
2
-
3
-
4
-
5
-
6
-
7
-
8
-
9
-
10
-
11
-
12
-
13
-
14
-
15
-
16
-
17
-
18
-
19
-
20
-
21
-
22
-
23
-
24
-
25
-
26
-
27
-
28
-
29
-
30
-
31
-
32
-
33
-
34
-
35
-
36
-
37
-
38
-
39
-
40
-
41
-
42
-
43
-
44
-
45
-
46
-
47
-
48
-
49
-
50
-
51
-
52
-
53
-
54
-
55
-
56
-
57
-
58
-
59
-
60
-
61
-
62
-
63
-
64
-
65
-
66
-
67
-
68
-
69
-
70
-
71
-
72
-
73
-
74
-
75
-
76
-
77
-
78
-
79
-
80
-
81
-
82
-
83
-
84
-
85
-
86
-
87
-
88
-
89
-
90
-
91
-
92
-
93
-
94
-
95
-
96
-
97
-
98
-
99
-
100
-
101
-
102
-
103
-
104
-
105
-
106
-
107
-
108
-
109
-
110
-
111
-
112
-
113
-
114
-
115
-
116
-
117
-
118
-
119
-
120
-
121
-
122
-
123
-
124
-
125
-
126
-
127
-
128
-
129
-
130
-
131
-
132
-
133
-
134
-
135
-
136
-
137
-
138
-
139
-
140
-
141
-
142
-
 143
143 -
 144
144 -
 145
145 -
 146
146 -
 147
147 -
 148
148 -
 149
149 -
 150
150 -
 151
151 -
 152
152 -
 153
153 -
154
-
155
-
156
-
157
-
158
-
159
-
160
-
161
 |
 |