Canon PIXMA iP4300 Guia de iniciacion rapida [Spanish Version] - Page 15
Replacing an Ink Tank
 |
View all Canon PIXMA iP4300 manuals
Add to My Manuals
Save this manual to your list of manuals |
Page 15 highlights
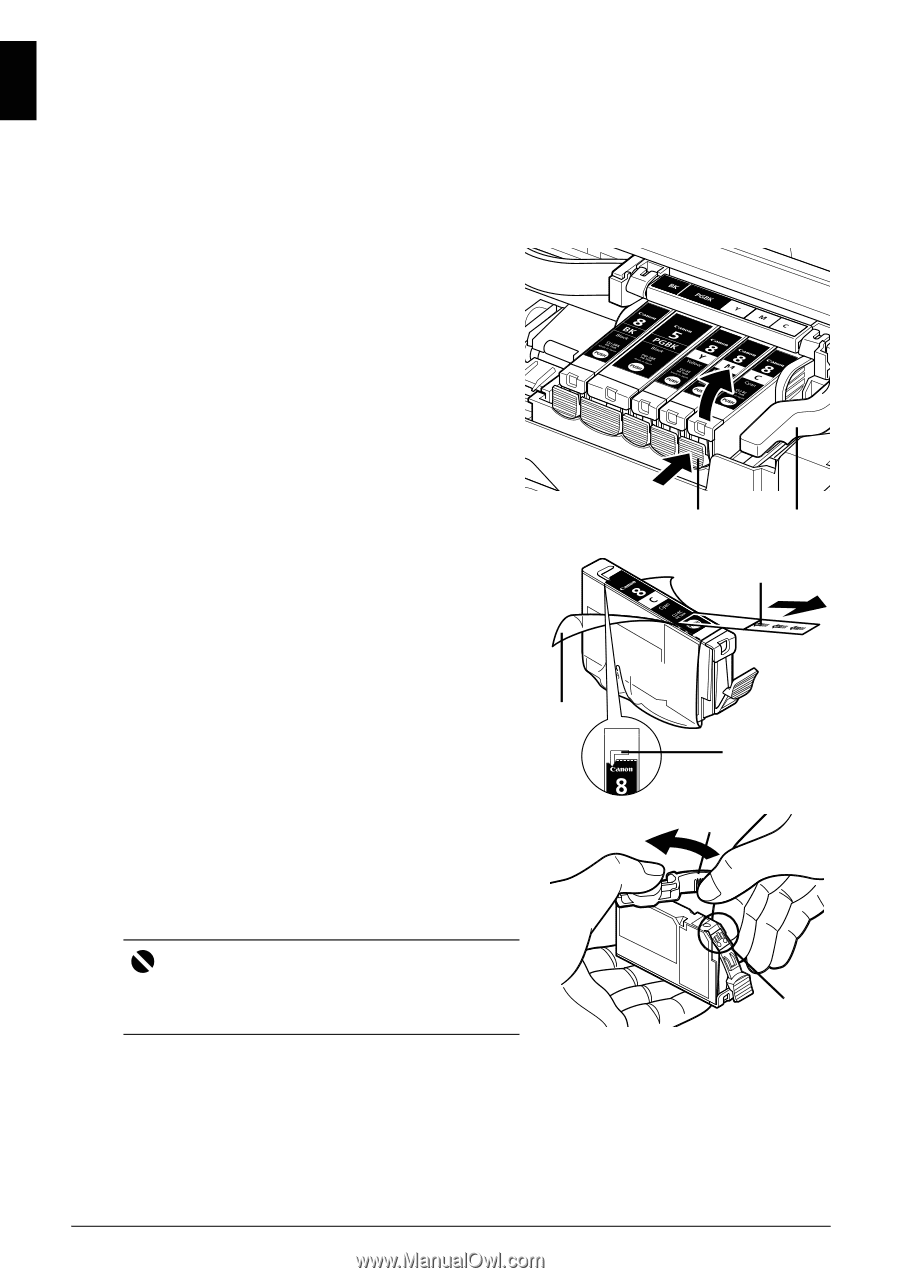
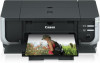
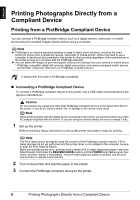
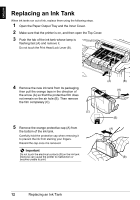
ENGLISH Replacing an Ink Tank When ink tanks run out of ink, replace them using the following steps. 1 Open the Paper Output Tray and the Inner Cover. 2 Make sure that the printer is on, and then open the Top Cover. 3 Push the tab of the ink tank whose lamp is flashing fast (A) and remove it. Do not touch the Print Head Lock Lever (B). 4 Remove the new ink tank from its packaging, then pull the orange tape in the direction of the arrow (A) so that the protective film does not remain on the air hole (B). Then remove the film completely (C). (C) 5 Remove the orange protective cap (A) from the bottom of the ink tank. Carefully hold the protective cap when removing it to prevent the ink from staining your fingers. Discard the cap once it is removed. Important Do not touch the electrical contacts (B) on the ink tank. Doing so can cause the printer to malfunction or become unable to print. (A) (B) (A) (B) (A) (B) 12 Replacing an Ink Tank
-
 1
1 -
2
-
3
-
4
-
5
-
6
-
7
-
8
-
9
-
 10
10 -
 11
11 -
 12
12 -
 13
13 -
 14
14 -
 15
15 -
 16
16 -
 17
17 -
 18
18 -
 19
19 -
 20
20 -
21
-
22
-
23
-
24
-
25
-
26
-
27
-
28
-
29
-
30
-
31
-
32
-
33
-
34
-
35
-
36
-
37
-
38
-
39
-
40
-
41
-
42
-
43
-
44
-
45
-
46
-
47
-
48
-
49
-
50
-
51
-
52
-
53
-
54
-
55
-
56
-
57
-
58
-
59
-
60
-
61
-
62
-
63
-
64
-
65
-
66
-
67
-
68
-
69
-
70
-
71
-
72
-
73
-
74
 |
 |