Canon PowerShot A570IS PowerShot A570 IS Camera User Guide Advanced - Page 41
Program AE
 |
UPC - 013803078442
View all Canon PowerShot A570IS manuals
Add to My Manuals
Save this manual to your list of manuals |
Page 41 highlights
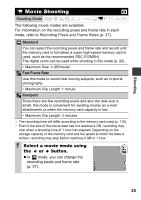
Shooting 3 Compose the second image so that it overlaps a portion of the first and shoot. z You can press the or button to return to the previously recorded image to retake the shot. z Minor discrepancies in the overlapping portions can be corrected when the images are stitched together. 4 Repeat the procedure for additional images. z A sequence may contain up to 26 images. z Press the FUNC./SET button after the last shot. z You cannot display the images on a TV when shooting in Stitch Assist mode. z The settings for the first image are applied to the second image onward (except for Macro setting). z Use PhotoStitch, a supplied software program, to merge the images on a computer. z When the button is pressed, you can switch between the items which you can set. - Exposure compensation/Shooting direction selection Program AE Shooting Mode The camera automatically sets the shutter speed and aperture value to match the brightness of the subject. z When a correct exposure cannot be obtained, the shutter speed and aperture values are shown in red on the LCD monitor when the shutter button is pressed halfway. Use the following shooting methods to obtain the correct exposure and make them show in white. - Using the flash - Changing the ISO speed - Changing the metering method 39
-
 1
1 -
2
-
3
-
4
-
5
-
6
-
7
-
8
-
9
-
10
-
11
-
12
-
13
-
14
-
15
-
16
-
17
-
18
-
19
-
20
-
21
-
22
-
23
-
24
-
25
-
26
-
27
-
28
-
29
-
30
-
31
-
32
-
33
-
34
-
35
-
 36
36 -
 37
37 -
 38
38 -
 39
39 -
 40
40 -
 41
41 -
 42
42 -
 43
43 -
 44
44 -
 45
45 -
 46
46 -
47
-
48
-
49
-
50
-
51
-
52
-
53
-
54
-
55
-
56
-
57
-
58
-
59
-
60
-
61
-
62
-
63
-
64
-
65
-
66
-
67
-
68
-
69
-
70
-
71
-
72
-
73
-
74
-
75
-
76
-
77
-
78
-
79
-
80
-
81
-
82
-
83
-
84
-
85
-
86
-
87
-
88
-
89
-
90
-
91
-
92
-
93
-
94
-
95
-
96
-
97
-
98
-
99
-
100
-
101
-
102
-
103
-
104
-
105
-
106
-
107
-
108
-
109
-
110
-
111
-
112
-
113
-
114
-
115
-
116
-
117
-
118
-
119
-
120
-
121
-
122
-
123
-
124
-
125
-
126
-
127
-
128
-
129
-
130
-
131
 |
 |
