Canon PowerShot SX500 IS User Guide - Page 19
Charging the Battery, Remove the battery cover and, insert the battery in the charger. - battery charger
 |
View all Canon PowerShot SX500 IS manuals
Add to My Manuals
Save this manual to your list of manuals |
Page 19 highlights
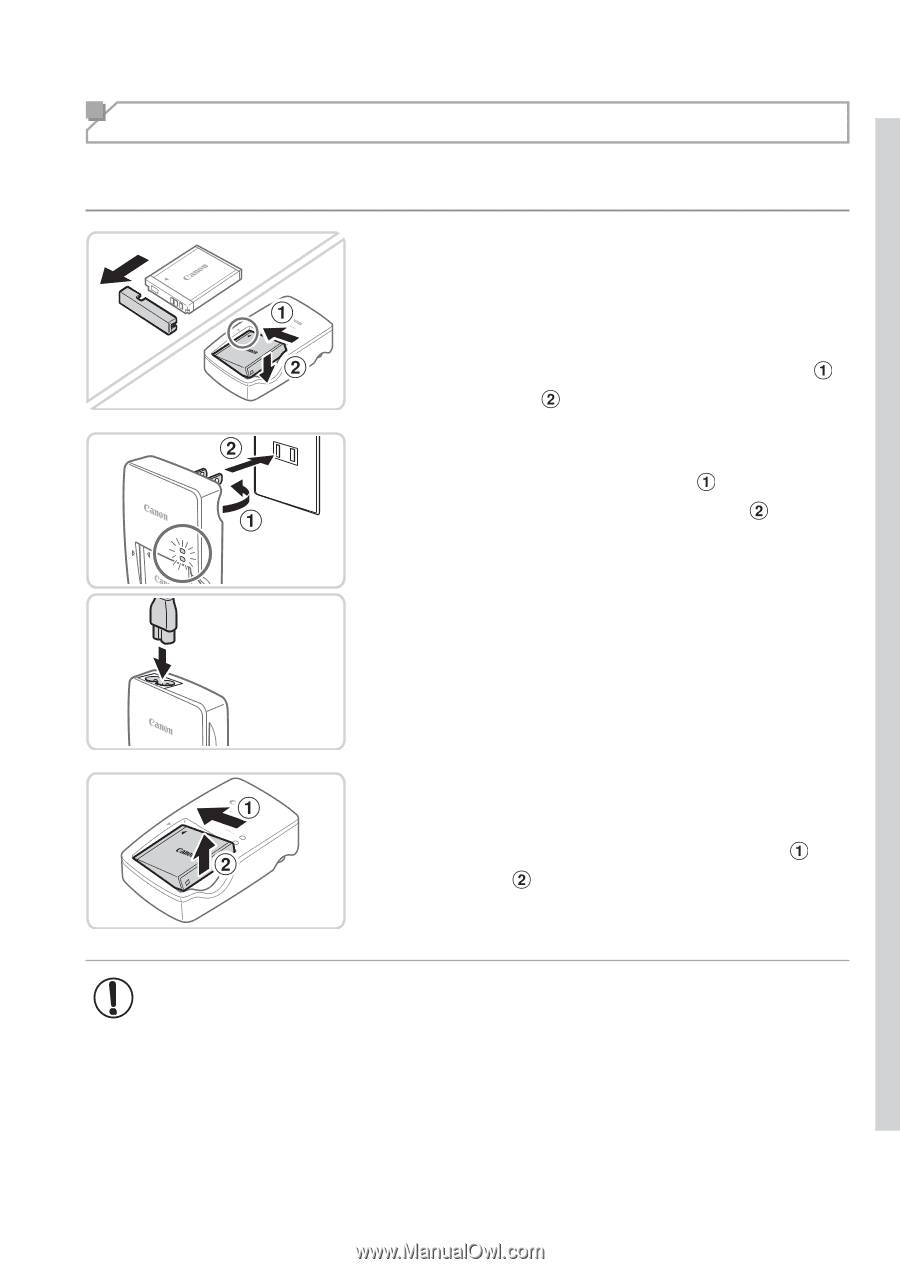
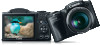
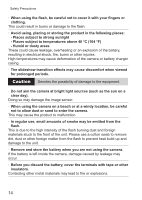
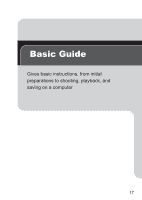
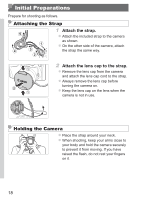
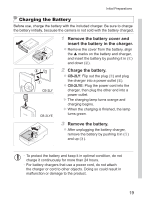
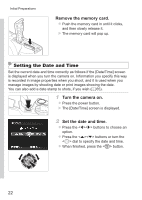
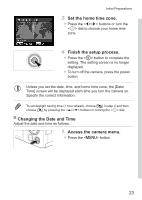
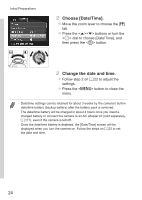
Initial Preparations Charging the Battery Before use, charge the battery with the included charger. Be sure to charge the battery initially, because the camera is not sold with the battery charged. CB-2LY CB-2LYE 1 Remove the battery cover and insert the battery in the charger. zzRemove the cover from the battery, align the p marks on the battery and charger, and insert the battery by pushing it in ( ) and down ( ). 2 Charge the battery. zzCB‑2LY: Flip out the plug ( ) and plug the charger into a power outlet ( ). zzCB‑2LYE: Plug the power cord into the charger, then plug the other end into a power outlet. XXThe charging lamp turns orange and charging begins. XXWhen the charging is finished, the lamp turns green. 3 Remove the battery. zzAfter unplugging the battery charger, remove the battery by pushing it in ( ) and up ( ). • To protect the battery and keep it in optimal condition, do not charge it continuously for more than 24 hours. • For battery chargers that use a power cord, do not attach the charger or cord to other objects. Doing so could result in malfunction or damage to the product. 19
-
 1
1 -
2
-
3
-
4
-
5
-
6
-
7
-
8
-
9
-
10
-
11
-
12
-
13
-
 14
14 -
 15
15 -
 16
16 -
 17
17 -
 18
18 -
 19
19 -
 20
20 -
 21
21 -
 22
22 -
 23
23 -
 24
24 -
25
-
26
-
27
-
28
-
29
-
30
-
31
-
32
-
33
-
34
-
35
-
36
-
37
-
38
-
39
-
40
-
41
-
42
-
43
-
44
-
45
-
46
-
47
-
48
-
49
-
50
-
51
-
52
-
53
-
54
-
55
-
56
-
57
-
58
-
59
-
60
-
61
-
62
-
63
-
64
-
65
-
66
-
67
-
68
-
69
-
70
-
71
-
72
-
73
-
74
-
75
-
76
-
77
-
78
-
79
-
80
-
81
-
82
-
83
-
84
-
85
-
86
-
87
-
88
-
89
-
90
-
91
-
92
-
93
-
94
-
95
-
96
-
97
-
98
-
99
-
100
-
101
-
102
-
103
-
104
-
105
-
106
-
107
-
108
-
109
-
110
-
111
-
112
-
113
-
114
-
115
-
116
-
117
-
118
-
119
-
120
-
121
-
122
-
123
-
124
-
125
-
126
-
127
-
128
-
129
-
130
-
131
-
132
-
133
-
134
-
135
-
136
-
137
-
138
-
139
-
140
-
141
-
142
-
143
-
144
-
145
-
146
-
147
-
148
-
149
-
150
-
151
-
152
-
153
-
154
-
155
-
156
-
157
-
158
-
159
-
160
-
161
-
162
-
163
-
164
-
165
-
166
-
167
-
168
-
169
-
170
-
171
-
172
-
173
-
174
-
175
-
176
-
177
-
178
-
179
-
180
-
181
-
182
-
183
-
184
-
185
-
186
-
187
-
188
-
189
-
190
-
191
-
192
-
193
-
194
-
195
-
196
-
197
-
198
-
199
-
200
-
201
-
202
-
203
-
204
-
205
-
206
-
207
-
208
-
209
-
210
-
211
-
212
-
213
-
214
-
215
-
216
-
217
-
218
-
219
-
220
-
221
-
222
-
223
-
224
-
225
-
226
-
227
-
228
 |
 |