Canon Speedlite Transmitter ST-E3-RT Instruction Manual - Page 46
Set to linked shooting mode., Set the channel and ID., Set the camera's shooting, functions., Set - speedlite
 |
View all Canon Speedlite Transmitter ST-E3-RT manuals
Add to My Manuals
Save this manual to your list of manuals |
Page 46 highlights
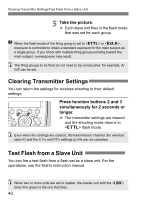
Linked Shooting 1 Set to linked shooting mode. Press the button continuously until is displayed on the LCD panel. X Linked shooting mode's "Slave unit" is set. Press the button again to set "Master unit" of the linked shooting mode. 2 Set the channel and ID. Set the channel by pressing function button 2 , and set the ID by pressing function button 3 . For details on the setting procedure, see pages 20 to 22. 3 Set the camera's shooting functions. 4 Set all the transmitters. Repeat steps 1 to 3 and set all the transmitters to "Master unit" or "Slave unit" in the linked shooting mode. Set the Speedlites used in linked shooting in the same way. When pressing the button to change the setting of a unit from "Slave unit" to "Master unit," the other transmitters (or Speedlites) that were set to "Master unit" until then automatically switch to "Slave unit". 44
-
 1
1 -
2
-
3
-
4
-
5
-
6
-
7
-
8
-
9
-
10
-
11
-
12
-
13
-
14
-
15
-
16
-
17
-
18
-
19
-
20
-
21
-
22
-
23
-
24
-
25
-
26
-
27
-
28
-
29
-
30
-
31
-
32
-
33
-
34
-
35
-
36
-
37
-
38
-
39
-
40
-
 41
41 -
 42
42 -
 43
43 -
 44
44 -
 45
45 -
 46
46 -
 47
47 -
 48
48 -
 49
49 -
 50
50 -
 51
51 -
52
-
53
-
54
-
55
-
56
-
57
-
58
-
59
-
60
-
61
-
62
-
63
-
64
-
65
-
66
-
67
-
68
-
69
-
70
-
71
-
72
-
73
-
74
-
75
-
76
-
77
-
78
-
79
-
80
-
81
-
82
-
83
-
84
-
85
-
86
-
87
-
88
-
89
-
90
-
91
-
92
-
93
-
94
-
95
-
96
-
97
-
98
-
99
-
100
-
101
-
102
-
103
-
104
-
105
-
106
-
107
-
108
-
109
-
110
-
111
-
112
-
113
-
114
-
115
-
116
-
117
-
118
-
119
-
120
-
121
-
122
-
123
-
124
-
125
-
126
-
127
-
128
-
129
-
130
-
131
-
132
-
133
-
134
-
135
-
136
-
137
-
138
-
139
-
140
-
141
-
142
-
143
-
144
-
145
-
146
-
147
-
148
-
149
-
150
-
151
-
152
-
153
-
154
-
155
-
156
-
157
-
158
-
159
-
160
-
161
-
162
-
163
-
164
-
165
-
166
-
167
-
168
-
169
-
170
-
171
-
172
-
173
-
174
-
175
-
176
-
177
-
178
-
179
-
180
-
181
-
182
-
183
-
184
-
185
-
186
-
187
-
188
-
189
-
190
-
191
-
192
-
193
-
194
-
195
-
196
-
197
-
198
-
199
-
200
-
201
-
202
-
203
-
204
-
205
-
206
-
207
-
208
-
209
-
210
-
211
-
212
-
213
-
214
-
215
-
216
-
217
-
218
-
219
-
220
 |
 |
