Casio CLASSPad300 User Guide - Page 87
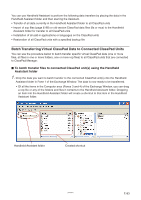
To batch transfer copied virtual ClassPad data to all connected ClassPad units
 |
UPC - 079767161071
View all Casio CLASSPad300 manuals
Add to My Manuals
Save this manual to your list of manuals |
Page 87 highlights
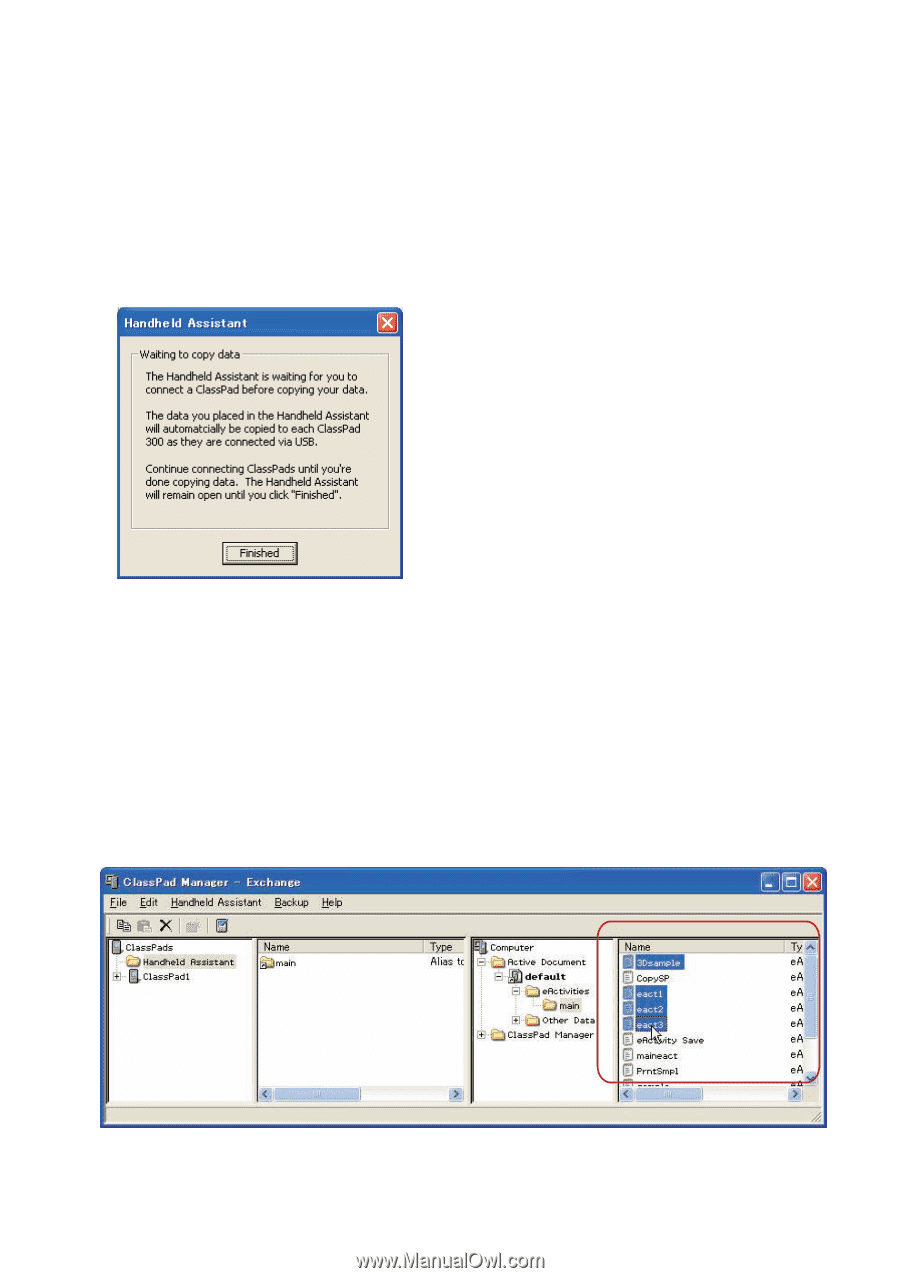
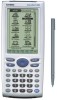
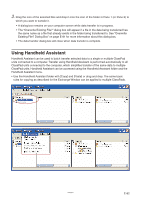
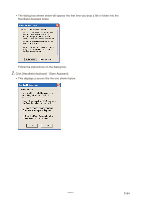
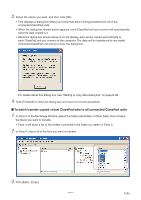
3. Select the option you want, and then click [OK]. • This displays a dialog box letting you know that data is being transferred to all of the connected ClassPad units. • When the dialog box shown below appears, each ClassPad unit you connect will automatically have the data copied to it. • While the dialog box shown below is on the display, data will be copied automatically to each ClassPad unit you connect to the computer. The data will be transferred to any newly connected ClassPad unit until you close the dialog box. For details about this dialog box, see "Waiting to copy data dialog box" on page E-90. 4. Click [Finished] to close the dialog box and return to normal operations. ■ To batch transfer copied virtual ClassPad data to all connected ClassPad units 1. In Pane 3 of the Exchange Window, select the folder (eActivities or Other Data) that contains the file(s) you want to transfer. • Pane 4 will show a list of the folders contained in the folder you select in Pane 3. 2. In Pane 4, select all of the files you want to transfer. 3. Click [Edit] - [Copy]. 20060301 E-85
-
 1
1 -
2
-
3
-
4
-
5
-
6
-
7
-
8
-
9
-
10
-
11
-
12
-
13
-
14
-
15
-
16
-
17
-
18
-
19
-
20
-
21
-
22
-
23
-
24
-
25
-
26
-
27
-
28
-
29
-
30
-
31
-
32
-
33
-
34
-
35
-
36
-
37
-
38
-
39
-
40
-
41
-
42
-
43
-
44
-
45
-
46
-
47
-
48
-
49
-
50
-
51
-
52
-
53
-
54
-
55
-
56
-
57
-
58
-
59
-
60
-
61
-
62
-
63
-
64
-
65
-
66
-
67
-
68
-
69
-
70
-
71
-
72
-
73
-
74
-
75
-
76
-
77
-
78
-
79
-
80
-
81
-
 82
82 -
 83
83 -
 84
84 -
 85
85 -
 86
86 -
 87
87 -
 88
88 -
 89
89 -
 90
90 -
 91
91 -
 92
92 -
93
-
94
-
95
-
96
-
97
-
98
-
99
-
100
-
101
-
102
-
103
-
104
-
105
-
106
-
107
-
108
-
109
-
110
-
111
-
112
-
113
 |
 |