Casio LK94 User Guide - Page 45
Using Split
 |
View all Casio LK94 manuals
Add to My Manuals
Save this manual to your list of manuals |
Page 45 highlights
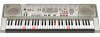
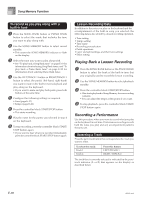
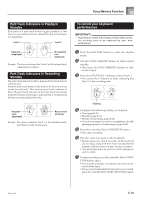
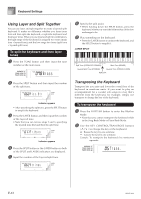
Keyboard Settings Using Split With split you can assign two different tones (a main tone and a split tone) to either end of the keyboard, which lets you play one tone with your left hand and another tone with your right hand. For example, you could select STRINGS as the main (high range) tone and PIZZICATO STRINGS as the split (low range) tone, putting an entire string ensemble at your fingertips. Split also lets you specify the split point, which is the location on the keyboard where the changeover between the two tones occurs. To split the keyboard 1 First select the main tone. Example: To select "062 STRINGS" as the main tone, press the TONE button and then use the number buttons or [+] and [-] buttons to input 0, 6 and then 2. St r ings 2 Press the SPLIT button. Aco .Bass 5 Now try playing something on the keyboard. • Every key from F 3 and below is assigned the PIZZICATO STRINGS tone, while every key from G3 and above is assigned the STRINGS tone. 6 Press the SPLIT button again to unsplit the keyboard and return it to normal. SPLIT Split Tone (PIZZICATO STRINGS) Main Tone (STRINGS) Split point NOTE • The split point is the point that separates the Auto Accompaniment area (pages E-32 and E-33) and the melody area of the keyboard. You can change the location of the split point, which also changes the sizes of the keyboard areas. Indicator appears 3 Select the split tone. Example: To select "060 PIZZICATO STRINGS" as the split tone, use the number buttons or [+] and [-] buttons to input 0, 6 and then 0. Pi zz .St r 4 Specify the split point. While holding down the SPLIT button, press the keyboard where you want the leftmost key of the high end range to be. Example: To specify G3 as the split point, press the G3 key. G3 655A-E-045A E-43
-
 1
1 -
2
-
3
-
4
-
5
-
6
-
7
-
8
-
9
-
10
-
11
-
12
-
13
-
14
-
15
-
16
-
17
-
18
-
19
-
20
-
21
-
22
-
23
-
24
-
25
-
26
-
27
-
28
-
29
-
30
-
31
-
32
-
33
-
34
-
35
-
36
-
37
-
38
-
39
-
 40
40 -
 41
41 -
 42
42 -
 43
43 -
 44
44 -
 45
45 -
 46
46 -
 47
47 -
 48
48 -
 49
49 -
 50
50 -
51
-
52
-
53
-
54
-
55
-
56
-
57
-
58
-
59
-
60
-
61
-
62
-
63
-
64
-
65
-
66
-
67
-
68
-
69
 |
 |