Compaq 12XL300 Models XL300, XL300A, and XL300B - Maintenance & Service Gu
Compaq 12XL300 - Presario - Celeron 600 MHz Manual
 |
UPC - 720591463632
View all Compaq 12XL300 manuals
Add to My Manuals
Save this manual to your list of manuals |
Compaq 12XL300 manual content summary:
- Compaq 12XL300 | Models XL300, XL300A, and XL300B - Maintenance & Service Gu - Page 1
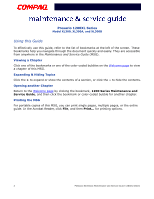
Product Description Battery Operations Parts Catalog Specifications Troubleshooting MSG Index Welcome to the Maintenance & Service Guide (MSG) Welcome to the Maintenance and Service Guide (MSG) for Compaq Presario 1200XL Series Portable Notebooks. This online guide is designed to serve the needs - Compaq 12XL300 | Models XL300, XL300A, and XL300B - Maintenance & Service Gu - Page 2
the screen. These bookmarks help you navigate through the document quickly and easily. They are accessible from anywhere in the Maintenance and Service Guide ( guide. In the Acrobat Reader, click File, and then Print... for printing options. 2 PRESARIO NOTEBOOK MAINTENANCE AND SERVICE GUIDE 1200XL - Compaq 12XL300 | Models XL300, XL300A, and XL300B - Maintenance & Service Gu - Page 3
herein may be trademarks and/or registered trademarks of their respective companies. Maintenance and Service Guide Compaq Presario 1200 Series Notebook Computer First Edition (July 2000) Compaq Computer Corporation PRESARIO NOTEBOOK MAINTENANCE AND SERVICE GUIDE 1200XL SERIES BEFORE YOU BEGIN 1 - Compaq 12XL300 | Models XL300, XL300A, and XL300B - Maintenance & Service Gu - Page 4
This Maintenance and Service Guide is a troubleshooting guide that is used as a reference guide when servicing the Compaq Presario 1200 Series Notebook Computers. Compaq Computer Corporation reserves the right to make changes to the Compaq Presario 1200 Series Notebooks without notice. Symbols - Compaq 12XL300 | Models XL300, XL300A, and XL300B - Maintenance & Service Gu - Page 5
support this product: • Compaq Presario 1200XL Series Notebook Computer documentation set • Introducing Windows 98 Guide • Introducing Windows 2000 Guide • Service Training Guides • Compaq Service Advisories and Bulletins • Compaq QuickFind • Compaq Service Quick Reference Guide PRESARIO NOTEBOOK - Compaq 12XL300 | Models XL300, XL300A, and XL300B - Maintenance & Service Gu - Page 6
Models and Features Compaq Presario 1200 Series Portable Notebook Computer Models Feature XL300 XL300A XL300B Display Processor Hard Drive 12.1 in HPA EMEA/APD 3) 56K Mini PCI d/f 3 = Seminole 2 = All AUS/NZ PRESARIO NOTEBOOK MAINTENANCE AND SERVICE GUIDE 1200XL SERIES PRODUCT DESCRIPTION 1 - Compaq 12XL300 | Models XL300, XL300A, and XL300B - Maintenance & Service Gu - Page 7
XL300B Description 1 Display Release Latch 6 Right TouchPad Button 2 Display 7 Scroll Button 3 Model Number 8 Left TouchPad Button 4 Power (On/Off) Button 9 TouchPad 5 Speakers - Keyboard 2 PRODUCT DESCRIPTION PRESARIO NOTEBOOK MAINTENANCE AND SERVICE GUIDE 1200XL SERIES - Compaq 12XL300 | Models XL300, XL300A, and XL300B - Maintenance & Service Gu - Page 8
Internet Zone Buttons and Lights Description 1 Num Lock Light 4 Instant E-mail Access Button 2 Caps Lock Light 5 Retail Central Button 3 Instant Internet Access Button 6 Power Button PRESARIO NOTEBOOK MAINTENANCE AND SERVICE GUIDE 1200XL SERIES PRODUCT DESCRIPTION 3 - Compaq 12XL300 | Models XL300, XL300A, and XL300B - Maintenance & Service Gu - Page 9
Presario 1200XL Series Models: XL300, XL300A, and XL300B Front Bezel Components Description 1 Power (On/Off) Light 4 Volume Down Button 2 Battery Charge Light 5 Volume Up Button 3 AC Power Light 4 PRODUCT DESCRIPTION PRESARIO NOTEBOOK MAINTENANCE AND SERVICE GUIDE 1200XL SERIES - Compaq 12XL300 | Models XL300, XL300A, and XL300B - Maintenance & Service Gu - Page 10
Presario 1200XL Series Models: XL300, XL300A, and XL300B Right-Side Components Description 1 Battery Compartment 2 PC Card Eject Button 3 PC Card Slot 4 Microphone Jack 5 Headphone Jack PRESARIO NOTEBOOK MAINTENANCE AND SERVICE GUIDE 1200XL SERIES PRODUCT DESCRIPTION 5 - Compaq 12XL300 | Models XL300, XL300A, and XL300B - Maintenance & Service Gu - Page 11
Series Models: XL300, XL300A, and XL300B Left-Side Components Description 1 Security Slot 4 CD or DVD Manual Eject Hole 2 CD or DVD Player 5 Diskette Drive 3 CD/DVD Eject Button 6 Diskette Drive Eject Button 6 PRODUCT DESCRIPTION PRESARIO NOTEBOOK MAINTENANCE AND SERVICE GUIDE 1200XL SERIES - Compaq 12XL300 | Models XL300, XL300A, and XL300B - Maintenance & Service Gu - Page 12
Presario 1200XL Series Models: XL300, XL300A, and XL300B Underneath the Unit Description 1 Stand Feet 4 Speaker Ports 2 Serial and Model Number 5 Modem Compartment Location 3 Memory Compartment PRESARIO NOTEBOOK MAINTENANCE AND SERVICE GUIDE 1200XL SERIES PRODUCT DESCRIPTION 7 - Compaq 12XL300 | Models XL300, XL300A, and XL300B - Maintenance & Service Gu - Page 13
Presario 1200XL Series Models: XL300, XL300A, and XL300B Rear Connectors Description 1 Modem 5 Fan Vent 2 AC Power 6 VGA External Monitor 3 Keyboard/Mouse Port 7 USB Ports 4 Printer/Parallel Port 8 PRODUCT DESCRIPTION PRESARIO NOTEBOOK MAINTENANCE AND SERVICE GUIDE 1200XL SERIES - Compaq 12XL300 | Models XL300, XL300A, and XL300B - Maintenance & Service Gu - Page 14
AHr W @ 14.8 V W @ 14.8 V W @ 14.8 V AC Power Requirements Operating Voltage Operating Current Operating Frequency Maximum Transient Temperature Operating Non-operating -operating (tw = 38.7°C max) 10 to 90% 5 to 95% PRESARIO NOTEBOOK MAINTENANCE AND SERVICE GUIDE 1200XL SERIES SPECIFICATIONS 1 - Compaq 12XL300 | Models XL300, XL300A, and XL300B - Maintenance & Service Gu - Page 15
Controller Compaq PCI Modem Enumerator Texas Instruments PCI-1410 CardBus Controller Trident CyberBlade i1 AGP (51) VIA AC'97 Audio Controller Synaptics PS/2 TouchPad Numeric Data Processor VIA Bus Master PCI IDE Controller 2 SPECIFICATIONS PRESARIO NOTEBOOK MAINTENANCE AND SERVICE GUIDE 1200XL - Compaq 12XL300 | Models XL300, XL300A, and XL300B - Maintenance & Service Gu - Page 16
Resources Direct Memory Access Controller Motherboard Resources Programmable Interrupt Controller Motherboard Resources Direct Memory Access Controller Numeric Data Processor Secondary IDE Controller (Dual FIFO) PRESARIO NOTEBOOK MAINTENANCE AND SERVICE GUIDE 1200XL SERIES SPECIFICATIONS 3 - Compaq 12XL300 | Models XL300, XL300A, and XL300B - Maintenance & Service Gu - Page 17
Controller Motherboard Resources PCI Bus VIA AC'97 Audio Controller (WDM) VIA AC'97 Audio Controller (WDM) VIA AC'97 Audio Controller (WDM) Compaq PCI Modem Enumerator Motherboard Resources Motherboard Resources Motherboard Resources 4 SPECIFICATIONS PRESARIO NOTEBOOK MAINTENANCE AND SERVICE GUIDE - Compaq 12XL300 | Models XL300, XL300A, and XL300B - Maintenance & Service Gu - Page 18
i1 AGP (77) VIA Tech 8601 CPU to AGP Controller Trident CyberBlade i1 AGP (77) Trident CyberBlade i1 AGP (77) Trident CyberBlade i1 AGP (77) VIA Tech VT8601 CPU to PCI Bridge System Board Extension for ACPI BIOS PRESARIO NOTEBOOK MAINTENANCE AND SERVICE GUIDE 1200XL SERIES SPECIFICATIONS 5 - Compaq 12XL300 | Models XL300, XL300A, and XL300B - Maintenance & Service Gu - Page 19
Presario 1200XL Series Model XL300, XL300A, and XL300B Display Information Dimensions Height Width Display Dimensions nits 1.2 to 1.5 W typ (Assuming backlight current of 5.0 mA, or 100 nits luminance) 50 ms 60 Hz 6 SPECIFICATIONS PRESARIO NOTEBOOK MAINTENANCE AND SERVICE GUIDE 1200XL SERIES - Compaq 12XL300 | Models XL300, XL300A, and XL300B - Maintenance & Service Gu - Page 20
Presario 1200XL Series Model XL300, XL300A, and XL300B Display Information (continued) Dimensions Height Width nits 1.2 to 1.5 W typ (Assuming backlight current of 5.0 mA, or 100 nits luminance) 50 ms 150 Hz PRESARIO NOTEBOOK MAINTENANCE AND SERVICE GUIDE 1200XL SERIES SPECIFICATIONS 7 - Compaq 12XL300 | Models XL300, XL300A, and XL300B - Maintenance & Service Gu - Page 21
64 MB 64 MB Memory Expansion Expansion Board Memory Total Memory none 32 MB 32 MB 64 MB 128 MB 64 MB 96 MB 160 MB 256 MB 288 MB none 64 MB 32 MB 96 MB 64 MB 128 MB 128 MB 193 MB 256 MB 320 MB 8 SPECIFICATIONS PRESARIO NOTEBOOK MAINTENANCE AND SERVICE GUIDE 1200XL SERIES - Compaq 12XL300 | Models XL300, XL300A, and XL300B - Maintenance & Service Gu - Page 22
Times Track-to-Track (ms) 3 Average (ms) 94 Setting Time (ms) 15 Latency Average (ms) 100 Cylinders (High/Low) 80 Number of Read/Write Heads 2 PRESARIO NOTEBOOK MAINTENANCE AND SERVICE GUIDE 1200XL SERIES SPECIFICATIONS 9 - Compaq 12XL300 | Models XL300, XL300A, and XL300B - Maintenance & Service Gu - Page 23
Presario 1200XL Series Model XL300, XL300A, and XL300B Hard Drive Hard Drives Drive Type 6.0GB Capacity Per Drive 6.0 GB Logical Configuration Cylinders Heads Sectors per Track 6 190/330 512 4 14 24 33.3 MB/s 10 SPECIFICATIONS PRESARIO NOTEBOOK MAINTENANCE AND SERVICE GUIDE 1200XL SERIES - Compaq 12XL300 | Models XL300, XL300A, and XL300B - Maintenance & Service Gu - Page 24
0.90 lbs (408.2 g) 2 hr 30 min 14.4 V 3000 mAH 43.2 WH Temperature Requirements Operating Non-Operating Charging 32°F (0 to 50°C) -20°C to 60°C 5°C to 45°C PRESARIO NOTEBOOK MAINTENANCE AND SERVICE GUIDE 1200XL SERIES SPECIFICATIONS 11 - Compaq 12XL300 | Models XL300, XL300A, and XL300B - Maintenance & Service Gu - Page 25
This appendix provides connector pin assignment tables for Compaq Presario 1200XL Series Portable Notebook. For more information about connectors, refer to the * 9 Data Bit 7 18-25 Signal Ground * = Active low PPRESARIO NOTEBOOK MAINTENANCE AND SERVICE GUIDE 1200XL SERIES PIN ASSIGNMENTS 1 - Compaq 12XL300 | Models XL300, XL300A, and XL300B - Maintenance & Service Gu - Page 26
Presario 1200XL Series Model XL300, XL300A, and XL300B Universal Serial Bus (USB) Connectors Pin Assignments Pin Signal 1 +5 V Ground Analog 14 Vertical Sync 7 Ground Analog 15 DDC2B Clock 8 Ground Analog 2 PIN ASSIGNMENTS PRESARIO NOTEBOOK MAINTENANCE AND SERVICE GUIDE 1200XL SERIES - Compaq 12XL300 | Models XL300, XL300A, and XL300B - Maintenance & Service Gu - Page 27
, and XL300B Pin Assignments Pin Signal 1 Unused 2 Tip 3 Ring 4 Unused Keyboard/Mouse Connector Pin Assignments Pin Signal Pin Signal 1 Data 1 4 +5 V 2 Data 2 5 Clock 1 3 Ground 6 Clock 2 PPRESARIO NOTEBOOK MAINTENANCE AND SERVICE GUIDE 1200XL SERIES PIN ASSIGNMENTS 3 - Compaq 12XL300 | Models XL300, XL300A, and XL300B - Maintenance & Service Gu - Page 28
brightness • Hard drive usage • Changes in operating temperature • Type and number of installed PC cards Note: The power consumption requirements for PC cards vary of battery life depends on the values selected. PRESARIO NOTEBOOK MAINTENANCE AND SERVICE GUIDE 1200XL SERIES BATTERY OPERATIONS 1 - Compaq 12XL300 | Models XL300, XL300A, and XL300B - Maintenance & Service Gu - Page 29
in the AC adapter and begin using the Notebook. The table below shows battery pack charge times by model. Computer Li-Ion Battery Pack NiMH Battery Pack Battery Charge Time On Line 4.5 hours premature termination TBD Off Line 2:50 hours TBD 2 BATTERY OPERATIONS PRESARIO NOTEBOOK MAINTENANCE AND - Compaq 12XL300 | Models XL300, XL300A, and XL300B - Maintenance & Service Gu - Page 30
, or local regulations. ÄCAUTION: Never attempt to open or service a battery pack. Opening a battery pack not only damages the pack and makes it unusable, but also exposes potentially harmful battery components. PRESARIO NOTEBOOK MAINTENANCE AND SERVICE GUIDE 1200XL SERIES BATTERY OPERATIONS 3 - Compaq 12XL300 | Models XL300, XL300A, and XL300B - Maintenance & Service Gu - Page 31
the hard drive goes into low power mode Important: The setting for the Hard Disk must be less than or equal to the setting for the system. If the Notebook is on a network, Compaq recommends that System Standby be set to Never. 4 BATTERY OPERATIONS PRESARIO NOTEBOOK MAINTENANCE AND SERVICE GUIDE - Compaq 12XL300 | Models XL300, XL300A, and XL300B - Maintenance & Service Gu - Page 32
their default values. Alarm Low Battery Default 10% Critical Battery 0% Alarms Alarm Action Notification: Text Power Mode: No Action Notification: No Action Power Mode: Hibernation PRESARIO NOTEBOOK MAINTENANCE AND SERVICE GUIDE 1200XL SERIES BATTERY OPERATIONS 5 - Compaq 12XL300 | Models XL300, XL300A, and XL300B - Maintenance & Service Gu - Page 33
the Advanced screen. • Click Start>Settings>Control Panel>Power Options>Intel(R) SpeedStep(TM) technology tab. • Double-click the Flag icon on the Windows taskbar to open the Intel(R) SpeedStep(TM) technology dialog box. 6 BATTERY OPERATIONS PRESARIO NOTEBOOK MAINTENANCE AND SERVICE GUIDE 1200XL - Compaq 12XL300 | Models XL300, XL300A, and XL300B - Maintenance & Service Gu - Page 34
. ÄCAUTION: The Notebook maintains system information and open files while in Standby mode. However, unsaved information is lost if the Notebook is turned off prior to system wake-up, or if a power loss occurs while using the AC adapter. PRESARIO NOTEBOOK MAINTENANCE AND SERVICE GUIDE 1200XL SERIES - Compaq 12XL300 | Models XL300, XL300A, and XL300B - Maintenance & Service Gu - Page 35
. Notebook will not automatically enter Hibernation mode if using AC Power. Deactivation Press Power button once. Press Power button once. Indicators Power light is off, screen is blank Power light is off, screen is blank 8 BATTERY OPERATIONS PRESARIO NOTEBOOK MAINTENANCE AND SERVICE GUIDE - Compaq 12XL300 | Models XL300, XL300A, and XL300B - Maintenance & Service Gu - Page 36
of installed PC Cards For more information on increasing battery-pack operating time, conditioning the battery pack, and disposing of a used battery pack, refer to the Battery Pack Operations section in this Maintenance and Service Guide. PRESARIO NOTEBOOK MAINTENANCE AND SERVICE GUIDE 1200XL - Compaq 12XL300 | Models XL300, XL300A, and XL300B - Maintenance & Service Gu - Page 37
disconnects while the Notebook is turned on, turn it off until normal service is restored. The next time the Notebook is turned on, ScanDisk may run to check the hard disk for errors caused by improper shutdown. 10 BATTERY OPERATIONS PRESARIO NOTEBOOK MAINTENANCE AND SERVICE GUIDE 1200XL SERIES - Compaq 12XL300 | Models XL300, XL300A, and XL300B - Maintenance & Service Gu - Page 38
and without the external device connected. 5. Install loopback plugs in the serial and parallel connectors if you want to test these ports. 6. Ensure that the hard drive is installed in the Notebook. PRESARIO NOTEBOOK MAINTENANCE AND SERVICE GUIDE 1200XL SERIES TROUBLESHOOTING 1 - Compaq 12XL300 | Models XL300, XL300A, and XL300B - Maintenance & Service Gu - Page 39
AC power source. When these preliminary steps are completed, you are ready to run POST. Clearing the Power-On Password Note: Clearing the Power-on password also removes all Notebook button bezel. Continued on next page. 2 TROUBLESHOOTING PRESARIO NOTEBOOK MAINTENANCE AND SERVICE GUIDE 1200XL SERIES - Compaq 12XL300 | Models XL300, XL300A, and XL300B - Maintenance & Service Gu - Page 40
piece of material such as a piece of wire or tool. 7. Reassemble the Notebook. 8. Turn on the Notebook to verify that the Power-on password has been cleared. If it has not been cleared, repeat Steps 1 through 8. PRESARIO NOTEBOOK MAINTENANCE AND SERVICE GUIDE 1200XL SERIES TROUBLESHOOTING 3 - Compaq 12XL300 | Models XL300, XL300A, and XL300B - Maintenance & Service Gu - Page 41
. Run Computer Setup. 1. Replace the memory modules. 2. Replace the system board. Memory test data error. 1. Replace the memory modules. 2. Replace the system board. XX000YZZ RAM failure. Replace the system board. 4 TROUBLESHOOTING PRESARIO NOTEBOOK MAINTENANCE AND SERVICE GUIDE 1200XL SERIES - Compaq 12XL300 | Models XL300, XL300A, and XL300B - Maintenance & Service Gu - Page 42
diskette controller. 1. Run Computer Checkup (TEST). 2. Check or replace cables. 3. Replace the system board. 605-Diskette Drive Error Probable Cause Recommended Action Mismatch in drive type. Run Computer Setup. PRESARIO NOTEBOOK MAINTENANCE AND SERVICE GUIDE 1200XL SERIES TROUBLESHOOTING 5 - Compaq 12XL300 | Models XL300, XL300A, and XL300B - Maintenance & Service Gu - Page 43
• Troubleshooting without Diagnostics • Before Replacing Parts • Solving Minor Problems • Solving Hard Drive Problems • Solving Hardware Installation Problems • Solving Keyboard/Numeric Keypad Problems • Solving Memory Problems 6 TROUBLESHOOTING PRESARIO NOTEBOOK MAINTENANCE AND SERVICE GUIDE - Compaq 12XL300 | Models XL300, XL300A, and XL300B - Maintenance & Service Gu - Page 44
View System Information (INSPECT) utility and select to print or save that information. Have the files or the printed information available when you call for support. PRESARIO NOTEBOOK MAINTENANCE AND SERVICE GUIDE 1200XL SERIES TROUBLESHOOTING 7 - Compaq 12XL300 | Models XL300, XL300A, and XL300B - Maintenance & Service Gu - Page 45
to print or save a log of errors. 9. Follow the instructions on the screen as the devices are tested. When testing is complete, the Test Option menu is displayed. 10. Exit the Test Option menu and the Diagnostics menu. 8 TROUBLESHOOTING PRESARIO NOTEBOOK MAINTENANCE AND SERVICE GUIDE 1200XL SERIES - Compaq 12XL300 | Models XL300, XL300A, and XL300B - Maintenance & Service Gu - Page 46
storage Graphics Memory Audio Operating system System files Windows files 7. Follow the on-screen instructions to cycle through the screens, return to the list and choose another item, or print the information. PRESARIO NOTEBOOK MAINTENANCE AND SERVICE GUIDE 1200XL SERIES TROUBLESHOOTING 9 - Compaq 12XL300 | Models XL300, XL300A, and XL300B - Maintenance & Service Gu - Page 47
18) Processor Test Memory Test Keyboard Test Parallel Printer Test Video Test Diskette Drive Test Serial Test Hard Drive Test Video Test Video Test Video Test Audio Test DVD or CD Test TouchPad Pointing Device Test 10 TROUBLESHOOTING PRESARIO NOTEBOOK MAINTENANCE AND SERVICE GUIDE 1200XL SERIES - Compaq 12XL300 | Models XL300, XL300A, and XL300B - Maintenance & Service Gu - Page 48
Presario 1200XL Series Model XL300, XL300A, and XL300B Processor Test Error Codes Error Code Description Recommended Action 101-xx 102-xx CPU the memory module and retest. 2. Install a new memory module and retest. PRESARIO NOTEBOOK MAINTENANCE AND SERVICE GUIDE 1200XL SERIES TROUBLESHOOTING - Compaq 12XL300 | Models XL300, XL300A, and XL300B - Maintenance & Service Gu - Page 49
Presario 1200XL Series Model XL300, XL300A, and XL300B Memory Test Error Codes Error Code Description Recommended Action 211-xx Random . 4. Check port and IRQ configuration. 5. Replace the system board and retest. 12 TROUBLESHOOTING PRESARIO NOTEBOOK MAINTENANCE AND SERVICE GUIDE 1200XL SERIES - Compaq 12XL300 | Models XL300, XL300A, and XL300B - Maintenance & Service Gu - Page 50
failed. Diskette change line test. Diskette type error. Diskette drive speed not within limits. Diskette drive/media ID error. 1. Replace media. 2. Run the configuration. 2. Replace the system board and retest. PRESARIO NOTEBOOK MAINTENANCE AND SERVICE GUIDE 1200XL SERIES TROUBLESHOOTING 13 - Compaq 12XL300 | Models XL300, XL300A, and XL300B - Maintenance & Service Gu - Page 51
test failed. Hard drive conditional format test failed. Hard drive ECC* test failed. Hard drive power mode test failed. Network preparation test failed. Drive monitoring test failed. *ECC = Error Correction Code 14 TROUBLESHOOTING PRESARIO NOTEBOOK MAINTENANCE AND SERVICE GUIDE 1200XL SERIES - Compaq 12XL300 | Models XL300, XL300A, and XL300B - Maintenance & Service Gu - Page 52
Video 320 x 200 mode color set 1 test failed. Video 640 x 200 mode test failed. Video screen memory page test failed. Video gray scale test failed. Video white screen test failed. Video noise pattern test failed. PRESARIO NOTEBOOK MAINTENANCE AND SERVICE GUIDE 1200XL SERIES TROUBLESHOOTING 15 - Compaq 12XL300 | Models XL300, XL300A, and XL300B - Maintenance & Service Gu - Page 53
1 test failed Video 640 x 200 mode test failed. Video screen memory page test failed. Video gray scale test failed. Video white screen test failed. Video noise pattern test failed. ECG/VGC memory test failed. 16 TROUBLESHOOTING PRESARIO NOTEBOOK MAINTENANCE AND SERVICE GUIDE 1200XL SERIES - Compaq 12XL300 | Models XL300, XL300A, and XL300B - Maintenance & Service Gu - Page 54
Presario 1200XL Series Model XL300, XL300A, and XL300B Error Code 2419-xx 2421-xx 2422-xx 2423-xx failed. Replace the system board and retest. Advanced VGA BitBLT test failed. Advanced VGA LineDraw test failed. PRESARIO NOTEBOOK MAINTENANCE AND SERVICE GUIDE 1200XL SERIES TROUBLESHOOTING 17 - Compaq 12XL300 | Models XL300, XL300A, and XL300B - Maintenance & Service Gu - Page 55
. 3. Verify that drivers are loaded and Read test failed. properly installed. Controller test failed. Random read test failed. 4. Replace the CD or DVD drive and retest. 5. Replace the system board and retest. 18 TROUBLESHOOTING PRESARIO NOTEBOOK MAINTENANCE AND SERVICE GUIDE 1200XL SERIES - Compaq 12XL300 | Models XL300, XL300A, and XL300B - Maintenance & Service Gu - Page 56
hardware, memory, and software problems. It also explains several types of common messages that may be displayed on the screen. The following pages contain troubleshooting information about: Audio Battery CD or DVD Drive Diskette Drive Display Hard Drive Hardware Installation Memory PC Card Power - Compaq 12XL300 | Models XL300, XL300A, and XL300B - Maintenance & Service Gu - Page 57
power cord is unplugged. Solving Battery Pack/Gauge Problems Probable Cause Solution(s) Battery pack is discharged. • Connect the Notebook to an external power source and charge the battery and not bent or broken. 20 TROUBLESHOOTING PRESARIO NOTEBOOK MAINTENANCE AND SERVICE GUIDE 1200XL SERIES - Compaq 12XL300 | Models XL300, XL300A, and XL300B - Maintenance & Service Gu - Page 58
Problems Problem Notebook is beeping and battery icon is blinking. Probable Cause Battery charge is low. Solution(s) Immediately save any open file(s). Then complete one of the following steps: • Connect the Notebook PRESARIO NOTEBOOK MAINTENANCE AND SERVICE GUIDE 1200XL SERIES TROUBLESHOOTING 21 - Compaq 12XL300 | Models XL300, XL300A, and XL300B - Maintenance & Service Gu - Page 59
Presario 1200XL Series Model XL300, XL300A, and XL300B Solving Battery Pack/Gauge Problems Problem Probable Cause Solution(s) Battery PC card Turn off or disconnect external is draining the battery. devices when not in use. 22 TROUBLESHOOTING PRESARIO NOTEBOOK MAINTENANCE AND SERVICE GUIDE - Compaq 12XL300 | Models XL300, XL300A, and XL300B - Maintenance & Service Gu - Page 60
temperature range for operation or storage. • Operating Range: 50°F to 104°F (10°C to 40°C) • Storage Range: -4°F to 86°F (-20°C to 30°C) Recharge the battery pack. PRESARIO NOTEBOOK MAINTENANCE AND SERVICE GUIDE 1200XL SERIES TROUBLESHOOTING 23 - Compaq 12XL300 | Models XL300, XL300A, and XL300B - Maintenance & Service Gu - Page 61
. At the system prompt, enter: FORMAT A: Disk drive cannot read a disk. Use the type of diskette required by the drive. Disk has a bad sector. Copy files to hard drive or another diskette. Reformat bad diskette. 24 TROUBLESHOOTING PRESARIO NOTEBOOK MAINTENANCE AND SERVICE GUIDE 1200XL SERIES - Compaq 12XL300 | Models XL300, XL300A, and XL300B - Maintenance & Service Gu - Page 62
black border may also appear on the left and right sides of the display. Both of these displays indicate that the monitor is working properly. PRESARIO NOTEBOOK MAINTENANCE AND SERVICE GUIDE 1200XL SERIES TROUBLESHOOTING 25 - Compaq 12XL300 | Models XL300, XL300A, and XL300B - Maintenance & Service Gu - Page 63
the display assembly. Defective display cable. Replace the display assembly. Defective display panel. Replace the display assembly. Defective system board. Replace the system board. 26 TROUBLESHOOTING PRESARIO NOTEBOOK MAINTENANCE AND SERVICE GUIDE 1200XL SERIES - Compaq 12XL300 | Models XL300, XL300A, and XL300B - Maintenance & Service Gu - Page 64
the display cable to the following until the problem is solved: 1. System board 2. Display assembly Defective display cable. Replace the display assembly. Defective inverter board. Replace the display assembly. PRESARIO NOTEBOOK MAINTENANCE AND SERVICE GUIDE 1200XL SERIES TROUBLESHOOTING 27 - Compaq 12XL300 | Models XL300, XL300A, and XL300B - Maintenance & Service Gu - Page 65
VGA color or monochrome monitor, the screen should be white. A narrow black border may also appear on the left and right sides of the display. Both of these displays indicate that the monitor is working properly. 28 TROUBLESHOOTING PRESARIO NOTEBOOK MAINTENANCE AND SERVICE GUIDE 1200XL SERIES - Compaq 12XL300 | Models XL300, XL300A, and XL300B - Maintenance & Service Gu - Page 66
on. Turn off the Notebook, turn on the external device, then turn on the Notebook to integrate the device with the computer system. Device is not seated properly. Turn off the Notebook and reinsert the device. PRESARIO NOTEBOOK MAINTENANCE AND SERVICE GUIDE 1200XL SERIES TROUBLESHOOTING 29 - Compaq 12XL300 | Models XL300, XL300A, and XL300B - Maintenance & Service Gu - Page 67
documentation for memory requirements. If necessary, install additional memory. Too many TSR (terminateand-stay-resident) applications are running. Remove from memory any TSR applications that you do not need. 30 TROUBLESHOOTING PRESARIO NOTEBOOK MAINTENANCE AND SERVICE GUIDE 1200XL SERIES - Compaq 12XL300 | Models XL300, XL300A, and XL300B - Maintenance & Service Gu - Page 68
of PC cards tested sucessfully in Compaq PC card platforms. Ensure that the card is inserted in the correct orientation. Check and secure telephone connection. Install drivers. See Specifications to verify COM port. PRESARIO NOTEBOOK MAINTENANCE AND SERVICE GUIDE 1200XL SERIES TROUBLESHOOTING 31 - Compaq 12XL300 | Models XL300, XL300A, and XL300B - Maintenance & Service Gu - Page 69
-click My Computer to verify the drive letter assigned to the card. The card is not supported. Contact a Compaq-authorized service provider for a list of PC cards tested successfully in Compaq PC card platforms. 32 TROUBLESHOOTING PRESARIO NOTEBOOK MAINTENANCE AND SERVICE GUIDE 1200XL SERIES - Compaq 12XL300 | Models XL300, XL300A, and XL300B - Maintenance & Service Gu - Page 70
. System initiated Hibernation after a preset timeout. Replace the battery pack with a fully charged battery pack, or connect the Notebook to an external power source. Then turn on the Notebook. Turn on the Notebook. PRESARIO NOTEBOOK MAINTENANCE AND SERVICE GUIDE 1200XL SERIES TROUBLESHOOTING 33 - Compaq 12XL300 | Models XL300, XL300A, and XL300B - Maintenance & Service Gu - Page 71
set the printer to On Line. Refer to the printer documentation to install the correct printer driver. Ensure that the printer signal cable is properly connected to the Notebook. Replace the printer cable and retest. 34 TROUBLESHOOTING PRESARIO NOTEBOOK MAINTENANCE AND SERVICE GUIDE 1200XL SERIES - Compaq 12XL300 | Models XL300, XL300A, and XL300B - Maintenance & Service Gu - Page 72
the TouchPad board. Replace system board. Install the appropriate device driver in Windows. Clean the TouchPad with a cloth dampened with alcohol or an ammonia-based glass cleaner. Wipe up liquid with a dry cloth. PRESARIO NOTEBOOK MAINTENANCE AND SERVICE GUIDE 1200XL SERIES TROUBLESHOOTING 35 - Compaq 12XL300 | Models XL300, XL300A, and XL300B - Maintenance & Service Gu - Page 73
there are no PC cards in the PC slots. 4. Close the display and all exterior doors of the Notebook. 5. Pack the Notebook in sufficient packing material to protect it. Use the original packing box or similar packaging. 36 TROUBLESHOOTING PRESARIO NOTEBOOK MAINTENANCE AND SERVICE GUIDE 1200XL SERIES - Compaq 12XL300 | Models XL300, XL300A, and XL300B - Maintenance & Service Gu - Page 74
V 7,000 V Packing PCBs in foam-lined box 21,000 V 11,000 V 5,000 V Ä CAUTION: As little as 700 Volts can degrade Notebook components. Be sure to ground yourself before touching the Notebook or its subassemblies. PRESARIO NOTEBOOK MAINTENANCE AND SERVICE GUIDE 1200XL SERIES REMOVAL SEQUENCE 1 - Compaq 12XL300 | Models XL300, XL300A, and XL300B - Maintenance & Service Gu - Page 75
excessive force during disassembly and reassembly. When handling plastic parts, use care. Apply pressure only at the points designated in the instructions. Most of the connectors in these Notebooks are ZIF Connectors. 2 REMOVAL SEQUENCE PRESARIO NOTEBOOK MAINTENANCE AND SERVICE GUIDE 1200XL SERIES - Compaq 12XL300 | Models XL300, XL300A, and XL300B - Maintenance & Service Gu - Page 76
with constant light pressure. ÄCAUTION: When servicing this Notebook, ensure that cables are placed in their proper location during the reassembly process. Improper cable placement can damage the Notebook. PRESARIO NOTEBOOK MAINTENANCE AND SERVICE GUIDE 1200XL SERIES REMOVAL SEQUENCE 3 - Compaq 12XL300 | Models XL300, XL300A, and XL300B - Maintenance & Service Gu - Page 77
can cause severe damage to the unit. The following illustrations show the proper placement for each cable: • Diskette Drive Ribbon Cable • Speaker Assembly Cable • Keyboard Ribbon Cable • Hard Drive Ribbon Cable 4 REMOVAL SEQUENCE PRESARIO NOTEBOOK MAINTENANCE AND SERVICE GUIDE 1200XL SERIES - Compaq 12XL300 | Models XL300, XL300A, and XL300B - Maintenance & Service Gu - Page 78
position for the diskette drive is shown below. ÄCAUTION: When servicing this Notebook, ensure that cables are placed in their proper location during the reassembly process. Improper cable placement can damage the Notebook. PRESARIO NOTEBOOK MAINTENANCE AND SERVICE GUIDE 1200XL SERIES REMOVAL - Compaq 12XL300 | Models XL300, XL300A, and XL300B - Maintenance & Service Gu - Page 79
and under the edge of the system board. ÄCAUTION: When servicing this Notebook, ensure that cables are placed in their proper location during the reassembly process. Improper cable placement can damage the Notebook. 6 REMOVAL SEQUENCE PRESARIO NOTEBOOK MAINTENANCE AND SERVICE GUIDE 1200XL SERIES - Compaq 12XL300 | Models XL300, XL300A, and XL300B - Maintenance & Service Gu - Page 80
for the keyboard is shown below. ÄCAUTION: When servicing this Notebook, ensure that cables are placed in their proper location during the reassembly process. Improper cable placement can damage the Notebook. PRESARIO NOTEBOOK MAINTENANCE AND SERVICE GUIDE 1200XL SERIES REMOVAL SEQUENCE 7 - Compaq 12XL300 | Models XL300, XL300A, and XL300B - Maintenance & Service Gu - Page 81
for the hard drive is shown below. ÄCAUTION: When servicing the Notebook, ensure that cables are placed in their proper location during the reassembly process. Improper cable placement can damage the Notebook. Note: 8 REMOVAL SEQUENCE PRESARIO NOTEBOOK MAINTENANCE AND SERVICE GUIDE 1200XL SERIES - Compaq 12XL300 | Models XL300, XL300A, and XL300B - Maintenance & Service Gu - Page 82
Presario 1200XL Series Model XL300, XL300A, and XL300B Preparing the Notebook for Disassembly Before beginning Removal and Replacement procedures, complete the following steps: 1. Disconnect AC power and any external devices. 2. Remove the battery pack (pg 10). 3. Remove any PC cards. Important: The - Compaq 12XL300 | Models XL300, XL300A, and XL300B - Maintenance & Service Gu - Page 83
the battery contacts. Place only the battery pack for Compaq Presario 1200XL Series Portable Notebooks in the battery compartment. Do not force the battery field-serviceable parts are located inside the battery pack. 10 REMOVAL SEQUENCE PRESARIO NOTEBOOK MAINTENANCE AND SERVICE GUIDE 1200XL - Compaq 12XL300 | Models XL300, XL300A, and XL300B - Maintenance & Service Gu - Page 84
and locate the modem compartment (left side when the front of the Notebook is toward you). 3. Remove one screw 1 from the modem door, slide the door forward 2 and then lift to remove it. Continued on the next page. PRESARIO NOTEBOOK MAINTENANCE AND SERVICE GUIDE 1200XL SERIES REMOVAL SEQUENCE 11 - Compaq 12XL300 | Models XL300, XL300A, and XL300B - Maintenance & Service Gu - Page 85
Presario 1200XL Series Model XL300, XL300A, and XL300B 4. Press the release latches 1 on each side that hold the Lift 2 the modem from the system board connector. To replace the modem board, reverse these procedures. 12 REMOVAL SEQUENCE PRESARIO NOTEBOOK MAINTENANCE AND SERVICE GUIDE 1200XL SERIES - Compaq 12XL300 | Models XL300, XL300A, and XL300B - Maintenance & Service Gu - Page 86
facing you, slide the door to the left and lift. 5. Pull 1 the side levers to release the memory module and lift 2 it off the connector on the system board. To replace the memory module, reverse these procedures. PRESARIO NOTEBOOK MAINTENANCE AND SERVICE GUIDE 1200XL SERIES REMOVAL SEQUENCE 13 - Compaq 12XL300 | Models XL300, XL300A, and XL300B - Maintenance & Service Gu - Page 87
, complete the following steps: 1. Prepare the Notebook for disassembly (pg 9). 2. Close the display and turn the Notebook upside down. 3. Remove four screws from underneath the Notebook. Continued on next page. 14 REMOVAL SEQUENCE PRESARIO NOTEBOOK MAINTENANCE AND SERVICE GUIDE 1200XL SERIES - Compaq 12XL300 | Models XL300, XL300A, and XL300B - Maintenance & Service Gu - Page 88
underside of the Palmrest LED and Volume Control board. 7. Lift the cover off the unit. To replace the Palmrest Cover with TouchPad, reverse these procedures. PRESARIO NOTEBOOK MAINTENANCE AND SERVICE GUIDE 1200XL SERIES REMOVAL SEQUENCE 15 - Compaq 12XL300 | Models XL300, XL300A, and XL300B - Maintenance & Service Gu - Page 89
Presario 1200XL Series Model XL300, XL300A, and XL300B Removing the Keyboard To remove the keyboard, complete the following steps: 1. Prepare the Notebook for disassembly (pg 9). 2. Remove the underneath the keyboard. 16 REMOVAL SEQUENCE PRESARIO NOTEBOOK MAINTENANCE AND SERVICE GUIDE 1200XL SERIES - Compaq 12XL300 | Models XL300, XL300A, and XL300B - Maintenance & Service Gu - Page 90
Presario 1200XL Series Model XL300, XL300A, and XL300B Removing the Heatspreader To remove the Heatspreader, complete the following steps: 1. Prepare the Notebook for disassembly (pg 9). when replacing the screws. PRESARIO NOTEBOOK MAINTENANCE AND SERVICE GUIDE 1200XL SERIES REMOVAL SEQUENCE 17 - Compaq 12XL300 | Models XL300, XL300A, and XL300B - Maintenance & Service Gu - Page 91
for disassembly (pg 9). 2. Remove the Palmrest Cover with TouchPad (pg 14). 3. Remove the keyboard (pg 16). 4. Open the display, gently pry open the display hinge covers, and slide them off the hinges. Continued on next page. 18 REMOVAL SEQUENCE PRESARIO NOTEBOOK MAINTENANCE AND SERVICE GUIDE - Compaq 12XL300 | Models XL300, XL300A, and XL300B - Maintenance & Service Gu - Page 92
Model XL300, XL300A, and XL300B 5. Close the Display, turn the unit upside down, and remove two screws located at the back of the Notebook that secure the Internet Zone cover to the chassis . Continued on next page. PRESARIO NOTEBOOK MAINTENANCE AND SERVICE GUIDE 1200XL SERIES REMOVAL SEQUENCE 19 - Compaq 12XL300 | Models XL300, XL300A, and XL300B - Maintenance & Service Gu - Page 93
XL300, XL300A, and XL300B 6. Turn Notebook right side up and open the display panel. 7. Remove the two innermost screws from the display hinges that secure the status panel to the chassis. Continued on next page. 20 REMOVAL SEQUENCE PRESARIO NOTEBOOK MAINTENANCE AND SERVICE GUIDE 1200XL SERIES - Compaq 12XL300 | Models XL300, XL300A, and XL300B - Maintenance & Service Gu - Page 94
Presario 1200XL Series Model XL300, XL300A, and XL300B 8. Lift up one corner of the Internet Zone cover 9. Remove Internet Zone cover 2 from the chassis. To replace the Internet Zone Cover, reverse these procedures. PRESARIO NOTEBOOK MAINTENANCE AND SERVICE GUIDE 1200XL SERIES REMOVAL SEQUENCE 21 - Compaq 12XL300 | Models XL300, XL300A, and XL300B - Maintenance & Service Gu - Page 95
: 1. Prepare the Notebook for disassembly (pg 9). 2. Remove the Internet Zone cover (pg 18). 3. Disconnect the internet button cable from the right side of the Internet Zone button board. Continued on the next page. 22 REMOVAL SEQUENCE PRESARIO NOTEBOOK MAINTENANCE AND SERVICE GUIDE 1200XL SERIES - Compaq 12XL300 | Models XL300, XL300A, and XL300B - Maintenance & Service Gu - Page 96
Presario 1200XL Series Model XL300, XL300A, and XL300B 4. Remove two screws securing the LVDS button board and remove it from the chassis. To replace the LVDS button board, reverse these procedures. PRESARIO NOTEBOOK MAINTENANCE AND SERVICE GUIDE 1200XL SERIES REMOVAL SEQUENCE 23 - Compaq 12XL300 | Models XL300, XL300A, and XL300B - Maintenance & Service Gu - Page 97
the hard drive from the chassis 2 and then disconnect the hard drive cable by gently pulling the cable from the hard drive connector. Note: Disconnect the cable from the hard drive after the hard drive is lifted from the chassis. 24 REMOVAL SEQUENCE PRESARIO NOTEBOOK MAINTENANCE AND SERVICE GUIDE - Compaq 12XL300 | Models XL300, XL300A, and XL300B - Maintenance & Service Gu - Page 98
, and XL300B Removing the Hard Drive Mounting Brackets To remove the hard drive mounting brackets, remove two screws from each side of the hard drive. To replace the hard drive and mounting brackets, reverse these procedures. PRESARIO NOTEBOOK MAINTENANCE AND SERVICE GUIDE 1200XL SERIES REMOVAL - Compaq 12XL300 | Models XL300, XL300A, and XL300B - Maintenance & Service Gu - Page 99
Presario 1200XL Series Model XL300, XL300A, and XL300B Removing the Processor To remove the processor, complete the following steps: 1. Prepare the Notebook for disassembly (pg 9). 2. . Continued on next page. 26 REMOVAL SEQUENCE PRESARIO NOTEBOOK MAINTENANCE AND SERVICE GUIDE 1200XL SERIES - Compaq 12XL300 | Models XL300, XL300A, and XL300B - Maintenance & Service Gu - Page 100
Presario 1200XL Series Model XL300, XL300A, and XL300B Replacing the Processor To replace the processor, to lock the processor in place. 4. Reassemble the remaining components by reversing their removal procedures. PRESARIO NOTEBOOK MAINTENANCE AND SERVICE GUIDE 1200XL SERIES REMOVAL SEQUENCE 27 - Compaq 12XL300 | Models XL300, XL300A, and XL300B - Maintenance & Service Gu - Page 101
procedure. To remove the display panel assembly, complete the following steps: 1. Prepare the Notebook for disassembly (pg 9). 2. Remove the Internet Zone cover (pg 18). 3. Remove the button on the next page. 28 REMOVAL SEQUENCE PRESARIO NOTEBOOK MAINTENANCE AND SERVICE GUIDE 1200XL SERIES - Compaq 12XL300 | Models XL300, XL300A, and XL300B - Maintenance & Service Gu - Page 102
and XL300B 8. While supporting the display, remove 1 the two outermost screws securing the display to the chassis and lift 2 the display panel out of the hinges. To replace the display panel, reverse these procedures. PRESARIO NOTEBOOK MAINTENANCE AND SERVICE GUIDE 1200XL SERIES REMOVAL SEQUENCE - Compaq 12XL300 | Models XL300, XL300A, and XL300B - Maintenance & Service Gu - Page 103
6. Remove the LVDS button board (pg 22). 7. Remove the hard drive (pg 24). 8. Remove the display panel assembly (pg 28). 9. Remove four screws 1 located on the top of the upper CPU cover. Continued on the next page. 30 REMOVAL SEQUENCE PRESARIO NOTEBOOK MAINTENANCE AND SERVICE GUIDE 1200XL SERIES - Compaq 12XL300 | Models XL300, XL300A, and XL300B - Maintenance & Service Gu - Page 104
down and remove one screw. 11. Turn the Notebook right side up and lift the cover off the chassis. Note: Now that the upper CPU cover is removed, you can remove the hard drive ribbon cable from the system board PRESARIO NOTEBOOK MAINTENANCE AND SERVICE GUIDE 1200XL SERIES REMOVAL SEQUENCE 31 - Compaq 12XL300 | Models XL300, XL300A, and XL300B - Maintenance & Service Gu - Page 105
Presario 1200XL Series Model XL300, XL300A, and XL300B Removing the Hard Drive Cable 1. Disconnect the hard drive cable by pulling the cable off the connector. 32 REMOVAL SEQUENCE PRESARIO NOTEBOOK MAINTENANCE AND SERVICE GUIDE 1200XL SERIES - Compaq 12XL300 | Models XL300, XL300A, and XL300B - Maintenance & Service Gu - Page 106
the Heatspreader (pg 17). 5. Remove the display panel assembly (pg 28). 6. Remove the upper CPU cover (pg 30). 7. Turn the Notebook upside down and remove the two screws securing the CD/DVD drive to the chassis. PRESARIO NOTEBOOK MAINTENANCE AND SERVICE GUIDE 1200XL SERIES REMOVAL SEQUENCE 33 - Compaq 12XL300 | Models XL300, XL300A, and XL300B - Maintenance & Service Gu - Page 107
XL300, XL300A, and XL300B 8. Push the CD/DVD drive forward from the back of the drive to disconnect it from the system board, and lift the CD/DVD to remove it. To replace the CD/DVD drive, reverse these procedures. 34 REMOVAL SEQUENCE PRESARIO NOTEBOOK MAINTENANCE AND SERVICE GUIDE 1200XL SERIES - Compaq 12XL300 | Models XL300, XL300A, and XL300B - Maintenance & Service Gu - Page 108
Remove the hard drive (pg 24). 8. Remove the display panel assembly (pg 28). 9. Remove the upper CPU cover (pg 30). 10. Remove one screw 1 from the right side of the board, and gently rock back and forth to disconnect it 2 from the system board PRESARIO NOTEBOOK MAINTENANCE AND SERVICE GUIDE 1200XL - Compaq 12XL300 | Models XL300, XL300A, and XL300B - Maintenance & Service Gu - Page 109
the upper CPU cover (pg 30). 10. Remove the power supply board (pg 35). 11. Disconnect 1 the fan cable from the connector on the system board and lift 2 the fan assembly from the chassis slot. Continued on the next page. 36 REMOVAL SEQUENCE PRESARIO NOTEBOOK MAINTENANCE AND SERVICE GUIDE 1200XL - Compaq 12XL300 | Models XL300, XL300A, and XL300B - Maintenance & Service Gu - Page 110
the fan. To replace the fan assembly and gasket, reverse these procedures. Important: When replacing the fan assembly ensure the manufacturing label is pointing inward. PRESARIO NOTEBOOK MAINTENANCE AND SERVICE GUIDE 1200XL SERIES REMOVAL SEQUENCE 37 - Compaq 12XL300 | Models XL300, XL300A, and XL300B - Maintenance & Service Gu - Page 111
for disassembly (pg 9). 2. Remove the Palmrest Cover with TouchPad (pg 14). 3. Remove the Keyboard (pg 16). 4. Remove the Heatspreader (pg 17). 5. Remove the Upper CPU Cover (pg 30). 6. Remove the or the battery. 38 REMOVAL SEQUENCE PRESARIO NOTEBOOK MAINTENANCE AND SERVICE GUIDE 1200XL SERIES - Compaq 12XL300 | Models XL300, XL300A, and XL300B - Maintenance & Service Gu - Page 112
and the ribbon cable (pg 42). 11. Remove the hard drive cable located above the battery charger board (pg 32). 12. Remove the floppy cable located above the battery charger board (pg 42). Continued on next page. PRESARIO NOTEBOOK MAINTENANCE AND SERVICE GUIDE 1200XL SERIES REMOVAL SEQUENCE 39 - Compaq 12XL300 | Models XL300, XL300A, and XL300B - Maintenance & Service Gu - Page 113
Presario 1200XL Series Model XL300, XL300A, and XL300B 13. Disconnect the speaker cable. Continued on next page. 40 REMOVAL SEQUENCE PRESARIO NOTEBOOK MAINTENANCE AND SERVICE GUIDE 1200XL SERIES - Compaq 12XL300 | Models XL300, XL300A, and XL300B - Maintenance & Service Gu - Page 114
Presario 1200XL Series Model XL300, XL300A, and XL300B 14. Remove 1 one screw from the battery charger and audio the battery charger board, ensure that the pins are aligned with the connector on the system board. PRESARIO NOTEBOOK MAINTENANCE AND SERVICE GUIDE 1200XL SERIES REMOVAL SEQUENCE 41 - Compaq 12XL300 | Models XL300, XL300A, and XL300B - Maintenance & Service Gu - Page 115
Internet Zone cover (pg 18). 7. Remove the LVDS button board (pg 22). 8. Remove the display panel assembly (pg 28). 9. Remove the hard drive (pg 24). 10. Remove the upper CPU cover (pg 30). Continued on next page. 42 REMOVAL SEQUENCE PRESARIO NOTEBOOK MAINTENANCE AND SERVICE GUIDE 1200XL SERIES - Compaq 12XL300 | Models XL300, XL300A, and XL300B - Maintenance & Service Gu - Page 116
Presario 1200XL Series Model XL300, XL300A, and XL300B 11. Remove screw from the diskette drive retaining bracket and lift the bracket out of the chassis. Continued on next page. PRESARIO NOTEBOOK MAINTENANCE AND SERVICE GUIDE 1200XL SERIES REMOVAL SEQUENCE 43 - Compaq 12XL300 | Models XL300, XL300A, and XL300B - Maintenance & Service Gu - Page 117
Presario 1200XL Series Model XL300, XL300A, and XL300B 12. Disconnect the diskette drive ribbon from the system board to expose the screw. Continued on next page. 44 REMOVAL SEQUENCE PRESARIO NOTEBOOK MAINTENANCE AND SERVICE GUIDE 1200XL SERIES - Compaq 12XL300 | Models XL300, XL300A, and XL300B - Maintenance & Service Gu - Page 118
two screws 1 and lift the diskette drive 2 from the chassis. To replace the diskette drive, reverse these procedures. ÄCAUTION: Ensure that cables are placed in their proper locations during the reassembly process. PRESARIO NOTEBOOK MAINTENANCE AND SERVICE GUIDE 1200XL SERIES REMOVAL SEQUENCE 45 - Compaq 12XL300 | Models XL300, XL300A, and XL300B - Maintenance & Service Gu - Page 119
LVDS button board (pg 22). 7. Remove the Heatspreader (pg 17). 8. Remove the upper CPU cover (pg 30). 9. Remove the hard drive (pg 24). 10. Remove the battery charger and audio board (pg 39). Continued on next page. 46 REMOVAL SEQUENCE PRESARIO NOTEBOOK MAINTENANCE AND SERVICE GUIDE 1200XL SERIES - Compaq 12XL300 | Models XL300, XL300A, and XL300B - Maintenance & Service Gu - Page 120
Presario 1200XL Series Model XL300, XL300A, and XL300B 11. Lift the speaker assembly from the chassis. its proper location during the reassembly process. To replace the speaker assembly, reverse these procedures. PRESARIO NOTEBOOK MAINTENANCE AND SERVICE GUIDE 1200XL SERIES REMOVAL SEQUENCE 47 - Compaq 12XL300 | Models XL300, XL300A, and XL300B - Maintenance & Service Gu - Page 121
DVD drive (pg 33). 10. Remove the upper CPU cover (pg 30). 11. Remove the hard drive (pg drive cable from the system board (pg 42). 15. Disconnect the speaker assembly cables from the system board (pg 46). Continued on next page. 48 REMOVAL SEQUENCE PRESARIO NOTEBOOK MAINTENANCE AND SERVICE GUIDE - Compaq 12XL300 | Models XL300, XL300A, and XL300B - Maintenance & Service Gu - Page 122
Presario 1200XL Series Model XL300, XL300A, and XL300B 16. Remove the three standoffs and three screws from the system board. Continued on next page. PRESARIO NOTEBOOK MAINTENANCE AND SERVICE GUIDE 1200XL SERIES REMOVAL SEQUENCE 49 - Compaq 12XL300 | Models XL300, XL300A, and XL300B - Maintenance & Service Gu - Page 123
Presario 1200XL Series Model XL300, XL300A, and XL300B 17. Remove four screws from the rear connector. Note: board, reverse these procedures. Important: Before replacing the system board, remove all remaining cables. 50 REMOVAL SEQUENCE PRESARIO NOTEBOOK MAINTENANCE AND SERVICE GUIDE 1200XL SERIES - Compaq 12XL300 | Models XL300, XL300A, and XL300B - Maintenance & Service Gu - Page 124
ordering spare parts. The serial number 1 is located underneath the unit. Illustrated Parts The following illustrations are typical of the spare parts provided with the Compaq Presario 1200XL Series Notebook Computers. PRESARIO NOTEBOOK MAINTENANCE AND SERVICE GUIDE 1200XL SERIES PARTS CATALOG 1 - Compaq 12XL300 | Models XL300, XL300A, and XL300B - Maintenance & Service Gu - Page 125
System Unit Presario 1200XL Series Models: XL300, XL300A, and XL300B Spare Part Items 1 Button Board Cover 2 Keyboard 3 Palmrest with Touchpad Button Board 4 Upper CPU Cover 5 Speakers with later in this chapter. 2 PARTS CATALOG PRESARIO NOTEBOOK MAINTENANCE AND SERVICE GUIDE 1200XL SERIES - Compaq 12XL300 | Models XL300, XL300A, and XL300B - Maintenance & Service Gu - Page 126
-001 222108 222132-001 Does part# exist. 222112-001 Does part# exist. 222139-001 222152-001 To order parts, refer to later in this chapter. PRESARIO NOTEBOOK MAINTENANCE AND SERVICE GUIDE 1200XL SERIES PARTS CATALOG 3 - Compaq 12XL300 | Models XL300, XL300A, and XL300B - Maintenance & Service Gu - Page 127
Presario 1200XL Series Models: XL300, XL300A, and XL300B Display Assembly Descritption Spare Part Number 12.1 in. DSTN Display 13.3 in. TFT Display Panel 222151-001 To order parts, refer to later in this chapter.' 4 PARTS CATALOG PRESARIO NOTEBOOK MAINTENANCE AND SERVICE GUIDE 1200XL SERIES - Compaq 12XL300 | Models XL300, XL300A, and XL300B - Maintenance & Service Gu - Page 128
GB 2 Diskette Drive 3 8X DVD Drive 6X DVD Drive (Not Shown) 4 24X CD ROM Drive (Not Shown) Spare Part Number 222128-001 222126-001 222127-001 222125-001 222123-001 222124-001 222118-001 To order parts, refer to later in this chapter. PRESARIO NOTEBOOK MAINTENANCE AND SERVICE GUIDE 1200XL SERIES - Compaq 12XL300 | Models XL300, XL300A, and XL300B - Maintenance & Service Gu - Page 129
Bracket (left) 2 Hard Drive Mounting Bracket (right) 3 Diskette Drive Retaining Bracket 222136-001 *Kit includes one each of the above items unless otherwise specified. To order parts, refer to later in this chapter. 6 PARTS CATALOG PRESARIO NOTEBOOK MAINTENANCE AND SERVICE GUIDE 1200XL SERIES - Compaq 12XL300 | Models XL300, XL300A, and XL300B - Maintenance & Service Gu - Page 130
Models: XL300, XL300A, and XL300B Miscellaneous Parts Description 1 AC Adapter 60W SLIM 2-Wire 2 AC Power Cords (Not Shown) Spare Part Number 222113-001 293831-001 To order parts, refer to later in this chapter. PRESARIO NOTEBOOK MAINTENANCE AND SERVICE GUIDE 1200XL SERIES PARTS CATALOG 7 - Compaq 12XL300 | Models XL300, XL300A, and XL300B - Maintenance & Service Gu - Page 131
Presario 1200XL Series Models: XL300, XL300A, and XL300B Miscellaneous Plastics Spare Part Items Spare Part Number Miscellaneous Plastics Kit* 222146-001 1 Battery Compartment Door (qty. 2) 2 Memory in this chapter. 8 PARTS CATALOG PRESARIO NOTEBOOK MAINTENANCE AND SERVICE GUIDE 1200XL SERIES - Compaq 12XL300 | Models XL300, XL300A, and XL300B - Maintenance & Service Gu - Page 132
Guide (BSG) Quick Reference Guide Quick Find for Windows North America, Latin America, Asia Pacific QuickFind for Windows Europe, Middle East, Africa QuickFind is updated July August September October November December PRESARIO NOTEBOOK MAINTENANCE AND SERVICE GUIDE 1200XL SERIES PARTS CATALOG 9 - Compaq 12XL300 | Models XL300, XL300A, and XL300B - Maintenance & Service Gu - Page 133
Item Description Spare Part Number Processors TBD TBD System Memory TBD TBD Diskette Drive CD-ROM Hard Drive TBD TBD TBD TBD TBD TBD Miscellaneous TBD TBD Software TBD TBD Other CTO Options TBD TBD 10 PARTS CATALOG PRESARIO NOTEBOOK MAINTENANCE AND SERVICE GUIDE 1200XL SERIES
-
 1
1 -
 2
2 -
 3
3 -
 4
4 -
 5
5 -
 6
6 -
 7
7 -
8
-
9
-
10
-
11
-
12
-
13
-
14
-
15
-
16
-
17
-
18
-
19
-
20
-
21
-
22
-
23
-
24
-
25
-
26
-
27
-
28
-
29
-
30
-
31
-
32
-
33
-
34
-
35
-
36
-
37
-
38
-
39
-
40
-
41
-
42
-
43
-
44
-
45
-
46
-
47
-
48
-
49
-
50
-
51
-
52
-
53
-
54
-
55
-
56
-
57
-
58
-
59
-
60
-
61
-
62
-
63
-
64
-
65
-
66
-
67
-
68
-
69
-
70
-
71
-
72
-
73
-
74
-
75
-
76
-
77
-
78
-
79
-
80
-
81
-
82
-
83
-
84
-
85
-
86
-
87
-
88
-
89
-
90
-
91
-
92
-
93
-
94
-
95
-
96
-
97
-
98
-
99
-
100
-
101
-
102
-
103
-
104
-
105
-
106
-
107
-
108
-
109
-
110
-
111
-
112
-
113
-
114
-
115
-
116
-
117
-
118
-
119
-
120
-
121
-
122
-
123
-
124
-
125
-
126
-
127
-
128
-
129
-
130
-
131
-
132
-
133
 |
 |

Presario 1200XL Series
Model XL300, XL300A, and XL300B
Before You
Begin
Product
Description
Specifications
Pin
Assignments
Battery
Operations
Troubleshooting
Removal
Sequence
Parts
Catalog
MSG Index
Welcome to the Maintenance & Service Guide (MSG)
Welcome to the
Maintenance and Service Guide
(MSG) for Compaq Presario 1200XL Series
Portable Notebooks. This online guide is designed to serve the needs of technicians whose
job is to repair Compaq products.
For copyright and trademark information, refer to the
Notice
section of this MSG. To locate
your unit’s serial number, to see symbol conventions, or to view technician’s notes, see the
Preface
. This MSG is updated online as needed.
For comments or questions about the contents of this MSG,
contact Compaq
.
To report a technical problem, contact your Regional Support Center or IM Help Center.
For help on navigating in this guide, refer to
Using this Guide
.