Compaq Presario SR1000 Compaq Presario Desktop Products Upgrading and Servicin - Page 8
replacing or adding a drive - hard drive removal
 |
View all Compaq Presario SR1000 manuals
Add to My Manuals
Save this manual to your list of manuals |
Page 8 highlights
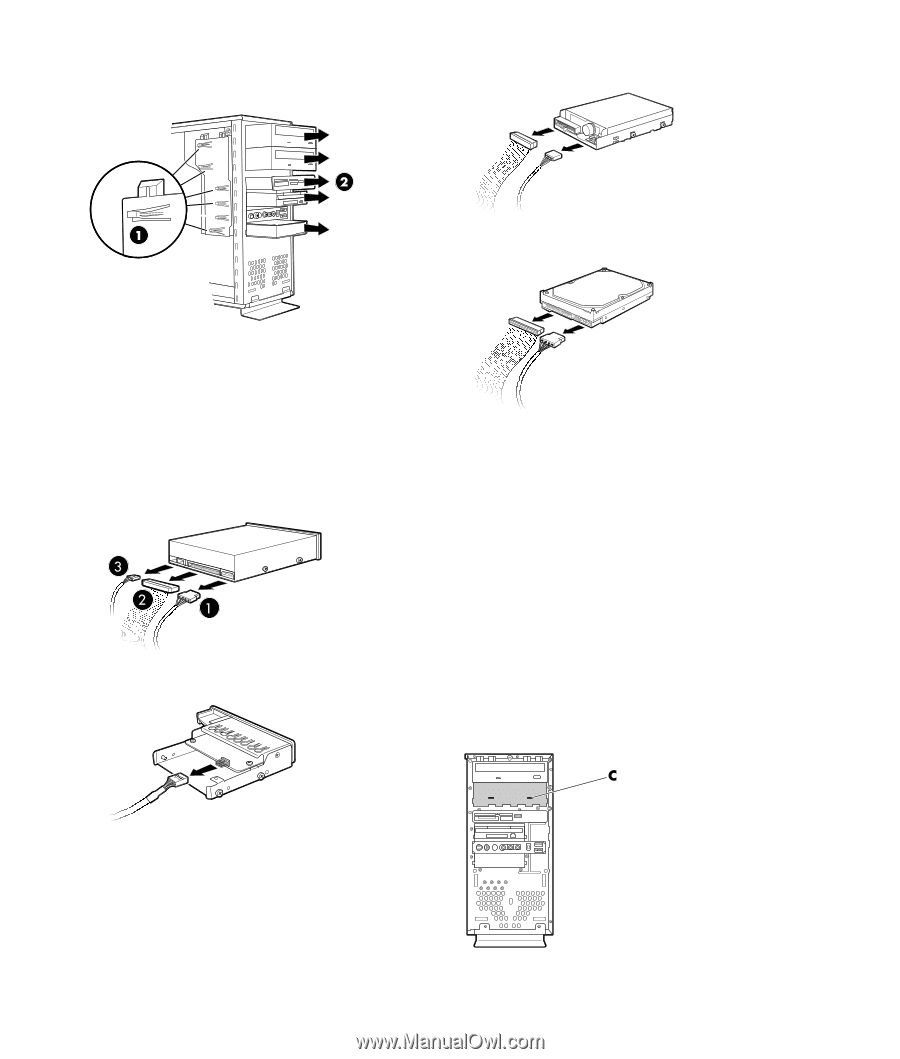
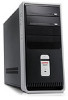
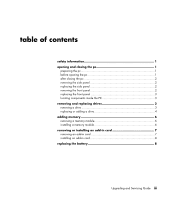
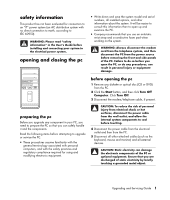
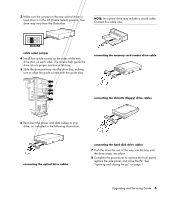
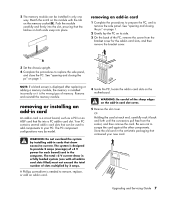
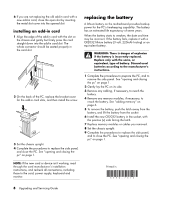
2 Locate the drive you want to remove. disconnecting the diskette (floppy) drive cables 3 Release the drive from the chassis by lifting the tab (1) on the latch drive bracket, and then sliding (2) the drive partway out of the bay. (The latch drive bracket secures the drives in their respective positions in the chassis.) 4 Disconnect the power cable (1) and data cable (2) from the back of the drive you want to remove, as indicated in the following illustrations. Use a gentle rocking motion. Some units may have a sound cable. If so, disconnect the sound cable (3). disconnecting the optical drive cables disconnecting the hard disk drive cables 5 Pull the drive out of the drive bay. 6 If you are replacing the old drive with a new drive, remove the four guide screws (two on each side) from the old drive. You need these screws to install the new drive. replacing or adding a drive 1 If necessary, remove the existing drive. See "removing a drive" on page 3. 2 If you are adding a drive to an empty lower optical drive bay, you must remove the blank plate from the bay. To do so, insert a flat screwdriver into the blank plate slot (C) and rotate the screwdriver to break the blank plate out of the chassis. Discard the blank plate. disconnecting the memory card reader drive cable 4 Upgrading and Servicing Guide
-
 1
1 -
2
-
 3
3 -
 4
4 -
 5
5 -
 6
6 -
 7
7 -
 8
8 -
 9
9 -
 10
10 -
 11
11 -
 12
12
 |
 |