Craftsman 17539 Operation Manual - Page 22
Cleaning
 |
View all Craftsman 17539 manuals
Add to My Manuals
Save this manual to your list of manuals |
Page 22 highlights
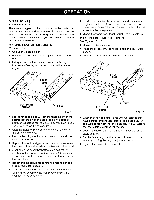
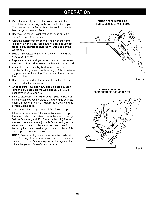
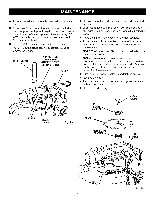
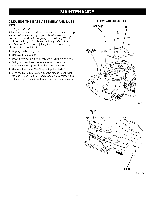
CLEANING THE BASE ASSEMBLY AND DUST PATH See Figures 25 - 27. After extended use, wood particles and resin may build up inside the base assembly of your biscuit joiner and clog the path for wood particles going into dust bag. Wood particles packing up in this area not only defeats the dustless feature of your biscuit joiner, it also makes cutting biscuit slots more difficult. • Unplug the biscuit joiner. • Remove the dust bag. • Place the biscuit joiner upside down on a workbench. • Using a screwdriver, remove the four screws and washers securing the shoe. Remove the shoe. • Remove the blade. See "Replacing the Blade." • With the blade removed, place the biscuit joiner right side up. Using a pair of needle nose pliers, stretch and release the springs from the tabs on the bearing plate. SHOWNWITHOUTDUSTBAG SCREW(S) SHOE DUSTBAG PORT \ SPRING Fig. 25 PLIERS Fig. 26 22
-
 1
1 -
2
-
3
-
4
-
5
-
6
-
7
-
8
-
9
-
10
-
11
-
12
-
13
-
14
-
15
-
16
-
 17
17 -
 18
18 -
 19
19 -
 20
20 -
 21
21 -
 22
22 -
 23
23 -
 24
24 -
 25
25 -
 26
26
 |
 |
