Craftsman 17541 Operation Manual - Page 20
Deep Cuts
 |
View all Craftsman 17541 manuals
Add to My Manuals
Save this manual to your list of manuals |
Page 20 highlights
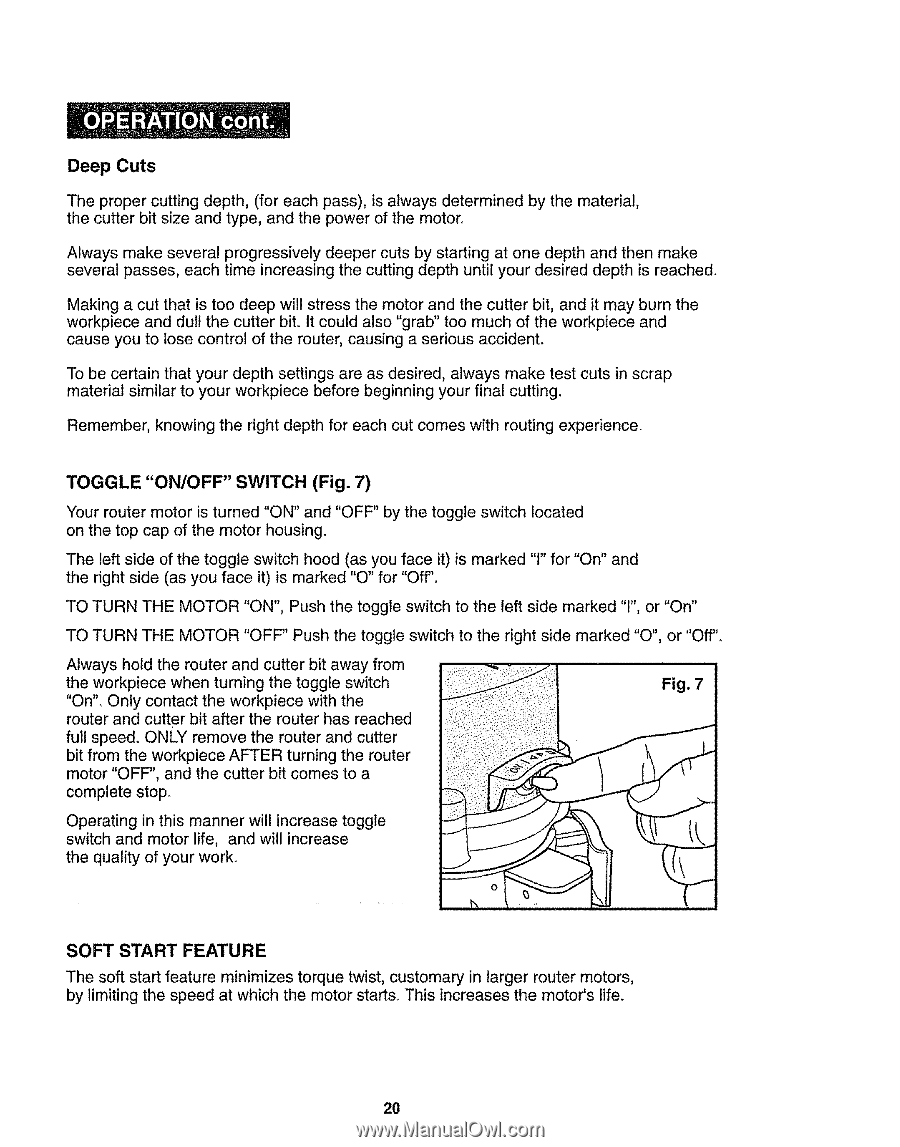
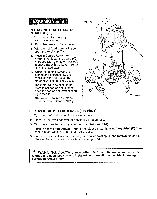
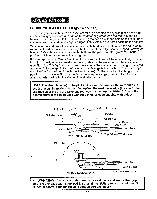
Deep Cuts The proper cutting depth, (for each pass), is always determined by the material, the cutter bit size and type, and the power of the motor. Always make several progressively deeper cuts by starting at one depth and then make several passes, each time increasing the cutting depth until your desired depth is reached. Making a cut that is too deep will stress the motor and the cutter bit, and it may burn the workpiece and du!l the cutter biL It could also "grab" too much of the workpiece and cause you to lose control of the router, causing a serious accident. To be certain that your depth settings are as desired, always make test cuts in scrap material similar to your workpiece before beginning your final cutting. Remember, knowing the right depth for each cut comes with routing experience. TOGGLE "ON/OFF" SWITCH (Fig. 7) Your router motor is turned "ON" and "OFF" by the toggle switch located on the top cap of the motor housing. The left side of the toggle switch hood (as you face it) is marked "1" for "On" and the right side (as you face it) is marked "O" for "Off". TO TURN THE MOTOR "ON", Push the toggle switch to the left side marked "1",or "On" TO TURN THE MOTOR "OFF" Push the toggle switch to the right side marked "O", or "Off"_ Always hold the router and cutter bit away from the workpiece when turning the toggle switch "On". Only contact the workpiece with the router and cutter bit after the router has reached full speed. ONLY remove the router and cutter bit from the workpiece AFTER turning the router motor "OFF", and the cutter bit comes to a complete stop. Fig. 7 Operating in this manner will increase toggle switch and motor life, and will increase the quality of your work_ SOFT START FEATURE The soft start feature minimizes torque twist, customary in larger router motors, by limiting the speed at which the motor starts. This increases the motor's life. 20
-
 1
1 -
2
-
3
-
4
-
5
-
6
-
7
-
8
-
9
-
10
-
11
-
12
-
13
-
14
-
 15
15 -
 16
16 -
 17
17 -
 18
18 -
 19
19 -
 20
20 -
 21
21 -
 22
22 -
 23
23 -
 24
24 -
 25
25 -
26
-
27
-
28
-
29
-
30
-
31
-
32
-
33
-
34
-
35
-
36
-
37
-
38
-
39
-
40
 |
 |