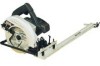
Craftsman 25980 User Instructions - Page 4
Adjusting the Accu-Rip Saw Guide to fit other saws
 |
View all Craftsman 25980 manuals
Add to My Manuals
Save this manual to your list of manuals |
Page 4 highlights
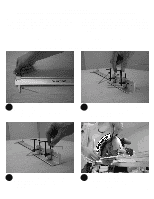
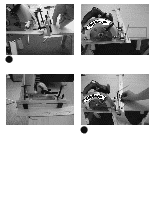
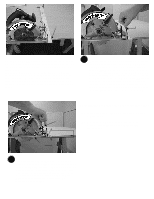
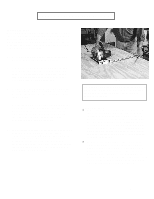
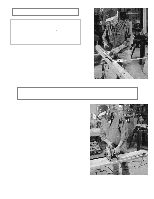
Make Sure "0" Mark is Aligned with Edge (B) Retainer Screw Fig. 6a Fig. 6a Shows the L-Brackets positioned properly. Note that the T-Bolts are in an Open area for easy access, and that the L-Brackets "reach" into the saw. This may vary with different saw designs. The Accu-Rip Saw Guide will work properly so long as the sharp points on the T-Bolts are tightened firmly into any area of the saw base. Because of the many designs of circular saws, you may need to try more than one position for the LBrackets. Choose the position that works best for you saw's design. 7 7. Fig. 7 7 With everything in position as instructed, now tighten the Retainer Screws (B). Use a COIN OR SMALL SCREWDRIVER to firmly tighten these screws as shown in Fig. 7. The Retainer Screws are designed to hold the L-Brackets and T-Bolts in the position you choose for YOUR saw. The next time you attach the Accu-Rip to your saw, the L-Brackets and T-Bolts will already be set in this position, making re-attaching the Accu-Rip quicker and easier. Your Accu-Rip is now set for your saw. Should it be necessary to reset the Accu-Rip for your saw, repeat steps 1 thru 7. Adjusting the Accu-Rip Saw Guide to fit other saws: (A) T-Bolts Hold Against Base Plate A) Loosen the Retainer Screws to allow the L-Brackets to move freely. B) Repeat Steps 1-7 above to adjust for the proper position of the L-Brackets and T-Bolts for that particular saw. Be sure Blade is FLUSH with Edge of Material. Blade Guard must be UP! Fig. 8 78 Hand-tighten the T-Bolts (A) firmly onto the saw's base plate as shown in Fig. 8. You should not use a tool to tighten the T-Bolts. The sharp points on the T-Bolts will make a slight indention in the base plate of your saw. When securely tightened, the T-Bolts will prevent the Accu-Rip from moving during use. This is very important to maintaining the accuracy of your cuts. 4
-
 1
1 -
 2
2 -
 3
3 -
 4
4 -
 5
5 -
 6
6 -
 7
7 -
 8
8
 |
 |
