Creative Outlier User Guide - Page 4
Charging headset, Pairing new, devices, Playback from audio devices, Call functions with mobile - driver
 |
View all Creative Outlier manuals
Add to My Manuals
Save this manual to your list of manuals |
Page 4 highlights
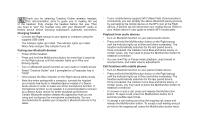
ENThank you for selecting Creative Outlier wireless headset. This documentation aims to guide you in making full use of the headset. Fully charge the headset before first use. Then you need to "pair" the headset once with your Bluetooth® audio or mobile device before enjoying subsequent automatic connection. Charging headset • Connect the Right earcup to your laptop or computer using the supplied USB cable • The indicator lights up in Red. The indicator lights up in Red. When fully charged, this indicator turns off. Pairing new Bluetooth devices • Power off the headset. • Press and hold the Multifunction button for more than 5 seconds on the Right earcup until the indicator lights up in Blue and blinking rapidly • Turn on Bluetooth search function on your audio or mobile device • Select "Creative Outlier" and if prompted for a Passcode, key in "0000" • Once paired, the Blue indicator on the Right earcup blinks slowly • Note that when pairing with a computer, connect the headset as a Hands-free Audio or Headset device instead of a Stereo Audio device in order to make use of the microphone function. If microphone function is not needed, it is recommended to connect as a Stereo Audio device for better playback performance. Certain Bluetooth solution detects the application that you are using and configures the microphone automatically. You are recommended to update your computer's Bluetooth drivers to the latest. • If your mobile device supports NFC (Near Field Communication) connectivity, you can simplify the above Bluetooth pairing process by just tapping the mobile device on the NFC icon at the Right earcup. A second tap will disconnect your mobile device. Refer to your mobile device's user guide to enable NFC functionality. Playback from audio devices • Turn on Bluetooth function on your paired audio device • Press and hold the Multifunction button on the Right earcup until the indicator lights up in Blue and blinks moderately. The headset automatically searches for the last paired device. Once connected, the indicator turns Blue and blinks slowly. In certain cases, you may need to press the Multifunction button to establish connection • You can now Play or Pause music playback, skip forward or reverse tracks, and make volume adjustments Call functions with mobile phones • Turn on Bluetooth function on your paired mobile device • Press and hold the Multifunction button on the Right earcup until the indicator lights up in Blue and blinks moderately. The headset automatically searches for the last paired device. Once connected, the indicator turns Blue and blinks slowly. In certain cases, you may need to press the Multifunction button to establish connection • To answer or end a call, press and release the Multifunction button. To reject a call, press the Multifunction button for 2 seconds (audible reject tone). • To accept a call waiting and drop the ongoing call, press and release the Multifunction button. To accept a call waiting and put on hold to the ongoing call, press the Multifunction button twice.
-
 1
1 -
 2
2 -
 3
3 -
 4
4 -
 5
5 -
 6
6 -
 7
7 -
 8
8 -
 9
9 -
 10
10 -
11
-
12
-
13
-
14
-
15
-
16
-
17
-
18
-
19
-
20
-
21
-
22
-
23
-
24
-
25
-
26
-
27
-
28
-
29
-
30
-
31
-
32
-
33
-
34
-
35
-
36
-
37
-
38
-
39
-
40
-
41
-
42
-
43
-
44
-
45
-
46
-
47
-
48
-
49
-
50
-
51
-
52
-
53
-
54
-
55
-
56
-
57
-
58
-
59
-
60
-
61
-
62
-
63
-
64
-
65
-
66
-
67
-
68
-
69
-
70
-
71
-
72
-
73
-
74
-
75
-
76
-
77
-
78
-
79
-
80
-
81
-
82
-
83
-
84
 |
 |
