D-Link DIR-632 Product Manual
D-Link DIR-632 Manual
 |
UPC - 790069336263
View all D-Link DIR-632 manuals
Add to My Manuals
Save this manual to your list of manuals |
D-Link DIR-632 manual content summary:
- D-Link DIR-632 | Product Manual - Page 1
- D-Link DIR-632 | Product Manual - Page 2
herein are trademarks or registered trademarks of their respective companies. Copyright © 2010 by D-Link Systems, Inc. All rights reserved. This publication may not be reproduced, in whole or in part, without prior expressed written permission from D-Link Systems, Inc. D-Link DIR-632 User Manual i - D-Link DIR-632 | Product Manual - Page 3
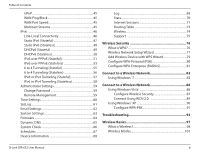
37 Website Filters 40 Inbound Filters 41 Firewall Settings 42 SPI 42 NAT Endpoint Filter 42 Anti-Spoof Check 42 DMZ 42 Routing 43 Advanced Wireless Settings 44 RTS Threshold 44 DTIM Interval 44 WMM Function 44 Advanced Network Settings 45 D-Link DIR-632 User Manual ii - D-Link DIR-632 | Product Manual - Page 4
83 Using Windows® 7 83 Connect to a Wireless Network 86 Using Windows Vista 86 Configure Wireless Security 87 Connect Using WCN 2.0 89 Using Windows® XP 90 Configure WPA-PSK 91 Troubleshooting 93 Wireless Basics 97 What is Wireless 98 Wireless Modes 101 D-Link DIR-632 User Manual iii - D-Link DIR-632 | Product Manual - Page 5
Table of Contents Networking Basics 102 Check your IP address 102 Statically Assign an IP address 103 Technical Specifications 104 Contacting Technical Support 105 Warranty 106 Registration 111 D-Link DIR-632 User Manual iv - D-Link DIR-632 | Product Manual - Page 6
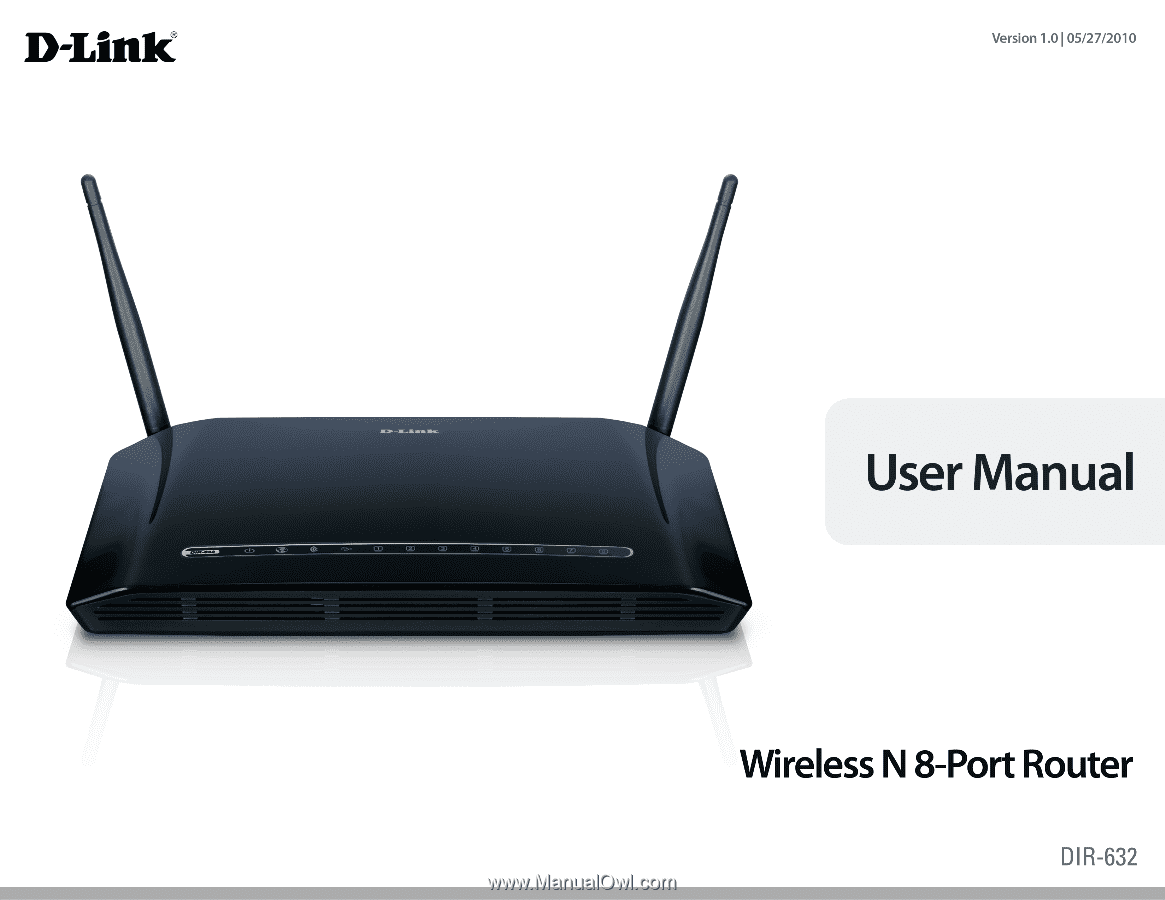
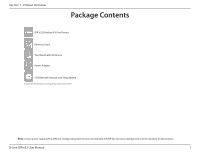
DIR-632 Wireless N 8-Port Router Ethernet Cable Two Detachable Antennas Power Adapter CD-ROM with Manual and Setup Wizard If any of the above items are missing, please contact your reseller. Note: Using a power supply with a different voltage rating than the one included with the DIR-632 - D-Link DIR-632 | Product Manual - Page 7
• IEEE 802.11n or 802.11g wireless clients • 10/100 Ethernet Web-based download the latest version. CD Installation Wizard Requirements Computer with the following: • Windows® 7/Vista®/XP (Service Pack 2 or higher) • An installed Ethernet adapter • CD-ROM drive D-Link DIR-632 User Manual - D-Link DIR-632 | Product Manual - Page 8
protect your network against outside intruders TOTAL COVERAGE Provides greater wireless signal rates even at farther distances for best-in-class Whole Home Coverage. ULTIMATE PERFORMANCE The D-Link Wireless N 8-Port Router (DIR-632) is a 802.11n compliant device that delivers real world performance - D-Link DIR-632 | Product Manual - Page 9
and environmental factors, including volume of network traffic, building materials and construction, and network overhead, lower actual data throughput rate. Environmental conditions will adversely affect wireless signal range. D-Link DIR-632 User Manual 4 - D-Link DIR-632 | Product Manual - Page 10
cable or DSL modem. 3 USB Connect a USB 1.1 or 2.0 flash drive to configure the wireless settings using WCN. 4 Reset Pressing the Reset button restores the router to its original factory default settings. 5 Power Receptor Receptor for the supplied power adapter. D-Link DIR-632 User Manual 5 - D-Link DIR-632 | Product Manual - Page 11
a USB flash drive with WCN information. The LED will blink 3 times if it successfully transfers the wireless settings. 5 Local Network's LED A solid light indicates a connection to an Ethernet-enabled computer on ports 1-8. This LED blinks during data transmission. D-Link DIR-632 User Manual 6 - D-Link DIR-632 | Product Manual - Page 12
the Setup Wizard from the D-Link CD, make sure the computer you are running the CD from is connected to the Internet and online or the wizard will not work. If you have disconnected any hardware, re-connect your computer back to the modem and make sure you are online. D-Link DIR-632 User Manual 7 - D-Link DIR-632 | Product Manual - Page 13
position access points, wireless routers, and computers so wireless connection may degrade dramatically or drop completely. Make sure your 2.4GHz phone base is as far away from your wireless devices as possible. The base transmits a signal even if the phone in not in use. D-Link DIR-632 User Manual - D-Link DIR-632 | Product Manual - Page 14
The power light, Internet light, and the LAN light (the port that your computer is plugged into) should be lit. If not, make sure your computer, modem, and router are powered on and verify the cable connections are correct. 9. Skip to page 13 to configure your router. D-Link DIR-632 User Manual 9 - D-Link DIR-632 | Product Manual - Page 15
and the subnet mask of your network. Click Save Settings to save your settings. Use this new IP address to access the configuration utility of the router in the future. Close the browser and change your computer's IP settings back to the original values as in Step 1. D-Link DIR-632 User Manual 10 - D-Link DIR-632 | Product Manual - Page 16
other Ethernet devices and computers. To configure your wireless network, open a web browser and enter the IP address you assigned to the router. Refer to the Configuration and Wireless Security sections for more information on setting up your wireless network. D-Link DIR-632 User Manual 11 - D-Link DIR-632 | Product Manual - Page 17
D: represents the drive letter of your CD-ROM drive). When the autorun screen appears, click Install. Note: It is recommended to write down the login password on the provided CD holder. D-Link DIR-632 User Manual 12 - D-Link DIR-632 | Product Manual - Page 18
and enter the IP address of the router (192.168.0.1). Select Admin from the drop-down menu and then enter your password. Leave the password blank by default. If you get a Page Cannot be Displayed error, please refer to the Troubleshooting section for assistance. D-Link DIR-632 User Manual 13 - D-Link DIR-632 | Product Manual - Page 19
Section 3 - Configuration Setup Wizard You may click Setup Wizard to quickly configure your router. If you want to enter your settings without running the wizard, click Manual Configuration and skip to page 18. D-Link DIR-632 User Manual 14 - D-Link DIR-632 | Product Manual - Page 20
Section 3 - Configuration Click Next to continue. Create a new password and then click Next to continue. Select your time zone from the drop-down menu and then click Next to continue. Select the type of Internet connection you use and then click Next to continue. D-Link DIR-632 User Manual 15 - D-Link DIR-632 | Product Manual - Page 21
subnet mask, gateway, and DNS server addresses. Note: Make sure to remove your PPPoE software from your computer. The software is no longer needed and will not work through a router. If you selected PPTP, enter your PPTP username and password. Click Next to continue. D-Link DIR-632 User Manual 16 - D-Link DIR-632 | Product Manual - Page 22
. Click Connect to save your settings. Once the router is finished rebooting, click Continue. Please allow 1-2 minutes to connect. Close your browser window and reopen it to test your Internet connection. It may take a few tries to initially connect to the Internet. D-Link DIR-632 User Manual 17 - D-Link DIR-632 | Product Manual - Page 23
MAC address on the Broadband Router. It is not recommended that you change the default MAC address unless required by your ISP. You can use the Clone Your PC's MAC Address button to replace the Internet port's MAC address with the MAC address of your Ethernet card. D-Link DIR-632 User Manual 18 - D-Link DIR-632 | Product Manual - Page 24
MAC address on the Broadband Router. It is not recommended that you change the default MAC address unless required by your ISP. You can use the Clone Your PC's MAC Address button to replace the Internet port's MAC address with the MAC address of your Ethernet card. D-Link DIR-632 User Manual 19 - D-Link DIR-632 | Product Manual - Page 25
MAC address on the Broadband Router. It is not recommended that you change the default MAC address unless required by your ISP. You can use the Clone Your PC's MAC Address button to replace the Internet port's MAC address with the MAC address of your Ethernet card. D-Link DIR-632 User Manual 20 - D-Link DIR-632 | Product Manual - Page 26
address on the Address: Broadband Router. It is not recommended that you change the default MAC address unless required by your ISP. You can use the Clone Your PC's MAC Address button to replace the Internet port's MAC address with the MAC address of your Ethernet card. D-Link DIR-632 User Manual - D-Link DIR-632 | Product Manual - Page 27
MAC address on the Broadband Router. It is not recommended that you change the default MAC address unless required by your ISP. You can use the Clone Your PC's MAC Address button to replace the Internet port's MAC address with the MAC address of your Ethernet card. D-Link DIR-632 User Manual 22 - D-Link DIR-632 | Product Manual - Page 28
. If you want to configure the wireless settings on your router using the wizard, click Wireless Network Setup Wizard and refer to page 77. Click Add Wireless Device with WPS if you want to add a wireless device using Wi-Fi Protected Setup (WPS) and refer to page 79. D-Link DIR-632 User Manual 23 - D-Link DIR-632 | Product Manual - Page 29
is selected, the SSID of the DIR-632 will not be seen by Site Survey utilities so your wireless clients will have to know the SSID of your DIR-632 in order to connect to it. Wireless Security: Refer to page 76 for more information regarding wireless security. D-Link DIR-632 User Manual 24 - D-Link DIR-632 | Product Manual - Page 30
is selected, the SSID of the DIR-632 will not be seen by Site Survey utilities so your wireless clients will have to know the SSID of your DIR-632 in order to connect to it. Wireless Security: Refer to page 76 for more information regarding wireless security. D-Link DIR-632 User Manual 25 - D-Link DIR-632 | Product Manual - Page 31
.255.0. Device Name: Enter a name for the router. Local Domain: Enter the Domain name (Optional). Enable DNS Relay: Uncheck the box to transfer the DNS server information from your ISP to your computers. If checked, your computers will use the router for a DNS server. D-Link DIR-632 User Manual 26 - D-Link DIR-632 | Product Manual - Page 32
WAN: from the WAN side, disable to allow manual configuration. NetBIOS Scope: This feature allows the configuration of a NetBIOS 'domain' name under which network hosts operates. This setting has no effect if the 'Learn NetBIOS information from WAN' is activated." D-Link DIR-632 User Manual 27 - D-Link DIR-632 | Product Manual - Page 33
Section 3 - Configuration NetBIOS Mode Select the different type of NetBIOS node: Broadcast only, Point-to-Point, Mixed-mode, and Hybrid. Type: Primary/Secondary Enter your Primary (and Secondary) WINS IP address(es). WINS IP Address: D-Link DIR-632 User Manual 28 - D-Link DIR-632 | Product Manual - Page 34
still need to extend the "DHCP IP Address Range" to address the issue, it is located in the DHCP Server section. Reserve: The Reserve option converts this dynamic IP allocation into a DHCP Reservation and adds the corresponding entry to the DHCP Reservations List. D-Link DIR-632 User Manual 29 - D-Link DIR-632 | Product Manual - Page 35
to share the USB device through the router. USB Settings: Choose between these two configuration: Network USB and WCN Configuration. Network USB: Please set the Network USB Detection interval time. Note: Please see the SharePort Manual on the CD for more information. D-Link DIR-632 User Manual 30 - D-Link DIR-632 | Product Manual - Page 36
are pre-defined virtual services already in the table. You may use them by enabling them and assigning the server IP to use that particular virtual service. For a list of ports for common applications, please visit http://support.dlink.com/faq/view.asp?prod_id=1191. D-Link DIR-632 User Manual 31 - D-Link DIR-632 | Product Manual - Page 37
. Schedule: The schedule of time when the Virtual Server Rule will be enabled. The schedule may be set to Always, which will allow the particular service to always be enabled. You can create your own times in the Tools > Schedules section. D-Link DIR-632 User Manual 32 - D-Link DIR-632 | Product Manual - Page 38
. Schedule: The schedule of time when the Virtual Server Rule will be enabled. The schedule may be set to Always, which will allow the particular service to always be enabled. You can create your own times in the Tools > Schedules section. D-Link DIR-632 User Manual 33 - D-Link DIR-632 | Product Manual - Page 39
firewall port (TCP, UDP, or Both). Schedule: The schedule of time when the Application Rule will be enabled. The schedule may be set to Always, which will allow the particular service to always be enabled. You can create your own times in the Tools > Schedules section. D-Link DIR-632 User Manual - D-Link DIR-632 | Product Manual - Page 40
default router to your Speed: ISP.This is determined by your ISP. ISP's often speed as a download/ upload pair. For example, 1.5Mbits/284Kbits. Using this example, you would enter 284. Alternatively you can test your uplink speed with a service such as www.dslreports.com. D-Link DIR-632 User Manual - D-Link DIR-632 | Product Manual - Page 41
menu. MAC Address: Enter the MAC address you would like to filter. To find the MAC address on a computer, please refer to the Networking Basics section in this manual. DHCP Client: Select a DHCP client from the drop-down menu and click - D-Link DIR-632 | Product Manual - Page 42
, limit web access based on time or dates, and/or block access from applications like P2P utilities or games. Add Policy: Click the Add Policy button to start the Access Control Wizard. Click Next to continue with the wizard. Access Control Wizard D-Link DIR-632 User Manual 37 - D-Link DIR-632 | Product Manual - Page 43
the drop-down menu and then click Next to continue. Enter the following information and then click Next to continue. • Address Type - Select IP address, MAC address, or Other Machines. • IP Address - Enter the IP address of the computer you want to apply the rule to. D-Link DIR-632 User Manual 38 - D-Link DIR-632 | Product Manual - Page 44
IP address. Dest IP End - Enter the ending IP address. Protocol - Select the protocol. Dest Port Start - Enter the starting port number. Dest Port End - Enter the ending port number. To enable web logging, click Enable. Click Save to save the access control rule. D-Link DIR-632 User Manual - D-Link DIR-632 | Product Manual - Page 45
are used to allow you to set up a list of allowed Web sites that can be used by multiple users through the network. To use this feature select to Allow or Deny, enter the domain or website and click or URLs that you want to allow or block. Click Save Settings. D-Link DIR-632 User Manual 40 - D-Link DIR-632 | Product Manual - Page 46
configure inbound data filtering rules that control data based on an IP address range. Inbound Filters can be used with Virtual Server, Port Forwarding, or Remote Administration features. Name: Enter a name for the the rule, or click the Delete icon to remove the rule. D-Link DIR-632 User Manual 41 - D-Link DIR-632 | Product Manual - Page 47
computer on the LAN that you want to have unrestricted Internet communication. If this computer obtains it's IP address automatically using DHCP, be sure to make a static reservation on the Basic > DHCP page so that the IP address of the DMZ machine does not change. D-Link DIR-632 User Manual 42 - D-Link DIR-632 | Product Manual - Page 48
method of customizing specific routes of data through your network. Destination IP: Enter the IP address of packets that will take this route. Netmask: Enter the : Select the interface that the IP packet must use to transit out of the router when this route is used. D-Link DIR-632 User Manual 43 - D-Link DIR-632 | Product Manual - Page 49
your wireless network. This will improve the quality of video and voice applications for your wireless clients. Short GI: Check this box to reduce the guard interval time therefore increasing the data capacity. However, it's less reliable and may create higher data loss. D-Link DIR-632 User Manual - D-Link DIR-632 | Product Manual - Page 50
: You may set the port speed of the Internet port to 10Mbps, 100Mbps, or auto. Some older cable or DSL modems may require you to set the port speed to 10Mbps. Multicast streams: Check the box to allow multicast traffic to pass through the router from the Internet. D-Link DIR-632 User Manual 45 - D-Link DIR-632 | Product Manual - Page 51
Section 3 - Configuration IPv6 Link-Local Connectivity My IPv6 Connection: Select Link-Local Only from the drop-down menu. LAN IPv6 Address Displays the IPv6 address of the router. Settings: D-Link DIR-632 User Manual 46 - D-Link DIR-632 | Product Manual - Page 52
IPv6 Address Range Start: Enter the start IPv6 Address for the DHCPv6 range for your local computers. IPv6 Address Range End: Enter the end IPv6 Address for the DHCPv6 range for your local computers. IPv6 Address Lifetime: Enter the IPv6 Address Lifetime (in minutes). D-Link DIR-632 User Manual 47 - D-Link DIR-632 | Product Manual - Page 53
's LAN Link-Local Address. Enable Check to enable the Autoconfiguration feature. Autoconfiguration: Autoconfiguration Type: Select Stateless. Refer to the previous page for Stateful. Router Advertisement Enter the Router Advertisement Lifetime (in minutes). Lifetime: D-Link DIR-632 User Manual 48 - D-Link DIR-632 | Product Manual - Page 54
IPv6 Address Range Start: Enter the start IPv6 Address for the DHCPv6 range for your local computers. IPv6 Address Range End: Enter the end IPv6 Address for the DHCPv6 range for your local computers. IPv6 Address Lifetime: Enter the IPv6 Address Lifetime (in minutes). D-Link DIR-632 User Manual 49 - D-Link DIR-632 | Product Manual - Page 55
's LAN Link-Local Address. Enable Autoconfiguration: Check to enable the Autoconfiguration feature. Autoconfiguration Type: Select Stateless. Refer to the previous page for Stateful. Router Advertisement Enter the Router Advertisement Lifetime (in minutes). Lifetime: D-Link DIR-632 User Manual 50 - D-Link DIR-632 | Product Manual - Page 56
or Use the following DNS Address. Primary/Secondary DNS Enter the primary and secondary DNS server addresses. Address: LAN IPv6 Address: Enter the LAN (local) IPv6 address for the router. LAN Link-Local Address: Displays the Router's LAN Link-Local Address. D-Link DIR-632 User Manual 51 - D-Link DIR-632 | Product Manual - Page 57
IPv6 Address Range Start: Enter the start IPv6 Address for the DHCPv6 range for your local computers. IPv6 Address Range End: Enter the end IPv6 Address for the DHCPv6 range for your local computers. IPv6 Address Lifetime: Enter the IPv6 Address Lifetime (in minutes). D-Link DIR-632 User Manual 52 - D-Link DIR-632 | Product Manual - Page 58
or Use the following DNS Address. Primary/Secondary DNS Enter the primary and secondary DNS server addresses. Address: LAN IPv6 Address: Enter the LAN (local) IPv6 address for the router. LAN Link-Local Address: Displays the Router's LAN Link-Local Address. D-Link DIR-632 User Manual 53 - D-Link DIR-632 | Product Manual - Page 59
Section 3 - Configuration Enable Autoconfiguration: Check to enable the Autoconfiguration feature. Autoconfiguration Type: Select Stateful (DHCPv6) or Stateless. Router Advertisement Enter the Router Advertisement Lifetime (in minutes). Lifetime: D-Link DIR-632 User Manual 54 - D-Link DIR-632 | Product Manual - Page 60
IPv6 Address Range Enter the start IPv6 Address for the DHCPv6 range for your Start: local computers. IPv6 Address Range End: Enter the end IPv6 Address for the DHCPv6 range for your local computers. IPv6 Address Lifetime: Enter the IPv6 Address Lifetime (in minutes). D-Link DIR-632 User Manual 55 - D-Link DIR-632 | Product Manual - Page 61
's LAN Link-Local Address. Enable Autoconfiguration: Check to enable the Autoconfiguration feature. Autoconfiguration Type: Select Stateless. Refer to the previous page for Stateful. Router Advertisement Enter the Router Advertisement Lifetime (in minutes). Lifetime: D-Link DIR-632 User Manual 56 - D-Link DIR-632 | Product Manual - Page 62
's LAN Link-Local Address. Enable Check to enable the Autoconfiguration feature. Autoconfiguration: Autoconfiguration Type: Select Stateless. Refer to the previous page for Stateful. Router Advertisement Enter the Router Advertisement Lifetime (in minutes). Lifetime: D-Link DIR-632 User Manual 57 - D-Link DIR-632 | Product Manual - Page 63
IPv6 Address Range Enter the start IPv6 Address for the DHCPv6 range for your Start: local computers. IPv6 Address Range End: Enter the end IPv6 Address for the DHCPv6 range for your local computers. IPv6 Address Lifetime: Enter the IPv6 Address Lifetime (in minutes). D-Link DIR-632 User Manual 58 - D-Link DIR-632 | Product Manual - Page 64
IP address of the DIR-632 and 8080 is the port used for the Web Management interface. Inbound Filter: This section will list any rules that are created. You may click the Edit icon to change the settings or enable/disable the rule, or click the Delete icon to remove the rule. D-Link DIR-632 User - D-Link DIR-632 | Product Manual - Page 65
option allows you to configure, update, and maintain the correct time on Manual: To manually input the time, enter the values in these fields for the Year, Month, Day, Hour, Minute, and Second and then click Set Time. You can also click Copy Your Computer's Time Settings. D-Link DIR-632 User Manual - D-Link DIR-632 | Product Manual - Page 66
send the router logs to a SysLog Server. SysLog Server: SysLog Server IP The address of the SysLog server that will be used to send Address: the logs. You may also select your computer from the drop-down menu (only if receiving an IP address from the router via DHCP). D-Link DIR-632 User Manual 61 - D-Link DIR-632 | Product Manual - Page 67
router alert messages, and firmware update notification to your email address. Enable Email When this option is enabled, router activity logs are e-mailed Notification: to a designated email address. From Email This email address a schedule, go to Tools > Schedules. D-Link DIR-632 User Manual 62 - D-Link DIR-632 | Product Manual - Page 68
the router was shipped from the factory. Any settings that have not been saved will be lost, including any rules that you have created. If you want to save the current router configuration settings, use the Save button above. Reboot Device: Click to reboot the router. D-Link DIR-632 User Manual 63 - D-Link DIR-632 | Product Manual - Page 69
Check Online for Latest Firmware Options: Version to have the router check automatically to see if there is a new firmware upgrade. Check Email Notification of Newer Firmware Version to have the router send an email when there is a new firmware available. D-Link DIR-632 User Manual 64 - D-Link DIR-632 | Product Manual - Page 70
you registered with your DDNS service provider. Username or Key: Enter the Username for your DDNS account. Password or Key: Enter the Password for your DDNS account. Timeout: Enter a time (in hours). Status: Displays the current status - Connected or Disconnected. D-Link DIR-632 User Manual 65 - D-Link DIR-632 | Product Manual - Page 71
Section 3 - Configuration System Check Ping Test: The Ping Test is used to send Ping packets to test if a computer is on the Internet. Enter the IP Address that you wish to Ping, and click Ping. Ping Results: The results of your ping attempts will be displayed here. D-Link DIR-632 User Manual 66 - D-Link DIR-632 | Product Manual - Page 72
List: The list of schedules will be listed here. Click the Edit icon to make changes or click the Delete icon to remove the schedule. D-Link DIR-632 User Manual 67 - D-Link DIR-632 | Product Manual - Page 73
wireless settings such as SSID and Channel. LAN Computers: Displays computers and devices that are connected to the router via Ethernet and that are receiving an IP address assigned by the router (DHCP). IGMP Multicast Displays the Multicast Group IP Address. Memberships: D-Link DIR-632 User Manual - D-Link DIR-632 | Product Manual - Page 74
and the level of the events to view. This router also has external Syslog Server support so you can send the log files to a router log to the email address configured in the Tools > Email screen. Save Log: This option will save the router to a log file on your computer. D-Link DIR-632 User Manual - D-Link DIR-632 | Product Manual - Page 75
Section 3 - Configuration Stats The screen below displays the Traffic Statistics. Here you can view the amount of packets that pass through the DIR-632 on both the WAN and the LAN ports. The traffic counter will reset if the device is rebooted. D-Link DIR-632 User Manual 70 - D-Link DIR-632 | Product Manual - Page 76
router. An Internet session is a conversation between a program or application on a LAN-side computer and a program or application on a WAN-side computer. Local: The IP address and, where appropriate, port in case there are any retransmitted packets still pending. D-Link DIR-632 User Manual 71 - D-Link DIR-632 | Product Manual - Page 77
of idle time until the router considers the session terminated. The Reset or closed TCP connections. The connection does not close instantly so that lingering packets can pass or the connection can be re-established. 7800 seconds - Established or closing TCP connections. D-Link DIR-632 User Manual - D-Link DIR-632 | Product Manual - Page 78
Section 3 - Configuration Routing Table This page displays the routing details configured for your router. D-Link DIR-632 User Manual 73 - D-Link DIR-632 | Product Manual - Page 79
Section 3 - Configuration Wireless The wireless client table will assist you in your wireles network setup and wireless device connection. Click Wireless Network Setup Wizard to begin. D-Link DIR-632 User Manual 74 - D-Link DIR-632 | Product Manual - Page 80
Section 3 - Configuration Support D-Link DIR-632 User Manual 75 - D-Link DIR-632 | Product Manual - Page 81
on your wireless router or access point. WPA/WPA2 incorporates user authentication through the Extensible Authentication Protocol (EAP). EAP is built on a more secure public key encryption system to ensure that only authorized network users can access the network. D-Link DIR-632 User Manual 76 - D-Link DIR-632 | Product Manual - Page 82
click Wireless Network Setup Wizard. Type your desired wireless network name (SSID). Automatically: Select this option to automatically generate the router's network key and click Next. Manually: Select this option to manually enter your network key and click Next. D-Link DIR-632 User Manual 77 - D-Link DIR-632 | Product Manual - Page 83
Section 4 - Security If you selected Automatically, the summary window will display your settings. Write down the security key and enter this on your wireless clients. Click Save to save your settings. If you selected Manually, the following screen will appear. D-Link DIR-632 User Manual 78 - D-Link DIR-632 | Product Manual - Page 84
this on your wireless clients. PIN: Select this option to use PIN method. In order to use this method you must know the wireless client's 8 digit PIN and click Connect. PBC: Select this option to use PBC (Push Button) method to add a wireless client. Click Connect. D-Link DIR-632 User Manual 79 - D-Link DIR-632 | Product Manual - Page 85
be between 8-63 characters. 7. Click Save Settings to save your settings. If you are configuring the router with a wireless adapter, you will lose connectivity until you enable WPA-PSK on your adapter and enter the same passphrase as you did on the router. D-Link DIR-632 User Manual 80 - D-Link DIR-632 | Product Manual - Page 86
and multicast data is changed (3600 is default). 6. Next to Authentication Timeout, enter the amount of time before a client is required to re-authenticate (60 minutes is default). 7. Next to RADIUS Server IP Address enter the IP Address of your RADIUS server. D-Link DIR-632 User Manual 81 - D-Link DIR-632 | Product Manual - Page 87
If the MAC Address Authentication box is selected then the user will need to connect from the same computer whenever logging into the wireless network. 11. Click Advanced to enter settings for a secondary RADIUS Server. 12. Click Apply Settings to save your settings. D-Link DIR-632 User Manual 82 - D-Link DIR-632 | Product Manual - Page 88
wireless adapter. If you are joining an existing network, you will need to know the security key or passphrase being used. 1. Click on the wireless icon in your system tray (lower-right corner). 2. The utility will display any available wireless networks in your area. D-Link DIR-632 User Manual - D-Link DIR-632 | Product Manual - Page 89
button. If you get a good signal but cannot access the Internet, check your TCP/IP settings for your wireless adapter. Refer to the Networking Basics section in this manual for more information. 4. The following window appears while your computer tries to connect to the router. D-Link DIR-632 User - D-Link DIR-632 | Product Manual - Page 90
or passphrase that is on your router and click Ok. It may take 20-30 seconds to connect to the wireless network. If the connection fails, please verify that the security settings are correct. The key or passphrase must be exactly the same as on the wireless router. D-Link DIR-632 User Manual 85 - D-Link DIR-632 | Product Manual - Page 91
area. Click on a network (displayed using the SSID) and click the Connect button. If you get a good signal but cannot access the Internet, check you TCP/IP settings for your wireless adapter. Refer to the Networking Basics section in this manual for more information. D-Link DIR-632 User Manual 86 - D-Link DIR-632 | Product Manual - Page 92
. 1. Open the Windows Vista® Wireless Utility by right-clicking on the wireless computer icon in your system tray (lower right corner of screen). Select Connect to a network. 2. Highlight the wireless network (SSID) you would like to connect to and click Connect. D-Link DIR-632 User Manual 87 - D-Link DIR-632 | Product Manual - Page 93
passphrase that is on your router and click Connect. It may take 20-30 seconds to connect to the wireless network. If the connection fails, please verify that the security settings are correct. The key or passphrase must be exactly the same as on the wireless router. D-Link DIR-632 User Manual 88 - D-Link DIR-632 | Product Manual - Page 94
Reset PIN to Default button. For additional information, please refer to page 79. If you are using third party software to set up Wi-Fi Protection, carefully follow the directions. When you are finished, proceed to the next section to set up the newly-configured router. D-Link DIR-632 User Manual - D-Link DIR-632 | Product Manual - Page 95
area. Click on a network (displayed using the SSID) and click the Connect button. If you get a good signal but cannot access the Internet, check you TCP/IP settings for your wireless adapter. Refer to the Networking Basics section in this manual for more information. D-Link DIR-632 User Manual 90 - D-Link DIR-632 | Product Manual - Page 96
Open the Windows® XP Wireless Utility by right-clicking on the wireless computer icon in your system tray (lower-right corner of screen). Select View Available Wireless Networks. 2. Highlight the wireless network (SSID) you would like to connect to and click Connect. D-Link DIR-632 User Manual 91 - D-Link DIR-632 | Product Manual - Page 97
. Enter the WPA-PSK passphrase and click Connect. It may take 20-30 seconds to connect to the wireless network. If the connection fails, please verify that the WPA-PSK settings are correct. The WPA-PSK passphrase must be exactly the same as on the wireless router. D-Link DIR-632 User Manual 92 - D-Link DIR-632 | Product Manual - Page 98
. Software firewalls such as Zone Alarm, Black Ice, Sygate, Norton Personal Firewall, and Windows® XP firewall may block access to the configuration pages. Check the help files included with your firewall software for more information on disabling or configuring it. D-Link DIR-632 User Manual 93 - D-Link DIR-632 | Product Manual - Page 99
to hold the button down for 10 seconds. Release the button and the router will go through its reboot process. Wait about 30 seconds to access the router. The default IP address is 192.168.0.1. When logging in, the username is admin and leave the password box empty. D-Link DIR-632 User Manual 94 - D-Link DIR-632 | Product Manual - Page 100
® 95, 98, and Me users type in command (Windows® NT, 2000, and XP users type in cmd) and press Enter (or click OK). • Once the window opens, you'll need to do a special ping. Use the following syntax: ping [url] [-f] [-l] [MTU value] Example: ping yahoo.com -f -l 1472 D-Link DIR-632 User Manual 95 - D-Link DIR-632 | Product Manual - Page 101
• Click on Setup and then click Manual Configure. • To change the MTU enter the number in the MTU field and click Save Settings to save your settings. • Test your email. If changing the MTU does not resolve the problem, continue changing the MTU in increments of ten. D-Link DIR-632 User Manual 96 - D-Link DIR-632 | Product Manual - Page 102
cards. Under many circumstances, it may be desirable for mobile network devices to link to a conventional Ethernet LAN in order to use servers, printers or an Internet connection supplied through the wired LAN. A Wireless Router is a device used to provide this link. D-Link DIR-632 User Manual 97 - D-Link DIR-632 | Product Manual - Page 103
WLAN the speed and wireless operation range are both less than WLAN, but in return it doesn't use nearly as much power which makes it ideal for personal devices, such as mobile phones, PDAs, headphones, laptops, speakers, and other devices that operate on batteries. D-Link DIR-632 User Manual 98 - D-Link DIR-632 | Product Manual - Page 104
in recent years that almost everyone is using it, whether it's for home, office, business, D-Link has a wireless solution for it. Home • Gives everyone at home broadband access • Surf the web, check printer with multiple computers • No need to dedicate office space D-Link DIR-632 User Manual 99 - D-Link DIR-632 | Product Manual - Page 105
on same frequency. Security Don't let you next-door neighbors or intruders connect to your wireless network. Secure your wireless network by turning on the WPA security feature on the router. Refer to product manual for detail information on how to set it up. D-Link DIR-632 User Manual 100 - D-Link DIR-632 | Product Manual - Page 106
Point or wireless router. All the wireless devices, or clients, will connect to the wireless router or access point. An Ad-Hoc network contains only clients, such as laptops with wireless cardbus adapters. All the adapters must be in Ad-Hoc mode to communicate. D-Link DIR-632 User Manual 101 - D-Link DIR-632 | Product Manual - Page 107
. Some firewall software programs may block a DHCP request on newly installed adapters. If you are connecting to a wireless network at a hotspot (e.g. hotel, coffee shop, airport), please contact an employee or administrator to verify their wireless network settings. D-Link DIR-632 User Manual 102 - D-Link DIR-632 | Product Manual - Page 108
Set Default Gateway the same as the LAN IP address of your router (192.168.0.1). Set Primary DNS the same as the LAN IP address of your router (192.168.0.1). The Secondary DNS is not needed or you may enter a DNS server from your ISP. Step 5 Click OK twice to save your settings. D-Link DIR-632 User - D-Link DIR-632 | Product Manual - Page 109
= 4.6 inches • H = 1.2inches Warranty • 1 Year limited • Status • USB * Maximum wireless signal rate derived from IEEE Standard 802.11a, 802.11g and 802.11n specifications. Actual data throughput . Environmental factors will adversely affect wireless signal range. D-Link DIR-632 User Manual 104 - D-Link DIR-632 | Product Manual - Page 110
asked questions and answers to technical issues. For customers within the United States: Phone Support: (877) 453-5465 Internet Support: http://support.dlink.com For customers within Canada: Phone Support: (800) 361-5265 Internet Support: http://support.dlink.ca D-Link DIR-632 User Manual 105 - D-Link DIR-632 | Product Manual - Page 111
paid that is attributable to the Software. Except as otherwise agreed by DLink in writing, the replacement Software is provided only to the original licensee, and is subject to the terms and conditions of the license granted by D-Link for the Software. Replacement D-Link DIR-632 User Manual 106 - D-Link DIR-632 | Product Manual - Page 112
customer shall submit a claim to D-Link as outlined below: • Customers need to provide their receipt (proof of purchase) even if the product is registered. Without a receipt, no warranty service will be done. The registration is not considered a proof of purchase. D-Link DIR-632 User Manual 107 - D-Link DIR-632 | Product Manual - Page 113
Number from D-Link Technical Support at 1-800- https://rma.dlink.ca/. • software, firmware or other products or services provided by anyone other than D-Link; and Products that have been purchased from inventory clearance or liquidation sales or other sales in which D-Link Link DIR-632 User Manual 108 - D-Link DIR-632 | Product Manual - Page 114
LINK FOR WARRANTY SERVICE) RESULTING FROM THE USE OF THE PRODUCT, RELATING TO WARRANTY SERVICE, OR ARISING OUT OF ANY BREACH OF THIS LIMITED WARRANTY, EVEN IF D-LINK installed and used in accordance with the instructions, may cause harmful interference to radio Link DIR-632 User Manual 109 - D-Link DIR-632 | Product Manual - Page 115
We declare that the product is limited in CH1~CH11 by specified firmware controlled in the USA. IC statement Operation is subject to the an uncontrolled environment. End users must follow the specific operating instructions for satisfying RF exposure Canada. D-Link DIR-632 User Manual 110 - D-Link DIR-632 | Product Manual - Page 116
Appendix F - Registration Registration Product registration is entirely voluntary and failure to complete or return this form will not diminish your warranty rights. Version 1.0 May 27, 2010 D-Link DIR-632 User Manual 111
-
 1
1 -
 2
2 -
 3
3 -
 4
4 -
 5
5 -
 6
6 -
 7
7 -
8
-
9
-
10
-
11
-
12
-
13
-
14
-
15
-
16
-
17
-
18
-
19
-
20
-
21
-
22
-
23
-
24
-
25
-
26
-
27
-
28
-
29
-
30
-
31
-
32
-
33
-
34
-
35
-
36
-
37
-
38
-
39
-
40
-
41
-
42
-
43
-
44
-
45
-
46
-
47
-
48
-
49
-
50
-
51
-
52
-
53
-
54
-
55
-
56
-
57
-
58
-
59
-
60
-
61
-
62
-
63
-
64
-
65
-
66
-
67
-
68
-
69
-
70
-
71
-
72
-
73
-
74
-
75
-
76
-
77
-
78
-
79
-
80
-
81
-
82
-
83
-
84
-
85
-
86
-
87
-
88
-
89
-
90
-
91
-
92
-
93
-
94
-
95
-
96
-
97
-
98
-
99
-
100
-
101
-
102
-
103
-
104
-
105
-
106
-
107
-
108
-
109
-
110
-
111
-
112
-
113
-
114
-
115
-
116
 |
 |