Dell 1700 Owner's Manual - Page 39
Print and Check the Network Setup Ready/Data, Error, Continue - cartridge
 |
UPC - 807027103116
View all Dell 1700 manuals
Add to My Manuals
Save this manual to your list of manuals |
Page 39 highlights
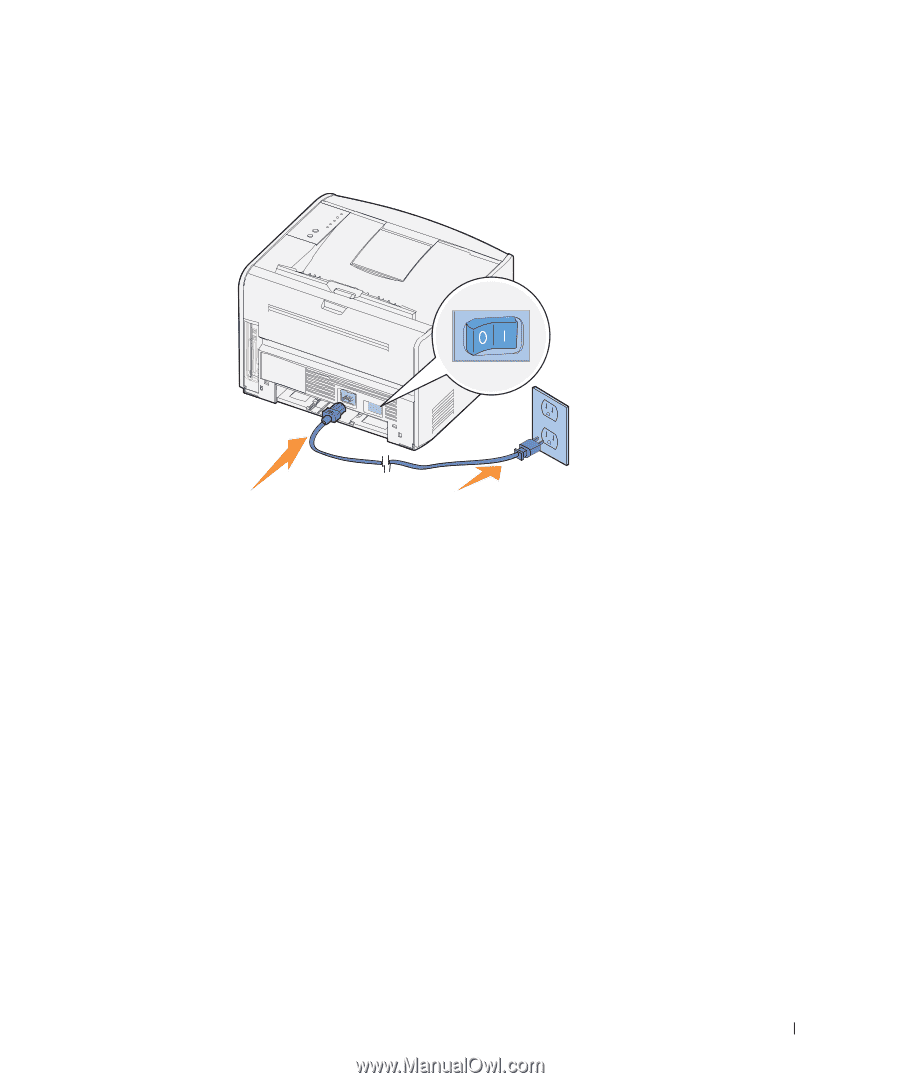
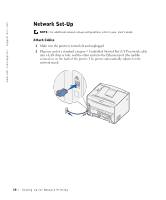
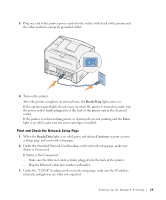
3 Plug one end of the printer power cord into the socket at the back of the printer and the other end into a properly grounded outlet. 4 Turn on the printer. After the printer completes its internal tests, the Ready/Data light comes on. If the operator panel lights do not come on when the printer is turned on, make sure the power cord is firmly plugged in at the back of the printer and at the electrical outlet. If the printer is on but nothing prints, or if print jobs are not printing and the Error light is on solid, make sure the toner cartridge is installed. Print and Check the Network Setup Page 1 When the Ready/Data light is on solid, press and release Continue to print a menu settings page and a network setup page. 2 Under the Standard Network Card heading on the network setup page, make sure Status is Connected. If Status is Not Connected: - Make sure the Ethernet cable is firmly plugged into the back of the printer. - Plug the Ethernet cable into another wall outlet. 3 Under the "TCP/IP" heading on the network setup page, make sure the IP address, netmask, and gateway are what you expected. Setting Up for Network Printing 39
-
 1
1 -
2
-
3
-
4
-
5
-
6
-
7
-
8
-
9
-
10
-
11
-
12
-
13
-
14
-
15
-
16
-
17
-
18
-
19
-
20
-
21
-
22
-
23
-
24
-
25
-
26
-
27
-
28
-
29
-
30
-
31
-
32
-
33
-
 34
34 -
 35
35 -
 36
36 -
 37
37 -
 38
38 -
 39
39 -
 40
40 -
 41
41 -
 42
42 -
 43
43 -
 44
44 -
45
-
46
-
47
-
48
-
49
-
50
-
51
-
52
-
53
-
54
-
55
-
56
-
57
-
58
-
59
-
60
-
61
-
62
-
63
-
64
-
65
-
66
-
67
-
68
-
69
-
70
-
71
-
72
-
73
-
74
-
75
-
76
-
77
-
78
-
79
-
80
-
81
-
82
-
83
-
84
-
85
-
86
-
87
-
88
-
89
-
90
-
91
-
92
-
93
-
94
-
95
-
96
-
97
-
98
-
99
-
100
-
101
-
102
 |
 |