Dell Alienware M11x R3 Service Manual - Page 26
Replacing the Keyboard
 |
View all Dell Alienware M11x R3 manuals
Add to My Manuals
Save this manual to your list of manuals |
Page 26 highlights
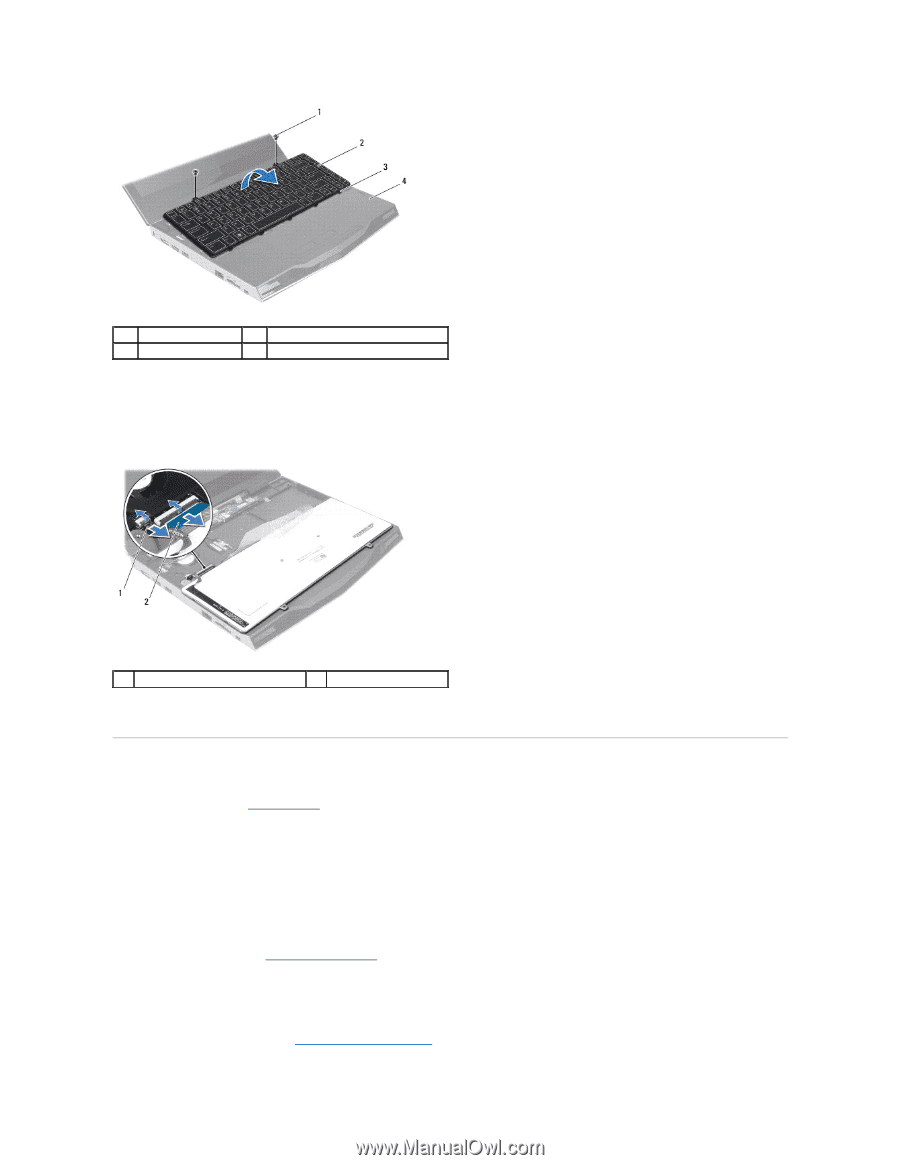
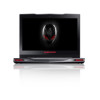
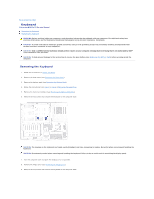
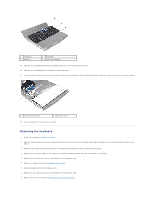
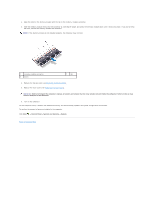
1 screws (2) 3 tabs (5) 2 keyboard 4 palm rest assembly 10. Carefully lift the keyboard and slide the keyboard tabs out of the slots on the palm rest. 11. Carefully turn the keyboard over and place it on the palm rest. 12. Lift the connector latches and pull the pull-tabs to disconnect the keyboard cable and backlit keyboard cable from their connectors on the system board. 1 backlit keyboard cable 2 keyboard cable 13. Lift the keyboard off the palm rest assembly. Replacing the Keyboard 1. Follow the instructions in Before You Begin. 2. Slide the keyboard cable and backlit keyboard cable into their connectors on the system board and press down on their connector latches to secure the cables. 3. Slide the tabs on the keyboard into the slots on the palm rest assembly and lower the keyboard into place. 4. Gently press around the edges of the keyboard to secure the keyboard under the tabs on the palm rest assembly. 5. Replace the two screws that secure the keyboard to the computer base. 6. Replace the hinge cover (see Replacing the Hinge Cover). 7. Close the display and turn the computer over. 8. Replace the two screws that secure the keyboard to the computer base. 9. Replace the memory module(s) (see Replacing the Memory Module(s)).
-
 1
1 -
2
-
3
-
4
-
5
-
6
-
7
-
8
-
9
-
10
-
11
-
12
-
13
-
14
-
15
-
16
-
17
-
18
-
19
-
20
-
 21
21 -
 22
22 -
 23
23 -
 24
24 -
 25
25 -
 26
26 -
 27
27 -
 28
28 -
 29
29 -
 30
30 -
 31
31 -
32
-
33
-
34
-
35
-
36
-
37
-
38
-
39
-
40
-
41
-
42
 |
 |