Dell PowerConnect W-IAP3WN Dell Instant 6.1.3.4-3.1.0.0 User Guide - Page 137
Role Derivation, User Roles, Creating a New User Role
 |
View all Dell PowerConnect W-IAP3WN manuals
Add to My Manuals
Save this manual to your list of manuals |
Page 137 highlights
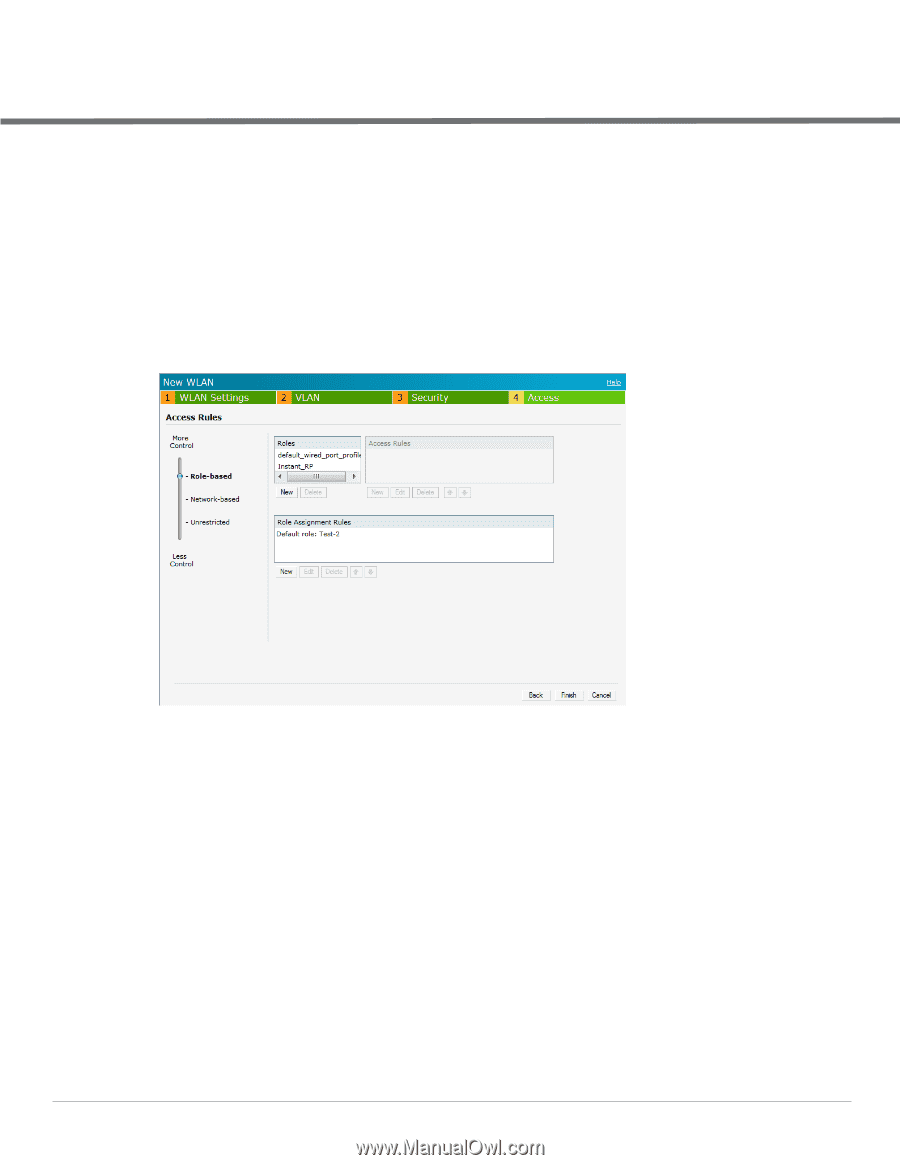
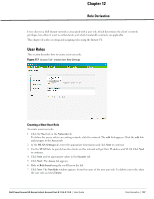
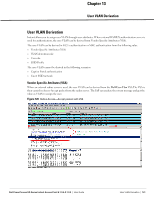
Chapter 12 Role Derivation Every client in a Dell Instant network is associated with a user role, which determines the client's network privileges, how often it must re-authenticate, and which bandwidth contracts are applicable. This chapter describes creating and assigning roles using the Instant UI. User Roles This section describes how to create a new user role. Figure 117 Access Tab - Instant User Role Settings Creating a New User Role To create a new user role: 1. Click the New link in the Networks tab. To define the access rule to an existing network, click the network. The edit link appears. Click the edit link and navigate to the Access tab. 2. In the WLAN Settings tab, enter the appropriate information and click Next to continue. 3. Use the VLAN tab, to specify how the clients on this network will get their IP address and VLAN.Click Next to continue. 4. Click Next and set appropriate values in the Security tab. 5. Click Next. The Access tab appears. 6. Slide to Role-based using the scroll bar on the left. 7. Click New. The New Rule window appears. Enter the name of the new user role. To delete a user role, select the user role and click Delete. Dell PowerConnect W-Series Instant Access Point 6.1.3.4-3.1.0.0 | User Guide Role Derivation | 137
-
 1
1 -
2
-
3
-
4
-
5
-
6
-
7
-
8
-
9
-
10
-
11
-
12
-
13
-
14
-
15
-
16
-
17
-
18
-
19
-
20
-
21
-
22
-
23
-
24
-
25
-
26
-
27
-
28
-
29
-
30
-
31
-
32
-
33
-
34
-
35
-
36
-
37
-
38
-
39
-
40
-
41
-
42
-
43
-
44
-
45
-
46
-
47
-
48
-
49
-
50
-
51
-
52
-
53
-
54
-
55
-
56
-
57
-
58
-
59
-
60
-
61
-
62
-
63
-
64
-
65
-
66
-
67
-
68
-
69
-
70
-
71
-
72
-
73
-
74
-
75
-
76
-
77
-
78
-
79
-
80
-
81
-
82
-
83
-
84
-
85
-
86
-
87
-
88
-
89
-
90
-
91
-
92
-
93
-
94
-
95
-
96
-
97
-
98
-
99
-
100
-
101
-
102
-
103
-
104
-
105
-
106
-
107
-
108
-
109
-
110
-
111
-
112
-
113
-
114
-
115
-
116
-
117
-
118
-
119
-
120
-
121
-
122
-
123
-
124
-
125
-
126
-
127
-
128
-
129
-
130
-
131
-
 132
132 -
 133
133 -
 134
134 -
 135
135 -
 136
136 -
 137
137 -
 138
138 -
 139
139 -
 140
140 -
 141
141 -
 142
142 -
143
-
144
-
145
-
146
-
147
-
148
-
149
-
150
-
151
-
152
-
153
-
154
-
155
-
156
-
157
-
158
-
159
-
160
-
161
-
162
-
163
-
164
-
165
-
166
-
167
-
168
-
169
-
170
-
171
-
172
-
173
-
174
-
175
-
176
-
177
-
178
-
179
-
180
-
181
-
182
-
183
-
184
-
185
-
186
-
187
-
188
-
189
-
190
-
191
-
192
-
193
-
194
-
195
-
196
-
197
-
198
-
199
-
200
-
201
-
202
-
203
-
204
-
205
-
206
-
207
-
208
-
209
-
210
-
211
-
212
-
213
-
214
-
215
-
216
-
217
-
218
-
219
-
220
-
221
-
222
-
223
-
224
-
225
-
226
-
227
-
228
-
229
-
230
-
231
-
232
-
233
-
234
-
235
-
236
-
237
-
238
-
239
-
240
-
241
-
242
-
243
-
244
-
245
-
246
 |
 |