Dell Precision 530 Microprocessor Replacement - Page 10
For each of the metal clips that secure the heat sink to
 |
View all Dell Precision 530 manuals
Add to My Manuals
Save this manual to your list of manuals |
Page 10 highlights
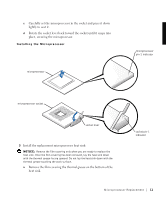
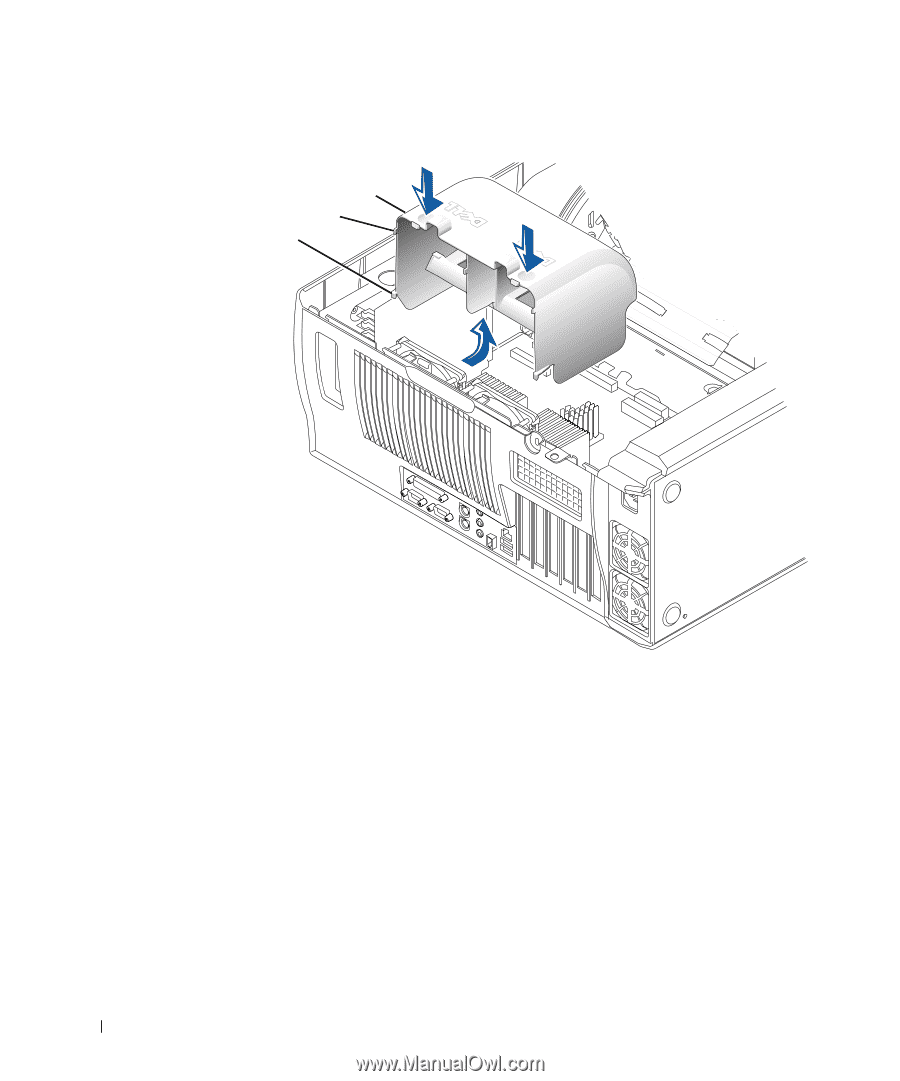
w w w.d el l.co m | su p po rt. d ell. com Removing the Microprocessor Airflow Shroud airflow shroud top anchor tabs (2) bottom anchor tabs (2) d Lift the airflow shroud out of the chassis. 2 Remove the microprocessor heat sink: a For each of the metal clips that secure the heat sink to the microprocessor, press down on the clip's latch to release it from the heat-sink retention base. Then lift the clip away from the heat sink. b Lift the heat sink away from the microprocessor. 8 Microprocessor Replacement
-
 1
1 -
2
-
3
-
4
-
 5
5 -
 6
6 -
 7
7 -
 8
8 -
 9
9 -
 10
10 -
 11
11 -
 12
12 -
 13
13 -
 14
14 -
 15
15 -
16
-
17
-
18
-
19
-
20
-
21
-
22
-
23
-
24
-
25
-
26
-
27
-
28
-
29
-
30
-
31
-
32
-
33
-
34
-
35
-
36
-
37
-
38
-
39
-
40
-
41
-
42
-
43
-
44
-
45
-
46
-
47
-
48
-
49
-
50
-
51
-
52
 |
 |
8
Microprocessor Replacement
www.dell.com | support.dell.com
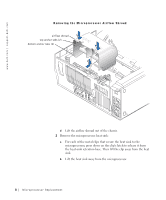
Removing the Microprocessor Airflow Shroud
d
Lift the airflow shroud out of the chassis.
2
Remove the microprocessor heat sink:
a
For each of the metal clips that secure the heat sink to the
microprocessor, press down on the clip±s latch to release it from
the heat-sink retention base. Then lift the clip away from the heat
sink.
b
Lift the heat sink away from the microprocessor.
airflow shroud
bottom anchor tabs (2)
top anchor tabs (2)