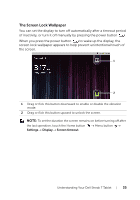
Dell Streak7 User's Manual (T-Mobile) - Page 38
Contacts settings - manual
 |
UPC - 884116065234
View all Dell Streak7 manuals
Add to My Manuals
Save this manual to your list of manuals |
Page 38 highlights
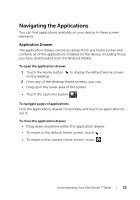
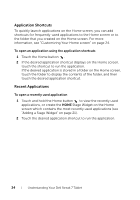
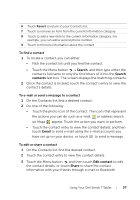
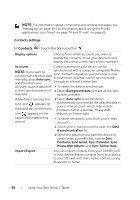
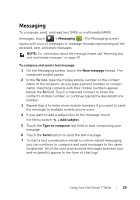
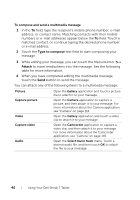
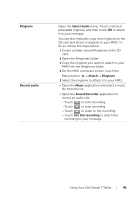
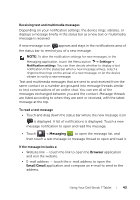
NOTE: For information about composing and sending messages, see "Messaging" on page 39. For information about using the e-mail applications, see "Gmail" on page 76 and "E-mail" on page 65. Contacts settings In Contacts , touch the Menu button . Display options Choose from which accounts you want to display the contacts, or set your device to only display the contacts who have phone numbers. Accounts Contacts stored on your device can be NOTE: If you want to synchronized with a computer using Dell Mobile synchronize individual data Sync; contacts stored on your personal e-mail manually, clear Auto-sync, and then from your account such as Gmail can be synchronized through an Internet connection. account, touch a data item • To select the data to synchronize: to start synchronization of 1 Select Background data to make all the sync that data. options available. While data is syncing, the sync icon appears on the status bar, and the sync icon appears on the 2 Select Auto-sync to let the device automatically synchronize the selected data in your e-mail account, which may include Contacts, Gmail, Calendar, Picasa Web Albums, or Twitter data. option of the data being synced. • To select the data to sync from your e-mail account: 1 Touch your e-mail account to open the Data & synchronization list. 2 Select the data that you want the device to synchronize automatically, such as Sync Contacts, Sync Gmail, Sync Calendar, Sync Picasa Web Albums, and Sync Twitter data. Import/Export You can import contacts from your SIM/SD card to your device, export contacts from your device to your SD card, and share visible contacts using Bluetooth or Gmail. 38 Using Your Dell Streak 7 Tablet
-
 1
1 -
2
-
3
-
4
-
5
-
6
-
7
-
8
-
9
-
10
-
11
-
12
-
13
-
14
-
15
-
16
-
17
-
18
-
19
-
20
-
21
-
22
-
23
-
24
-
25
-
26
-
27
-
28
-
29
-
30
-
31
-
32
-
 33
33 -
 34
34 -
 35
35 -
 36
36 -
 37
37 -
 38
38 -
 39
39 -
 40
40 -
 41
41 -
 42
42 -
 43
43 -
44
-
45
-
46
-
47
-
48
-
49
-
50
-
51
-
52
-
53
-
54
-
55
-
56
-
57
-
58
-
59
-
60
-
61
-
62
-
63
-
64
-
65
-
66
-
67
-
68
-
69
-
70
-
71
-
72
-
73
-
74
-
75
-
76
-
77
-
78
-
79
-
80
-
81
-
82
-
83
-
84
-
85
-
86
-
87
-
88
-
89
-
90
-
91
-
92
-
93
-
94
-
95
-
96
-
97
-
98
-
99
-
100
-
101
-
102
-
103
-
104
-
105
-
106
-
107
-
108
-
109
-
110
-
111
-
112
-
113
-
114
-
115
-
116
-
117
-
118
-
119
-
120
-
121
-
122
-
123
-
124
-
125
-
126
-
127
-
128
-
129
-
130
-
131
-
132
-
133
-
134
-
135
-
136
-
137
-
138
-
139
-
140
-
141
-
142
-
143
-
144
-
145
 |
 |