Epson C1100N User Guide - Page 281
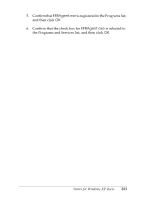
B. For EpsonNet WebManager Users, Exceptions, Add Program, Browse, COMMON, ENEZINST, eninst.exe, Start
 |
UPC - 010343606838
View all Epson C1100N manuals
Add to My Manuals
Save this manual to your list of manuals |
Page 281 highlights
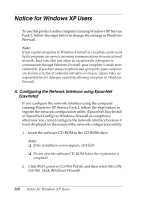
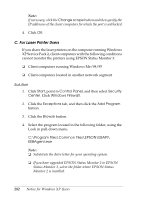
3. Click the Exceptions tab, and then click the Add Program button. 4. Click the Browse button. 5. Select the CD-ROM drive from the Look in pull-down menu. 6. Double-click the COMMON folder and then the ENEZINST folder. 7. Select eninst.exe, and then click Open. 8. Confirm that eninst.exe is registered in the Programs list, and then click OK. 9. Confirm that the check box for eninst.exe is selected in the Programs and Services list, and then click OK. Note: If you use EpsonNet Config to configure the network interface, add it to the Programs and Services list as an exception after installing it from the software CD-ROM. B. For EpsonNet WebManager Users If EpsonNet WebManager is installed on the computer running Windows XP Service Pack 2, make the following settings; otherwise the client computers cannot access EpsonNet WebManager. 1. Click Start, point to Control Panel, and then select Security Center. Click Windows Firewall. 2. Click the Exceptions tab, and then click the Add Port button. 3. Enter the name of the port in the Name text box and 8090 in the Port number text box, and then select the TCP radio button. Notice for Windows XP Users 281
-
 1
1 -
2
-
3
-
4
-
5
-
6
-
7
-
8
-
9
-
10
-
11
-
12
-
13
-
14
-
15
-
16
-
17
-
18
-
19
-
20
-
21
-
22
-
23
-
24
-
25
-
26
-
27
-
28
-
29
-
30
-
31
-
32
-
33
-
34
-
35
-
36
-
37
-
38
-
39
-
40
-
41
-
42
-
43
-
44
-
45
-
46
-
47
-
48
-
49
-
50
-
51
-
52
-
53
-
54
-
55
-
56
-
57
-
58
-
59
-
60
-
61
-
62
-
63
-
64
-
65
-
66
-
67
-
68
-
69
-
70
-
71
-
72
-
73
-
74
-
75
-
76
-
77
-
78
-
79
-
80
-
81
-
82
-
83
-
84
-
85
-
86
-
87
-
88
-
89
-
90
-
91
-
92
-
93
-
94
-
95
-
96
-
97
-
98
-
99
-
100
-
101
-
102
-
103
-
104
-
105
-
106
-
107
-
108
-
109
-
110
-
111
-
112
-
113
-
114
-
115
-
116
-
117
-
118
-
119
-
120
-
121
-
122
-
123
-
124
-
125
-
126
-
127
-
128
-
129
-
130
-
131
-
132
-
133
-
134
-
135
-
136
-
137
-
138
-
139
-
140
-
141
-
142
-
143
-
144
-
145
-
146
-
147
-
148
-
149
-
150
-
151
-
152
-
153
-
154
-
155
-
156
-
157
-
158
-
159
-
160
-
161
-
162
-
163
-
164
-
165
-
166
-
167
-
168
-
169
-
170
-
171
-
172
-
173
-
174
-
175
-
176
-
177
-
178
-
179
-
180
-
181
-
182
-
183
-
184
-
185
-
186
-
187
-
188
-
189
-
190
-
191
-
192
-
193
-
194
-
195
-
196
-
197
-
198
-
199
-
200
-
201
-
202
-
203
-
204
-
205
-
206
-
207
-
208
-
209
-
210
-
211
-
212
-
213
-
214
-
215
-
216
-
217
-
218
-
219
-
220
-
221
-
222
-
223
-
224
-
225
-
226
-
227
-
228
-
229
-
230
-
231
-
232
-
233
-
234
-
235
-
236
-
237
-
238
-
239
-
240
-
241
-
242
-
243
-
244
-
245
-
246
-
247
-
248
-
249
-
250
-
251
-
252
-
253
-
254
-
255
-
256
-
257
-
258
-
259
-
260
-
261
-
262
-
263
-
264
-
265
-
266
-
267
-
268
-
269
-
270
-
271
-
272
-
273
-
274
-
275
-
 276
276 -
 277
277 -
 278
278 -
 279
279 -
 280
280 -
 281
281 -
 282
282 -
 283
283 -
 284
284 -
 285
285 -
 286
286 -
287
-
288
-
289
-
290
-
291
-
292
-
293
-
294
 |
 |