Epson CX4800 Quick Reference Guide - Page 20
on the next screen., button, click it. Then click - stylus printer
 |
UPC - 010343855090
View all Epson CX4800 manuals
Add to My Manuals
Save this manual to your list of manuals |
Page 20 highlights
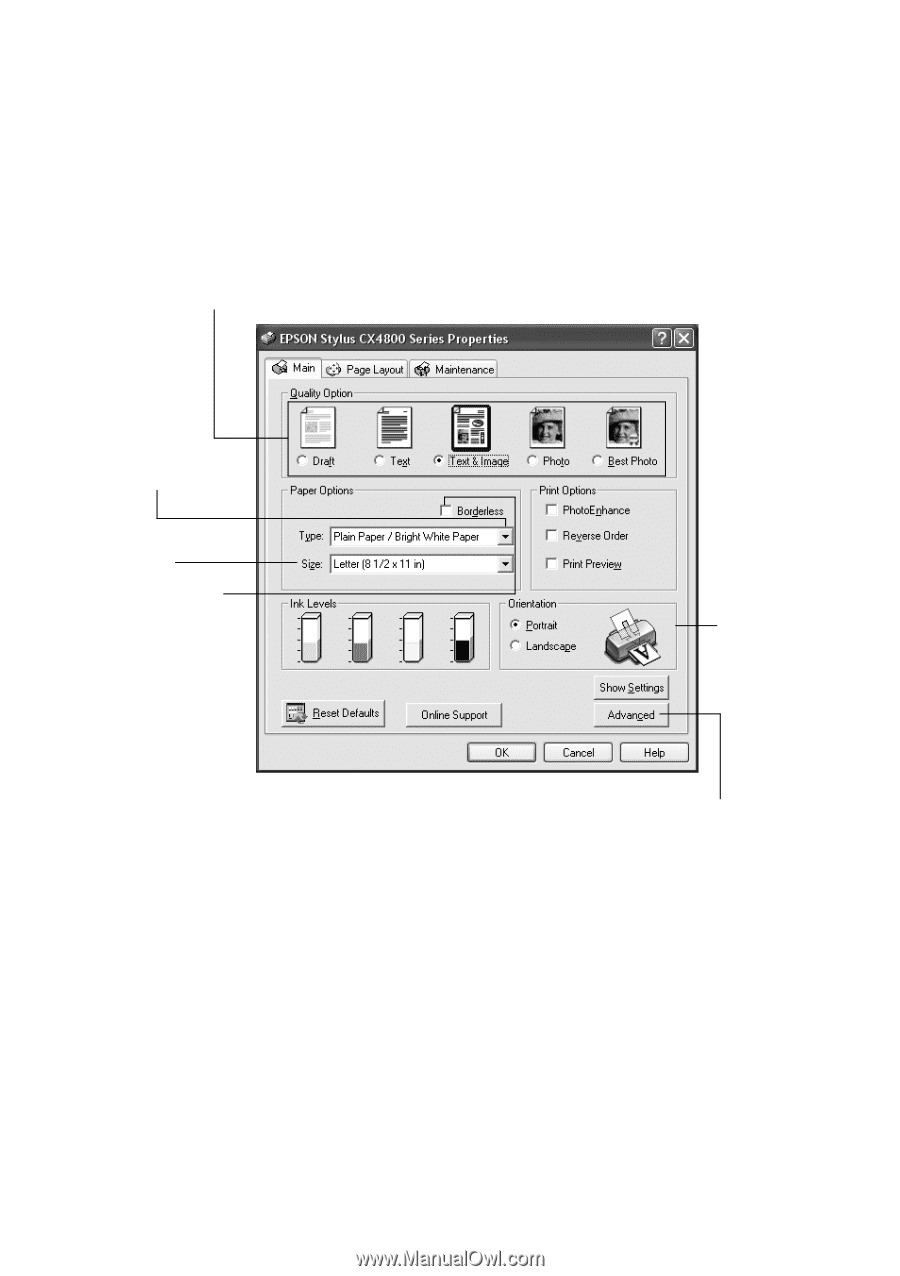
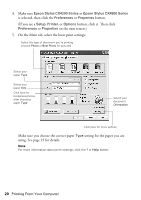
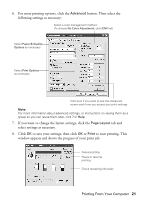
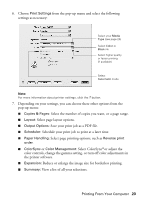
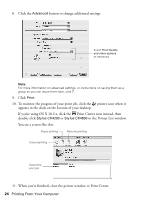
4. Make sure Epson Stylus CX4200 Series or Epson Stylus CX4800 Series is selected, then click the Preferences or Properties button. (If you see a Setup, Printer, or Options button, click it. Then click Preferences or Properties on the next screen.) 5. On the Main tab, select the basic print settings: Select the type of document you're printing (choose Photo or Best Photo for pictures) Select your paper Type Select your paper Size Click here for borderless photos, after choosing paper Type Select your document Orientation Click here for more options Make sure you choose the correct paper Type setting for the paper you are using. See page 25 for details. Note: For more information about print settings, click the ? or Help button. 20 Printing From Your Computer
-
 1
1 -
2
-
3
-
4
-
5
-
6
-
7
-
8
-
9
-
10
-
11
-
12
-
13
-
14
-
 15
15 -
 16
16 -
 17
17 -
 18
18 -
 19
19 -
 20
20 -
 21
21 -
 22
22 -
 23
23 -
 24
24 -
 25
25 -
26
-
27
-
28
-
29
-
30
-
31
-
32
-
33
-
34
-
35
-
36
-
37
-
38
-
39
-
40
-
41
-
42
-
43
-
44
-
45
-
46
-
47
-
48
 |
 |