Epson CX4800 Quick Reference Guide - Page 29
Maintaining Your Epson Stylus CX All-in-One, Checking the Print Head Nozzles and Ink - cartridges
 |
UPC - 010343855090
View all Epson CX4800 manuals
Add to My Manuals
Save this manual to your list of manuals |
Page 29 highlights
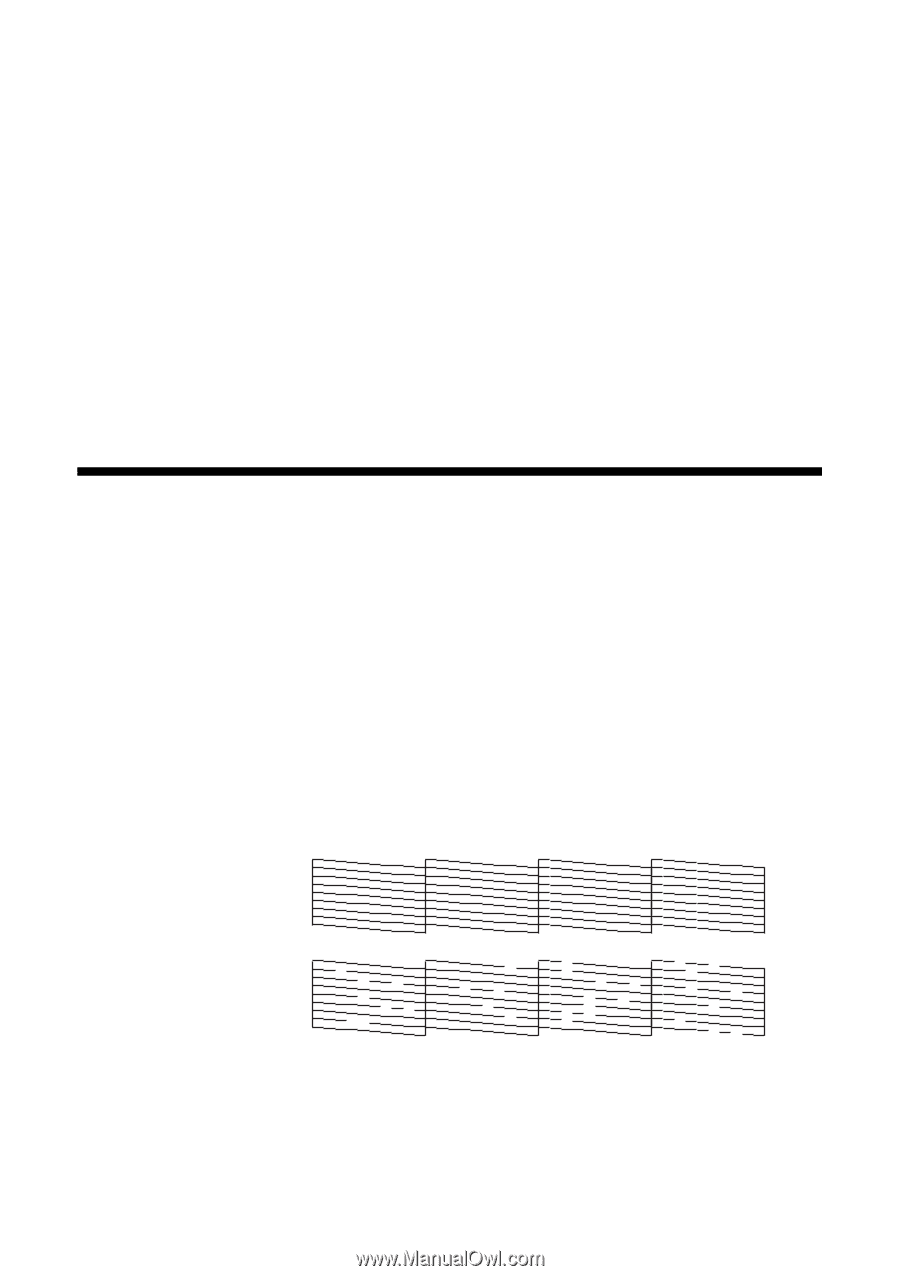
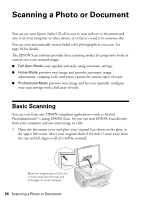
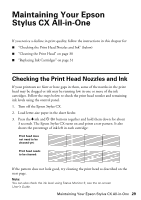
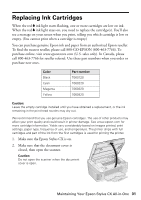
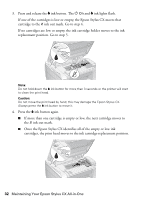
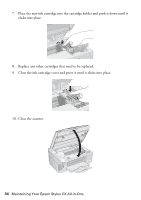
Maintaining Your Epson Stylus CX All-in-One If you notice a decline in print quality, follow the instructions in this chapter for: ■ "Checking the Print Head Nozzles and Ink" (below) ■ "Cleaning the Print Head" on page 30 ■ "Replacing Ink Cartridges" on page 31 Checking the Print Head Nozzles and Ink If your printouts are faint or have gaps in them, some of the nozzles in the print head may be clogged or ink may be running low in one or more of the ink cartridges. Follow the steps below to check the print head nozzles and remaining ink levels using the control panel. 1. Turn off the Epson Stylus CX. 2. Load letter-size paper in the sheet feeder. 3. Press the B ink and P On buttons together and hold them down for about 3 seconds. The Epson Stylus CX turns on and prints a test pattern. It also shows the percentage of ink left in each cartridge: Print head does not need to be cleaned yet: Print head needs to be cleaned: If the pattern does not look good, try cleaning the print head as described on the next page. Note: You can also check the ink level using Status Monitor 3; see the on-screen User's Guide. Maintaining Your Epson Stylus CX All-in-One 29
-
 1
1 -
2
-
3
-
4
-
5
-
6
-
7
-
8
-
9
-
10
-
11
-
12
-
13
-
14
-
15
-
16
-
17
-
18
-
19
-
20
-
21
-
22
-
23
-
 24
24 -
 25
25 -
 26
26 -
 27
27 -
 28
28 -
 29
29 -
 30
30 -
 31
31 -
 32
32 -
 33
33 -
 34
34 -
35
-
36
-
37
-
38
-
39
-
40
-
41
-
42
-
43
-
44
-
45
-
46
-
47
-
48
 |
 |