Epson CX7800 Photo Projects Made Easy Without Using a Computer - Page 7
Copying 4 X 6-inch Photos - stopped printing
 |
UPC - 010343855687
View all Epson CX7800 manuals
Add to My Manuals
Save this manual to your list of manuals |
Page 7 highlights
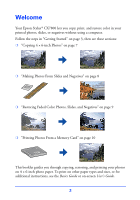
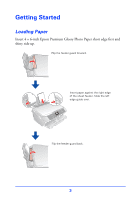
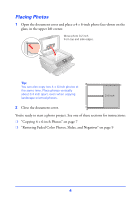
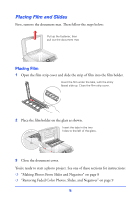
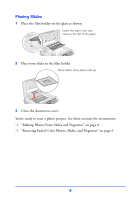
Copying 4 × 6-inch Photos Before you begin, load paper and place your photo on the glass as described in "Getting Started" on page 3. 1 Press the Film/Photo mode button. 2 If necessary, press the l or r Photo/Options button to select Copy Photograph. Tip: You can also restore faded color photos when copying. See "Restoring Faded Color Photos, Slides, and Negatives" on page 9 for details. 3 Press the x Start button to preview your photos on the LCD screen. 4 Press the l or r Photo/Options button to view your photos and the u or d Copies button to select the number of copies to print. 5 If necessary, press the paper type button to select Photo Paper and the paper size button to select 4"×6." 6 Press the x Start button to print your photo. Note: To cancel printing, press the y Stop/Clear Settings button. 7
-
 1
1 -
 2
2 -
 3
3 -
 4
4 -
 5
5 -
 6
6 -
 7
7 -
 8
8 -
 9
9 -
 10
10 -
 11
11 -
 12
12
 |
 |
