Epson CX7800 Photo Projects Made Easy Without Using a Computer - Page 9
Restoring Faded Color Photos, Slides, and Negatives
 |
UPC - 010343855687
View all Epson CX7800 manuals
Add to My Manuals
Save this manual to your list of manuals |
Page 9 highlights
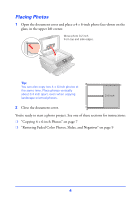
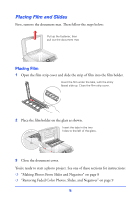
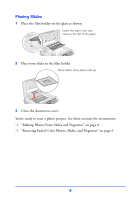
Restoring Faded Color Photos, Slides, and Negatives If you have faded color photos, negatives, or slides, your Epson Stylus CX7800 can bring them back to life using the color restoration feature. Before you begin, load paper and place your photo, negatives, or slides on the glass as described in "Getting Started" on page 3. 1 Press the Film/Photo mode button. 2 Press the l or r Photo/Options button to select one of these settings: ❍ Copy Photograph Restoration ON ❍ Negative Film Restoration ON ❍ Positive Film Restoration ON ❍ Slides Restoration ON ❍ B&W Negative Film Restoration ON 3 Press the x Start button preview your photos on the LCD screen. 4 Press the l or r Photo/Options button to view your photos and the u or d Copies button to select the number of copies to print. 5 If necessary, press the paper type button to select Photo Paper and the paper size button to select 4"×6." 6 Press the x Start button to print your photos. Note: To cancel printing, press the y Stop/Clear Settings button. 9
-
 1
1 -
2
-
3
-
 4
4 -
 5
5 -
 6
6 -
 7
7 -
 8
8 -
 9
9 -
 10
10 -
 11
11 -
 12
12
 |
 |
