Epson PowerLite 83c Product Information Guide - Page 5
Selecting the Image Source, What To Do If You See a Blank Screen, If you’re using a PC laptop: - lcd projector
 |
View all Epson PowerLite 83c manuals
Add to My Manuals
Save this manual to your list of manuals |
Page 5 highlights
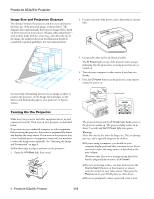
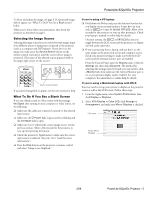
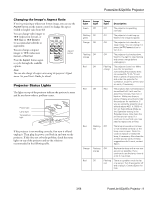
PowerLite 822p/83c Projector To focus and adjust the image, see page 6. If a projected image fails to appear, see "What To Do If You See a Blank Screen" below. When you're done with your presentation, shut down the projector as described on page 6. Selecting the Image Source Selecting the image source lets you switch between images input from different pieces of equipment connected to the projector (such as a computer and DVD player). If you don't see the image you want, press the Source Search button on the remote control or projector until the correct device image is projected. (The name of the selected source appears briefly in the upper right corner on the screen.) Source Search button If a projected image fails to appear, see the next section for help. What To Do If You See a Blank Screen If you see a blank screen or a blue screen with the message No Signal after turning on your computer or video source, try the following: ❏ Make sure the cables are connected correctly to the selected input source. ❏ Make sure the P Power light is green and not flashing and the A/V Mute slide is open. ❏ Make sure you've selected the correct image source; see the previous section. Allow a few seconds for the projector to sync up after pressing the button. ❏ Check the projector's Signal menu to make sure the correct input source is selected. (See your User's Guide for more information.) ❏ Press the Help button on the projector or remote control and select "Image is not displayed." If you're using a PC laptop: ❏ Hold down the Fn key and press the function key that lets you display on an external monitor. It may have an icon such as or it may be labelled CRT/LCD. Allow a few seconds for the projector to sync up after pressing it. Check your laptop's manual or online help for details. On most systems, the or CRT/LCD key lets you toggle between the LCD screen and the projector, or display on both at the same time. ❏ If you're projecting from a laptop, and you don't see the same image on the projection screen and computer screen, check your monitor settings to make sure both the LCD screen and the external monitor port are enabled. From the Control Panel, open the Display utility. Click the Settings tab, then click Advanced. The method for adjusting the settings varies by brand; you may need to click a Monitor tab, then make sure the external Monitor port is set as your primary display and/or enabled. See your computer's documentation or online help for details. If you're using a Macintosh laptop with OS X: You may need to set up your system to display on the projector screen as well as the LCD screen. Follow these steps: 1. From the Apple menu, select System Preferences, then click Display or Displays. 2. Select VGA Display or Color LCD, click Arrange or Arrangement, and make sure Mirror Displays is checked. Click here Select Mirror Displays 3/08 PowerLite 822p/83c Projector - 5
-
 1
1 -
 2
2 -
 3
3 -
 4
4 -
 5
5 -
 6
6 -
 7
7 -
 8
8 -
 9
9 -
 10
10 -
 11
11 -
12
-
13
-
14
-
15
 |
 |
