Epson V11H181020SC User's Guide
Epson V11H181020SC - MovieMate 25 WVGA LCD Projector Manual
 |
UPC - 010343856998
View all Epson V11H181020SC manuals
Add to My Manuals
Save this manual to your list of manuals |
Epson V11H181020SC manual content summary:
- Epson V11H181020SC | User's Guide - Page 1
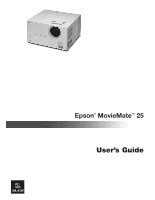
Epson® MovieMate™ 25 User's Guide CPD-20183 - Epson V11H181020SC | User's Guide - Page 2
Seiko Epson Corporation's operating and maintenance instructions. Seiko Epson Corporation shall not be liable for any damages or problems Epson Corporation. MovieMate is a trademark, PrivateLine is a registered trademark, and Extra Care, Epson Connection, and Epson Store are service marks of Epson - Epson V11H181020SC | User's Guide - Page 3
Registration and Warranty MovieMate 25 Parts MovieMate 25 Controls Optional Accessories About This Manual Getting More Information Playing Movies Choosing a Location Setting Up MovieMate Starting Your Movie Adjusting the Picture Adjusting the Sound Turning Off MovieMate Controlling Playback Pausing - Epson V11H181020SC | User's Guide - Page 4
Time 27 Playing Video CDs with Playback Control (PBC) 28 Customizing MovieMate 29 Setting Parental Controls 29 Locking the Tray 30 Saving Power 30 Changing Language Settings 30 Adjusting the Resume and On-Screen Guide Settings 31 Adjusting the Audio 31 Adjusting Picture Settings - Epson V11H181020SC | User's Guide - Page 5
MovieMate Cleaning the Lens Cleaning MovieMate's Case Cleaning and Replacing the Air Filter Replacing the Lamp Resetting the Lamp Timer Storing MovieMate Transporting MovieMate Problem Solving What To Do When the Lights Flash Solving MovieMate Operation Problems Solving Picture and Sound Problems - Epson V11H181020SC | User's Guide - Page 6
6 Contents - Epson V11H181020SC | User's Guide - Page 7
deep, vibrant images ■ JVC® DVD player with Dolby® Digital and DTS ■ Built-in JVC speakers with 2.1 stereo sound ■ An external 40 W subwoofer ■ Long-life bulb providing up to 3000 hours of use ■ Two-year home service warranty Registration and Warranty The Epson MovieMate 25 comes with a basic two - Epson V11H181020SC | User's Guide - Page 8
MovieMate 25 Parts Front View S-Video port Remote control receiver Push to open Intake vents Video port Main power switch Power inlet Audio inputs Subwoofer output port Lens cover Lens Optical audio-out port with protective plug Back View Lamp cover latch Speaker Exhaust vents Display - Epson V11H181020SC | User's Guide - Page 9
Power button DVD Tray Open/Close button Source button Stop button Volume buttons Play/Pause button Break button Image On/Off button Playback buttons Audio buttons DVD video buttons MovieMate adjustment buttons Remote Control Back Front Power switch Crossover knob Volume knob Subwoofer - Epson V11H181020SC | User's Guide - Page 10
at www.epson.ca or (800) 807-7766. About This Manual See the Quick Setup sheet to set up your MovieMate and connect it to the subwoofer. This book contains information on using MovieMate, plus maintenance instructions, troubleshooting tips, important safety instructions, specifications, and - Epson V11H181020SC | User's Guide - Page 11
Playing Movies Follow the instructions in this section to choose a location, play a movie, and control playback. Choosing a Location You can use your MovieMate just about anywhere-in the living room, bedroom, or even outside. You can use it with the subwoofer and screen, or simply project on a wall - Epson V11H181020SC | User's Guide - Page 12
within 10 feet of an electrical outlet, power strip, or extension cord. You will need two sockets: one for MovieMate, and one for the subwoofer. ■ For the best sound, make sure the subwoofer faces toward you and away from the screen. ■ Do not tilt the projector more than 5 degrees up or down. 12 - Epson V11H181020SC | User's Guide - Page 13
1. If your MovieMate came with a screen, set it up following the instructions included in the screen box. Make sure you read all the instructions to avoid damaging the screen. 2. Put the batteries in the remote control. 3. Connect the subwoofer as shown below. See the instructions included with the - Epson V11H181020SC | User's Guide - Page 14
4. Plug in MovieMate and the subwoofer. Note: For best results, make sure the subwoofer faces toward you and away from the screen. 5. Turn on the power switches on MovieMate and the subwoofer. 14 Playing Movies - Epson V11H181020SC | User's Guide - Page 15
Starting Your Movie 1. Press the button to open the DVD tray. 2. Insert your DVD and close the tray. If the movie doesn't start automatically, you may have to press the Power button or the Image On/Off button. 3. Adjust the volume if necessary. Playing Movies 15 - Epson V11H181020SC | User's Guide - Page 16
off to the side, use the horizontal and vertical lens shift dials to adjust its position. Note: The lens shift feature cannot move the image both horizontally and to the right or left at the same time. Up Left Right Down Lens shift dials 2. Rotate the zoom ring to reduce or enlarge the picture - Epson V11H181020SC | User's Guide - Page 17
knob on the back of the subwoofer. Turning Off MovieMate 1. To stop playing a DVD or CD, press control panel. on the remote control or on MovieMate's 2. Press Open/Close to open the tray. 3. Remove the disc and press again to close the tray. 4. Press Power. The lamp turns off. When it cools - Epson V11H181020SC | User's Guide - Page 18
and the subwoofer. 8. Before you put MovieMate away, attach the lens cover. Controlling Playback You can use the buttons on the remote control or the MovieMate control panel to pause, fast-forward, or replay sections of your video. You can also select items on a DVD menu by using the remote control - Epson V11H181020SC | User's Guide - Page 19
return to normal play. Skipping ■ To skip to the next chapter or track, press on the remote control. ■ To return to the start of the current chapter or track, press on the remote control. Replaying a Scene ■ To replay the previous 10 seconds, press (not available on all DVDs). Playing Movies 19 - Epson V11H181020SC | User's Guide - Page 20
DVD Menus Many DVDs set the toggle switch on the remote control to the -123 position. again, then . ■ To enter the number 25, press , then again, then . ■ subwoofer), press . The video continues to play. Press again to resume. ■ To temporarily stop the video (turn off the lamp and darken the screen - Epson V11H181020SC | User's Guide - Page 21
currently selected color mode is displayed on the screen. 2. Press repeatedly until the desired color mode darkened rooms. With this setting, the Epson cinema filter automatically provides more natural skin any sound from the built-in speakers or subwoofer. Warning: Make sure the volume is not set - Epson V11H181020SC | User's Guide - Page 22
22 Playing Movies - Epson V11H181020SC | User's Guide - Page 23
the next or previous track. ■ You can also select a specific track by using the numeric buttons, as described on page 20. To use the numeric buttons, you need to set the toggle switch on the remote control to the -123 position. ■ To turn off the lamp when playing music, press . Press to turn the - Epson V11H181020SC | User's Guide - Page 24
files on CDs or DVDs. See page 53 for information on the types of discs that are supported. When you insert a lamp when playing music files, press . ■ To turn the lamp back on, press again. ■ You can select program or random play following the instructions instructions. 24 Doing More with MovieMate - Epson V11H181020SC | User's Guide - Page 25
Using Advanced Playback Controls MovieMate 25 provides advanced features for looping videos or music tracks and selecting titles, chapters, or tracks. On DVDs that include subtitles, multiple languages, or multiple camera angles, you can use remote control for easy access to these features. - Epson V11H181020SC | User's Guide - Page 26
the toggle switch on the remote control back to the Func.position. ■ To cancel individual items on the program screen, press . ■ To on a music CD or chapters and titles on a DVD. 1. When the CD or DVD is stopped, press display window. repeatedly until you see power. 26 Doing More with MovieMate - Epson V11H181020SC | User's Guide - Page 27
of language codes, see page 55. Searching for a Specific Time You can search for a specific time to begin playing a video (from the start of DVDs or CDs. 1. Press twice. The on-screen menu is displayed: 2. Press until is highlighted, then press . 3. Set the toggle switch on the remote control - Epson V11H181020SC | User's Guide - Page 28
remote control back to the Func.- position. To cancel the on-screen menu, press . The video (or CD) begins playing from the location you specified. Playing Video CDs with Playback Control (PBC) When you insert a video CD with playback control the remote control screen when playing back without PBC, press twice - Epson V11H181020SC | User's Guide - Page 29
, and customize other features of MovieMate. Many of these settings are available through the Setup menus, which you can accesss by pressing the Setup button on the remote control (when a DVD is not playing). Setting Parental Controls You can set parental controls to prevent children from viewing - Epson V11H181020SC | User's Guide - Page 30
hold the button on the MovieMate control panel, then press . Power saving is disabled. Changing Language Settings You can use the Language Setup menu to change the default language for DVDs that allow you to make this selection. 1. When a DVD is not playing, press the button on the remote control - Epson V11H181020SC | User's Guide - Page 31
. To return to the previous menu level, press . to save it. For a list of language Adjusting the Resume and On-Screen Guide Settings 1. When a DVD is not playing, press the button on the remote control. 2. Press to highlight and display the OTHERS Setup menu. 3. Press to highlight RESUME or On - Epson V11H181020SC | User's Guide - Page 32
DVD LEVEL 1, DVD LEVEL 2, or DVD LEVEL 3 (the highest volume and default setting). ■ To adjust the settings in the Audio Setup menu, follow these steps: 1. Press the button on the remote control : Select the appropriate setting for the best DVD volume control. ■ ON: Dynamic range compression is on - Epson V11H181020SC | User's Guide - Page 33
example, camcorder input. SCREEN SAVER: Select whether to fade out a projected still image after 5 MovieMate is tilted up or down, you can also use this button to correct the non-rectangular "keystone" shape of the image. 1. Press the button on the remote control. You see the following on the screen - Epson V11H181020SC | User's Guide - Page 34
or to increase or decrease the setting. The settings are saved, even after you turn MovieMate off. Viewing and Adjusting Video Information You can use the Visual Info. button on the remote control to view the number of hours the lamp has been used, and to reset the timer after you install a new - Epson V11H181020SC | User's Guide - Page 35
L and R Audio inputs. When you view video from an external source, you can use most of MovieMate's controls, including adjusting color mode, volume, DVD level, and sound mode. You will need connection cables, which may be included with your external equipment, or may be purchased from an electronics - Epson V11H181020SC | User's Guide - Page 36
S-Video White Red Main power switch 2. Connect the power cords and plug in all the equipment. 3. Turn on MovieMate's main power switch. 4. Press the Power button on MovieMate or on the remote control. 5. Press the button on MovieMate or on the remote control. 6. Turn on the power to the connected - Epson V11H181020SC | User's Guide - Page 37
, make sure you close MovieMate's port compartment cover. Adjusting the Audio from External Devices You can use all of MovieMate's audio controls, as described on pages , make sure you replace the cap on the Optical Audio Out port and close MovieMate's port compartment cover. Doing More with - Epson V11H181020SC | User's Guide - Page 38
38 Doing More with MovieMate - Epson V11H181020SC | User's Guide - Page 39
, except as specifically explained in this User's Guide. The only parts you should replace are the lamp and air filter. If another part needs replacing, contact Epson or a qualified servicer (see page 52). Follow the instructions in this section to clean the lens and case, clean and replace the air - Epson V11H181020SC | User's Guide - Page 40
off the main power switch and unplug MovieMate. 2. Use a small vacuum cleaner designed for computers and other office equipment to clean the filters, as shown. If you cannot clean the removable filter or it is broken, you need to replace it. You can purchase a new filter (part # V13H13409) from an - Epson V11H181020SC | User's Guide - Page 41
. ■ The message Replace the lamp appears on the screen when you start projecting. Lamp light Caution: If you continue to use the lamp after you see the replacement indicators, the lamp is more likely to break. You can purchase a new lamp (part # V13H010L33) from an authorized Epson reseller. To - Epson V11H181020SC | User's Guide - Page 42
lamp cover. . 4. Loosen the two silver screws holding the lamp in place. (You can't remove these screws.) 5. Grasp the lamp as shown and pull it straight out. Note: The lamp 6. Gently insert the new lamp and tighten its screws. Caution: Don't touch the glass portion of the lamp with your bare hands; - Epson V11H181020SC | User's Guide - Page 43
into place. (MovieMate won't work if the lamp cover is loose.) After replacing the lamp, you need to reset the lamp timer, as described in the next section. Resetting the Lamp Timer 1. Press the button on the remote control. You see the following on the screen: 2. To reset the lamp timer, continue - Epson V11H181020SC | User's Guide - Page 44
the storage area are within the recommended range for the projector: 14 to 140 °F (-10 to 60 °C) and 10 to 90% relative humidity without condensation. ■ Attach the lens cover. ■ Remove the batteries from the remote control. ■ Package MovieMate in its original packaging or equivalent (as described in - Epson V11H181020SC | User's Guide - Page 45
explains how to interpret MovieMate's status lights, solve problems, and contact technical support. What To Do When the Lights Flash The lights on top of MovieMate indicate its status and let you know when a problem occurs. If all lights are off, make sure the power cable is connected correctly - Epson V11H181020SC | User's Guide - Page 46
and check the lamp. See page 43. If the lamp is broken, or the lights continue to flash after you turn the power back on, unplug the power cord and contact Epson. See page 52. The Power button is flashing orange and green and the warning light is flashing red. MovieMate has a problem with its fan - Epson V11H181020SC | User's Guide - Page 47
, wait until it stops flashing, then press the Power button. ■ Make sure the lens cover is off. ■ The image may be off the screen. Use the lens shift dials to adjust its position. See page 16. ■ Press the button on MovieMate or on the remote control to make sure the picture hasn't been turned off - Epson V11H181020SC | User's Guide - Page 48
work with MovieMate. Epson does not support any third-party remote controls. Solving Picture and Sound Problems The picture is blurry or out of focus. ■ Adjust the focus using the focus ring. See page 16. ■ Make sure the lens cover is off. ■ There may be dirt on the lens. Clean the lens as described - Epson V11H181020SC | User's Guide - Page 49
out the picture if a still image is projected for more than 5 minutes. See page 33. ■ If the picture looks darker than it used to, you may need to replace the lamp. See page 41. The colors on the screen don't look right. ■ Press the button on the remote control to select the best setting for your - Epson V11H181020SC | User's Guide - Page 50
(see pages 31 and 32). ■ Try using the Treble buttons on the remote control. There is no sound coming from the subwoofer. ■ Make sure you use the audio cable to connect the subwoofer to MovieMate. ■ Make sure the subwoofer's power switch is turned on. ■ Try adjusting the volume knob on the front of - Epson V11H181020SC | User's Guide - Page 51
Problems with External Video Equipment No picture appears on the screen. ■ Make sure the equipment is turned on. ■ Press the Power button on MovieMate or on the remote control. ■ Press the or Play button on the external equipment. ■ Make sure you don't have cables connected to both the S-video and - Epson V11H181020SC | User's Guide - Page 52
you call, please have the following information ready: ■ Product name (Epson MovieMate 25) ■ Product serial number (located on the bottom of MovieMate) ■ Description of the problem You can purchase lamps and accessories from an authorized Epson reseller. To find the nearest reseller, call 800-GO - Epson V11H181020SC | User's Guide - Page 53
safety instructions, and other important information about your MovieMate. MovieMate Specifications General Type of display Size of LCD panels Lens Resolution (native format) Brightness Contrast ratio Image size Projection distance Speakers Zoom ratio Lens shift (maximum) Optical aspect ratio DVD - Epson V11H181020SC | User's Guide - Page 54
Remote Control Range Approx. 23 feet (7 m) Battery AA × 2 Projection Lamp Type 135 W UHE (Ultra High Efficiency) Part number ELPLP33, V13H010L33 Lamp life Approx. 2000 hours (all color modes except Theatre Black) Approx. 3000 hours (Theatre Black mode) Note: Lamp life results vary - Epson V11H181020SC | User's Guide - Page 55
Tatar TW Twi UK Ukranian UR Urdu UZ Uzbek VI Vietnamese VO Volapuk WO Wolof XH Xhosa YO Yoruba ZU Zulu SL Slovenian SM Samoan Specifications and Notices 55 - Epson V11H181020SC | User's Guide - Page 56
ICs are used in this projector. Compatible Video Formats MovieMate supports analog TV (NTSC, PAL, SECAM) with composite video or S-Video connection. Images are automatically resized, if necessary, to display in the projector's native resolution. Signal TV (NTSC) TV (PAL, SECAM) Resolution 640 - Epson V11H181020SC | User's Guide - Page 57
when setting up and using MovieMate: ■ Except as specifically explained in this User's Guide, do not attempt to service this product yourself. Refer all servicing to qualified service personnel. ■ Never open any cover on the projector, except the lamp and filter covers. Dangerous electrical - Epson V11H181020SC | User's Guide - Page 58
under the following conditions: when the power cord or plug is damaged or frayed; if liquid has been spilled into the projector, or if it has been exposed to rain, water, or excessive humidity; if it doesn't operate normally when you follow the operating instructions, or if it exhibits a distinct - Epson V11H181020SC | User's Guide - Page 59
or other object. ■ Do not use the projector with the lens cover on; otherwise, the cover could melt and Users This equipment has been tested and found to comply with the limits for a Class B digital device, pursuant to Part the dealer or an experienced radio/TV technician for help. WARNING The - Epson V11H181020SC | User's Guide - Page 60
cause undesired operation. Trade Name: Epson Type of Product: Projector Model: EMP-TWD1 Marketing Name: MovieMate 25 Epson America, Inc. Limited Warranty What Is Covered: Epson America, Inc. ("Epson") warrants to the original end user customer that the Epson product enclosed with this limited - Epson V11H181020SC | User's Guide - Page 61
. This warranty does not cover consumables (e.g., fuses), other than lamps. This warranty does not apply to refurbished or reconditioned products, and this warranty is not transferable. Epson is not responsible for warranty service should the Epson label or logo or the rating label or serial number - Epson V11H181020SC | User's Guide - Page 62
62 Specifications and Notices - Epson V11H181020SC | User's Guide - Page 63
projection, 12, 53 Documentation, 10 Dolby digital, 32 Downmix, 32 DVD level, 31, 37 DVD tray, locking, 30 DVDs inserting, 15 menus, 20 playing, 11 to 21 Dynamic range compression, 32 E Electrical specifications, 54 Epson accessories, 10, 52 Home Service, 7 PrivateLine Support, 52 technical support - Epson V11H181020SC | User's Guide - Page 64
, 11 to 12 Locking DVD tray, 30 Looping, 25 M Maintenance, 39 to 43 Menus, 20 MovieMate choosing location, 11 to 12 cleaning, 39 control panel, 9 dimensions, 54 distance from screen, 12, 53 lights, 45 to 46 maintenance, 39 to 43 operation problems, 47 to 48 parts, 8 positioning, 11 to 12 speakers - Epson V11H181020SC | User's Guide - Page 65
, 48 Program play, 26 Projection distance, 12, 53 R Random play, 26 Registration, 7 Remote control batteries, 13 buttons, 9 problems, 48 Repeating scenes or tracks, 25 Replacing lamp, 41 to 43 Resetting lamp timer, 43 Resolution, 53 Resume setting, 31 S Safety approvals, 54 instructions, 57 to 59 - Epson V11H181020SC | User's Guide - Page 66
T Technical support, 10, 52 Temperature, MovieMate, 12, 40, 46 Time search, 27 Tint setting, 33 Transporting MovieMate, 44 Treble, adjusting, 37 TV video formats, 56 V VCR, connecting, 35 to 36 Ventilation, 12, 40, 46 Vents, 8 Vertical lens shift, 11, 16 Video camera, connecting, 35 to 36 Video - Epson V11H181020SC | User's Guide - Page 67
- Epson V11H181020SC | User's Guide - Page 68
Epson MovieMate 25 CPD-20183-R1 Printed in xxx
-
 1
1 -
 2
2 -
 3
3 -
 4
4 -
 5
5 -
 6
6 -
 7
7 -
8
-
9
-
10
-
11
-
12
-
13
-
14
-
15
-
16
-
17
-
18
-
19
-
20
-
21
-
22
-
23
-
24
-
25
-
26
-
27
-
28
-
29
-
30
-
31
-
32
-
33
-
34
-
35
-
36
-
37
-
38
-
39
-
40
-
41
-
42
-
43
-
44
-
45
-
46
-
47
-
48
-
49
-
50
-
51
-
52
-
53
-
54
-
55
-
56
-
57
-
58
-
59
-
60
-
61
-
62
-
63
-
64
-
65
-
66
-
67
-
68
 |
 |
Epson
®
MovieMate
™
25
User’s Guide