Fujitsu 5650C Operator's Guide - Page 30
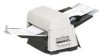
Document, 2 Side Guide, 3 Side Guide button both sides, 4 ADF Paper Chute - pick roller
 |
UPC - 097564306815
View all Fujitsu 5650C manuals
Add to My Manuals
Save this manual to your list of manuals |
Page 30 highlights
Introduction CONTENTS 1 NAMES AND FUNCTIONS OF PARTS 2 BASIC SCANNER OPERATION 2.1 Turning the scanner ON/OFF 2.2 Loading documents onto the ADF 2.3 Scanning documents 2.4 How to use the Scanner Driver 3 SCANNING VARIOUS TYPES OF DOCUMENTS 4 DAILY CARE 5 REPLACING CONSUMABLES 6 TROUBLESHOOTING 7 ONLINE SETUP 8 DOCUMENT SPECIFICATION OF ADF 9 OPTIONS 10 SCANNER SPECIFICATIONS Appendix 2.2 Loading documents onto the ADF (Continued from the previous page) 4. Adjust the side guides to the width of the documents. Move the side guides so that they contact both sides of the documents. If there is any space between the side guides and the edges of documents, the scanned image may be skewed. Set the documents face-down onto the ADF paper chute (so that the side to be scanned faces towards the ADF paper chute). (1) Document, (2) Side Guide, (3) Side Guide button (both sides), (4) ADF Paper Chute ATTENTION q Please remove clips and staples from the document. When double-feeds or miss picking occurred, reduce the quantity of document. q When loading small documents onto the ADF paper chute, be careful not to touch the Chute roller cover for it may open while scanning operation and your fingers may get caught. 1 | 2 | 3 | 4 | 5 | 6 All Rights Reserved, Copyright (C) PFU LIMITED 2004
-
 1
1 -
2
-
3
-
4
-
5
-
6
-
7
-
8
-
9
-
10
-
11
-
12
-
13
-
14
-
15
-
16
-
17
-
18
-
19
-
20
-
21
-
22
-
23
-
24
-
 25
25 -
 26
26 -
 27
27 -
 28
28 -
 29
29 -
 30
30 -
 31
31 -
 32
32 -
 33
33 -
 34
34 -
 35
35 -
36
-
37
-
38
-
39
-
40
-
41
-
42
-
43
-
44
-
45
-
46
-
47
-
48
-
49
-
50
-
51
-
52
-
53
-
54
-
55
-
56
-
57
-
58
-
59
-
60
-
61
-
62
-
63
-
64
-
65
-
66
-
67
-
68
-
69
-
70
-
71
-
72
-
73
-
74
-
75
-
76
-
77
-
78
-
79
-
80
-
81
-
82
-
83
-
84
-
85
-
86
-
87
-
88
-
89
-
90
-
91
-
92
-
93
-
94
-
95
-
96
-
97
-
98
-
99
-
100
-
101
-
102
-
103
-
104
-
105
-
106
-
107
-
108
-
109
-
110
-
111
-
112
-
113
-
114
-
115
-
116
-
117
-
118
-
119
-
120
-
121
-
122
-
123
-
124
-
125
-
126
-
127
-
128
-
129
-
130
-
131
-
132
-
133
-
134
-
135
-
136
-
137
-
138
-
139
-
140
-
141
-
142
-
143
-
144
-
145
-
146
-
147
-
148
-
149
-
150
-
151
-
152
-
153
-
154
-
155
-
156
-
157
-
158
-
159
-
160
-
161
 |
 |
