Garmin Vector 2S Owners Manual - Page 11
fēnix 2 Device Instructions, Pairing Vector with the fēnix 2 Device, Customizing the Data Fields - pedal set
 |
View all Garmin Vector 2S manuals
Add to My Manuals
Save this manual to your list of manuals |
Page 11 highlights
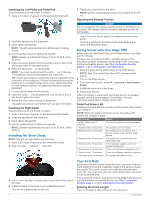
fēnix 2 Device Instructions Pairing Vector with the fēnix 2 Device Before you can pair ANT+ sensors, Bluetooth® wireless technology must be turned off. 1 Bring the fēnix device within 3 m of the sensor. NOTE: Stay 10 m away from other ANT+ sensors while pairing. 2 Hold MENU. 3 Select Settings > Sensors > Power. 4 Rotate the crank arm a few times. 5 Select your sensor. 6 Select Status > On. When the sensor is paired with your fēnix device, the sensor status changes from Searching to Connected. Customizing the Data Fields 1 Hold MENU. 2 Select Settings > Sensors > Activity > Bike > Data Pages. 3 Select Add Page, and follow the on-screen instructions to add a new page (optional). 4 Select a page to edit. 5 Select Edit to change the data fields. Entering the Crank Length The crank length is often printed on the crank arm. 1 Rotate the pedals a few times in order to activate Vector. 2 Hold MENU. 3 Select Settings > Sensors > Power > Crank Length. 4 Enter the crank length, and select Done. Forerunner® 920XT Device Instructions Pairing Vector with the Forerunner 920XT Device 1 Bring the Forerunner device within 3 m of the sensor. NOTE: Stay 10 m away from other ANT+ sensors while pairing. 2 Select > Settings > Sensors and Accessories > Add New > Power. 3 Rotate the crank arm a few times. 4 Select your sensor. When the sensor is paired, a message appears. Customizing the Data Fields 1 Select > Activity Settings > Data Screens. 2 Select a screen. 3 If necessary, select Status > On to enable the data screens. 4 If necessary, edit the number of data fields. 5 Select a data field to change it. Entering the Crank Length The crank length is often printed on the crank arm. 1 Rotate the pedals a few times in order to activate Vector. 2 Select > Settings > Sensors and Accessories. 3 Select your sensor. 4 Select Crank Length. 5 Enter the crank length. Forerunner 910XT Device Instructions Pairing Vector with the Forerunner 910XT Device 1 Bring the Forerunner device within 3 m of the sensor. NOTE: Stay 10 m away from other ANT+ sensors while pairing. 2 Select MODE > Settings > Bike Settings. 3 Select your bike. 4 Select ANT+Power > Yes > Restart Scan. 5 Rotate the crank arm a few times. When the sensor is paired, a message appears, and appears solid on the screen. Customizing the Data Fields 1 Select MODE > Settings > Bike Settings > Data Fields. 2 Select a page to edit. 3 If necessary, edit the number of data fields. 4 Select a data field to change it. Entering the Crank Length The crank length is often printed on the crank arm. 1 Rotate the pedals a few times in order to activate Vector. 2 Select MODE > Settings > Bike Settings. 3 Select your bike. 4 Select Bike Details > More > Crank Length. 5 Enter the crank length. Upgrading Vector 1 to Vector 2 NOTE: The upgrade process is similar for the Vector and Vector S systems. The Vector S system has a pedal-only installation for the right pedal. You should keep the left pedal parts separate from the right pedal parts. 1 Remove the existing pedals and pedal pods (Removing the Pedal Pod and Pedal, page 7). 2 Replace the existing cartridges (optional Replacing the Pedals and Cartridges, page 4. 3 Install the pedals, upgrade washers, and new pedal pods (Installing the Pedal, Upgrade Washer, and New Pedal Pod, page 8). 4 Check the LED status messages (Pedal Pod Status LED, page 2). 5 Update the Vector software to the latest version (Updating the Software Using Vector Updater, page 9). 6 Pair the Vector system to your Edge device and calibrate the Vector system (Your First Ride, page 2). Removing the Pedal Pod and Pedal NOTICE Do not attempt to pry the cable from the spindle. Use the pedal wrench to slowly loosen the pedal . À Á Upgrading Vector 1 to Vector 2 7
-
 1
1 -
2
-
3
-
4
-
5
-
 6
6 -
 7
7 -
 8
8 -
 9
9 -
 10
10 -
 11
11 -
 12
12 -
 13
13 -
 14
14 -
 15
15 -
 16
16
 |
 |
