Gateway 995 995 Series Server User Guide
Gateway 995 Manual
 |
View all Gateway 995 manuals
Add to My Manuals
Save this manual to your list of manuals |
Gateway 995 manual content summary:
- Gateway 995 | 995 Series Server User Guide - Page 1
Contents Index Search Gateway 995 Server user'sguide - Gateway 995 | 995 Series Server User Guide - Page 2
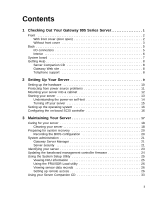
- Gateway 995 | 995 Series Server User Guide - Page 3
5 Interior 6 System board 7 Getting Help 8 Server Companion CD 8 Gateway Web site 8 Telephone support 8 2 Setting Up Your Server 9 Setting up the hardware 10 Protecting from power source problems 11 Mounting your server into a cabinet 12 Starting your server 13 Understanding the power-on - Gateway 995 | 995 Series Server User Guide - Page 4
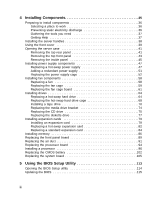
to work 36 Preventing static electricity discharge 36 Gathering the tools you need 37 Getting Help 37 Installing the server handles 38 Using the front cover 39 Opening the server case 41 Removing the top rear panel 41 Removing the top front panel 43 Removing the inside panel 45 Installing - Gateway 995 | 995 Series Server User Guide - Page 5
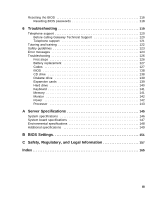
the BIOS 116 Resetting BIOS passwords 118 6 Troubleshooting 119 Telephone support 120 Before calling Gateway Technical Support 120 Telephone support 121 Tutoring and training 122 Safety guidelines 123 Error messages 124 Troubleshooting 126 First steps 126 Battery replacement 127 Codes - Gateway 995 | 995 Series Server User Guide - Page 6
iv - Gateway 995 | 995 Series Server User Guide - Page 7
1 Checking Out Your Gateway 995 Series Server Read this chapter to learn: ■ Where drives, ports, jacks, and controls are located ■ Where system board components are located ■ What help resources are available 1 - Gateway 995 | 995 Series Server User Guide - Page 8
Chapter 1: Checking Out Your Gateway 995 Series Server Front With front cover (door open) USB port Serial RJ-45 Front panel controls Tape drive bay Diskette drive CD drive Hot-swap hard drives Front panel controls Sleep button Server ID indicator Server ID button Reset button Power - Gateway 995 | 995 Series Server User Guide - Page 9
) CD drive (optional) Hot-swap hard drives Front panel controls: ports and buttons Non-maskable interrupt button Sleep USB port button Serial RJ-45 jack Server ID button Power button Reset button www.gateway.com 3 - Gateway 995 | 995 Series Server User Guide - Page 10
Chapter 1: Checking Out Your Gateway 995 Series Server Front panel controls: indicators Server ID indicator Hard drive activity indicator LAN 1 (10/100) indicator LAN 2 (1 Gb) indicator System fault indicator Power indicator 4 www.gateway.com - Gateway 995 | 995 Series Server User Guide - Page 11
power connections 32-bit and 64-bit PCI expansion Hot-swap 64-bit PCI expansion Back I/O connectors I/O connectors Parallel port LAN 1 (10/100 Mb) jack Server ID indicator PS/2 keyboard port Serial port PS/2 mouse port VGA port USB ports LAN 2 (10/100/1000 MB) jack www.gateway.com 5 - Gateway 995 | 995 Series Server User Guide - Page 12
Chapter 1: Checking Out Your Gateway 995 Series Server Interior Processor sockets Fans Memory board 32-bit and 64-bit PCI expansion Hot-swap 64-bit PCI expansion Hot-swap hard drive cage Power supply cage 6 www.gateway.com - Gateway 995 | 995 Series Server User Guide - Page 13
panel Fan signal CMOS battery SCSI channel A SCSI channel B IDE Diskette drive System board secondary power System board power control System board primary power www.gateway.com 7 - Gateway 995 | 995 Series Server User Guide - Page 14
you use your server. Visit the Gateway Web site at support.gateway.com for: ■ Technical documentation and product guides ■ Technical tips and support ■ Updated hardware drivers ■ Order status ■ Frequently asked questions (FAQs) Telephone support You can access a wide range of services through your - Gateway 995 | 995 Series Server User Guide - Page 15
2 Setting Up Your Server Read this chapter to learn how to: ■ Use your server safely ■ Install your server into a cabinet ■ Start and turn off your server ■ Set up your operating system 9 - Gateway 995 | 995 Series Server User Guide - Page 16
or wall outlet, do not attempt to modify the plug in any way. Use a UPS or wall outlet that is appropriate for the supplied AC power cords. ■ Avoid subjecting your server to extreme temperature changes. Do not expose your server to direct sunlight, heating ducts, or other heat-generating objects - Gateway 995 | 995 Series Server User Guide - Page 17
noise can also be a problem if your server is located near, or shares server. You cannot run your server for an extended period of time while using only the UPS. Be sure to use a UPS with surge protection. To buy a UPS, contact Gateway Technical Support, Gateway Sales, or visit accessories.gateway - Gateway 995 | 995 Series Server User Guide - Page 18
, follow the instructions included in the rail kit box. Warning To avoid injury when mounting the server into a cabinet, use only a mechanical lifting aid or another person to help lift the server. Do not try to move or lift the server by the handles on the power supplies. 12 www.gateway.com - Gateway 995 | 995 Series Server User Guide - Page 19
to the server, such as a monitor, keyboard, and mouse. 2 Press the power button. Power indicator Power button When the power indicator is... Green (steady on) Green (blinking) Off It means... The server is turned on. The server is in sleep mode. The server is turned off. www.gateway.com 13 - Gateway 995 | 995 Series Server User Guide - Page 20
checks the server memory and components. If POST finds any problems, the server displays error messages and emits audible beep codes. Write down any error messages that you see, then see "Error messages" on page 124 and "Codes" on page 127 for troubleshooting information. 14 www.gateway.com - Gateway 995 | 995 Series Server User Guide - Page 21
the operating system. You may lose data if you do not follow the correct procedure. To turn off the server: 1 See the operating system's documentation or online help for instructions on shutting down the operating system. Whenever possible, you should use the operating system's shut down procedure - Gateway 995 | 995 Series Server User Guide - Page 22
system because it was not already installed by Gateway, see the appropriate installation guide for instructions. For help in configuring your operating system, see "Telephone support" on page 120. Configuring the on-board SCSI controller Your server has an onboard SCSI controller with two channels - Gateway 995 | 995 Series Server User Guide - Page 23
3 Maintaining Your Server Read this chapter to learn how to: ■ Care for your server ■ Record the BIOS configuration ■ Manage your server and network 17 - Gateway 995 | 995 Series Server User Guide - Page 24
server to extreme temperatures. Do not expose your server server to overheat. Cleaning your server Keep your server clean and the vents free from dust. Cleaning tips ■ Always turn off your server server. ■ Use a damp, lint-free cloth to clean your server and other parts of your server server turned - Gateway 995 | 995 Series Server User Guide - Page 25
to remove dust and lint trapped under the keys. If you spill liquid on the keyboard, turn off your server and turn the keyboard upside down to let the liquid drain. Let the keyboard dry completely before trying to use the tape from the drive whenever the drive is not in use. www.gateway.com 19 - Gateway 995 | 995 Series Server User Guide - Page 26
start the server and attempt to fix the problem. See your operating system's documentation or online help for instructions on server set up and working. To record your BIOS configuration: 1 Print the appendix for "BIOS Settings" on page 151. 2 Restart your server, then press F2 when the Gateway - Gateway 995 | 995 Series Server User Guide - Page 27
multiple computers on a Windows™ network from a single window, then implement commands and policies across the network with a single action. With Gateway Server Manager, you can run system management tasks which are triggered by certain events or conditions. Printed documentation comes with the - Gateway 995 | 995 Series Server User Guide - Page 28
To remove a BIOS security password: 1 Restart your server, then press F2 when the Gateway logo screen appears during startup. The BIOS Setup utility opens. 2 Select also be cleared using jumpers on the system board. For instructions, see "Resetting BIOS passwords" on page 118. 22 www.gateway.com - Gateway 995 | 995 Series Server User Guide - Page 29
server. For the Server ID indicators to turn on, the server does not need to be turned on, but it does need to be plugged in. Your server has one indicator on the front, and one indicator on the back. To turn on the server indicator: 1 Press the server ID button. The two blue server ID - Gateway 995 | 995 Series Server User Guide - Page 30
performs several system management functions such as: ■ Monitoring server components and sensors ■ Managing nonvolatile storage for the system reset). You should update the BMC firmware only when Gateway Technical Support has instructed you to update it. To update the BMC firmware: 1 Download the - Gateway 995 | 995 Series Server User Guide - Page 31
lets you: ■ View Field Replaceable Unit (FRU) information ■ View sensor data records ■ Set up the server to send alerts for platform events ■ Set up the server for out-of-band (OOB) access through Gateway Server Manager Important The SSU does not work within a DOS window running under an operating - Gateway 995 | 995 Series Server User Guide - Page 32
server's FRU and SDR information. To use the FRU/SDR Load utility: 1 Boot your server from the Server Records (SDR): 1 Boot your server from the Server Companion CD, then select System set up the server so you can perform system management tasks access: 1 Boot your server from the Server Companion CD, then select - Gateway 995 | 995 Series Server User Guide - Page 33
step, complete the IP addressing boxes: ■ Host IP Address-The IP address of this server. ■ Gateway IP Address-The IP address of the router for this server. ■ Subnet Mask-The IP address for the server's subnet. The server uses this to decide if the alert destination is on the same subnet. 8 Click - Gateway 995 | 995 Series Server User Guide - Page 34
Always Active-The EMP is available at any time. ■ Preboot-The EMP is available only when the server is powered down or is running POST during startup. After the operating system is loaded, a connection cannot NMI. ■ Disabled-The remote system has full control of the server. 28 www.gateway.com - Gateway 995 | 995 Series Server User Guide - Page 35
to return to the PEM window. Setting up paging alerts To set up paging alerts: 1 Boot your server from the Server Companion CD, then select System Setup Utility from the menu. The System Setup Utility starts. 2 Install save, the actual string saved is displayed in the edit box. www.gateway.com 29 - Gateway 995 | 995 Series Server User Guide - Page 36
Chapter 3: Maintaining Your Server 6 Click Save to save the changes. 7 Click Close to return to the PEM window. 8 In the PEM window, click Configure PEP. 9 Click Send Alert. 17 Click Save to save the configuration. 18 Click Close to return to the Platform Event Manager window. 30 www.gateway.com - Gateway 995 | 995 Series Server User Guide - Page 37
step, complete the IP addressing boxes: ■ Host IP Address-The IP address of this server. ■ Gateway IP Address-The IP address of the router for this server. ■ Subnet Mask-The IP address for the server's subnet. The server uses this to decide if the alert destination is on the same subnet. 8 In the - Gateway 995 | 995 Series Server User Guide - Page 38
Chapter 3: Maintaining Your Server 10 In the BMC LAN Alerting Actions window, move the events that you want to generate an alert to the Enabled column and move all to the BMC LAN Configuration window. 13 Click Save to save the changes. 14 Click Close to return to the PEM window. 32 www.gateway.com - Gateway 995 | 995 Series Server User Guide - Page 39
Using your Server Companion CD Using your Server Companion CD Use the Server Companion CD to access file utilities, drivers, and documentation for your server and its components. For instructions, see Using Your Server Companion CD. www.gateway.com 33 - Gateway 995 | 995 Series Server User Guide - Page 40
Chapter 3: Maintaining Your Server 34 www.gateway.com - Gateway 995 | 995 Series Server User Guide - Page 41
4 Installing Components Read this chapter to learn how to: ■ Open and close the server case ■ Install drives ■ Install expansion cards and memory modules ■ Install processors and the processor board ■ Replace the power supply ■ Replace the SCSI backplane ■ Replace the - Gateway 995 | 995 Series Server User Guide - Page 42
■ Has a stable surface on which to set your server ■ Has enough room to place all of your server parts ■ Is near a grounded outlet so you can test your server after installation ■ Is near a telephone (in case you need help from Gateway Technical Support). The telephone must be directly connected to - Gateway 995 | 995 Series Server User Guide - Page 43
Gathering the tools you need Some tools and supplies that you may need to work on your server are: ■ A notebook to take notes ■ A Phillips screwdriver ■ A small flat-blade performing any of these procedures, contact Gateway Technical Support. For more information, see "Getting Help" on page 8. www - Gateway 995 | 995 Series Server User Guide - Page 44
while sliding it out of the cabinet for servicing. Installing the server handles is usually performed as part of the procedure for installing the server into a cabinet. For more information, see the Gateway 995 Series Server Rack Installation Guide. To install the handles: 1 Line up the screw holes - Gateway 995 | 995 Series Server User Guide - Page 45
cover Remove the front cover to access hot-swap power supplies. To install the front cover: ■ Line up the cover with the front of the server, then press it into place. To remove the front cover: ■ Grasp the cover and pull it away from the - Gateway 995 | 995 Series Server User Guide - Page 46
the front cover door: 1 Grasp the finger hold on the left side of the door, then swing the door open to the right. 40 www.gateway.com - Gateway 995 | 995 Series Server User Guide - Page 47
the server with all panels in place, except while replacing hot-swap components. Operating the server without the panel in place will cause the server to always install all panels before running the server for an extended time. Operating the server for longer than five minutes without the panels in - Gateway 995 | 995 Series Server User Guide - Page 48
To remove the top rear panel: 1 Loosen the two screws that secure the panel to the server. Screws 2 Slide the panel toward the back of the server about one inch, then lift the panel away from the server. 3 To remove the inside panel, see "Removing the inside panel" on page 45. 42 www - Gateway 995 | 995 Series Server User Guide - Page 49
unplug the power cords and all other cables connected to the server. Warning This server has two power cords. To disconnect internal AC power, you must unplug both power cords. 2 Remove the front cover, if installed. For instructions, see "Using the front cover" on page 39. www.gateway.com 43 - Gateway 995 | 995 Series Server User Guide - Page 50
Chapter 4: Installing Components 3 Remove the three screws that secure the panel to the server. Screws 4 Press down slightly on the panel while sliding it toward the front of the server about one inch, then lift the panel away from the server. 44 www.gateway.com - Gateway 995 | 995 Series Server User Guide - Page 51
server, then unplug the power cords and all other cables connected to the server. Warning This server has two power cords. To disconnect internal AC power, you must unplug both power cords. 2 Remove the top rear panel. For instructions, see "Removing the top rear panel" on page 41. www.gateway - Gateway 995 | 995 Series Server User Guide - Page 52
Chapter 4: Installing Components 3 Loosen the two screws that secure the inside panel to the server. Screws 4 Lift the panel away from the server. 46 www.gateway.com - Gateway 995 | 995 Series Server User Guide - Page 53
a qualified computer technician should service the power supplies. Your server comes with 3-wire AC power cords fitted with the correct plug style for your region. If this plug does not match the connector on your UPS or wall outlet, do not attempt to modify the plug in any way. Use a UPS or wall - Gateway 995 | 995 Series Server User Guide - Page 54
a power supply problem, you can also examine the cluster of three LEDs to the right of the power supplies. ■ The top LED indicates the left power supply is connected to AC power and is functioning correctly. ■ The center LED indicates a center power supply is installed and the server is operating in - Gateway 995 | 995 Series Server User Guide - Page 55
Installing power supply components 5 Loosen the screw at the bottom of the failed power supply. Only two power supplies are shown here. Screws 6 Rotate the handle of the failed power supply outward until you can grab onto it securely with your hand. www.gateway.com 49 - Gateway 995 | 995 Series Server User Guide - Page 56
the vacant slot, then press it all the way in until it is flush with the front of the server. Warning If you are not installing a replacement module, you must install a power supply slot cover to maintain correct air flow and cooling. For instructions, see "Adding a redundant power supply" on page - Gateway 995 | 995 Series Server User Guide - Page 57
vacant slot, then press it all the way in until it clicks into place. 4 If you have added a third power supply to the server for the first time, you must run the FRU/SDR utility for the server to use it as a redundant power supply. For instructions on running the FRU/SDR utility, see - Gateway 995 | 995 Series Server User Guide - Page 58
service technician. To replace the power supply cage: 1 Follow the instructions in "Preventing static electricity discharge" on page 36. Make sure that you turn off the server instructions, see "Replacing a cards. For instructions, see "Replacing board. For instructions, see "Replacing - Gateway 995 | 995 Series Server User Guide - Page 59
8 Remove the screw that secures the AC power plug module to the back of the server. Screw 9 Remove the plug module from the back of the server by lifting it up ¼ inch, then pulling it toward the front of the server. Let the module hang over the side of the server. www.gateway.com 53 - Gateway 995 | 995 Series Server User Guide - Page 60
Chapter 4: Installing Components 10 Remove the four screws that secure the electronics bay to the server. Screws Screws 11 Slide the electronics bay toward the back of the server until the bay is completely removed. 54 www.gateway.com - Gateway 995 | 995 Series Server User Guide - Page 61
Installing power supply components 12 Remove the plug module's cable from the cable guides inside the server. Cable guides 13 Remove the four screws (two on each side) that secure the front support bracket to the server. Screws Screws www.gateway.com 55 - Gateway 995 | 995 Series Server User Guide - Page 62
Components 14 Remove the support bracket by sliding it toward the front of the server. 15 Loosen the captive screw that secures the power supply cage to the server. Screw Warning Make sure that all cables from the power supply cage are disconnected from server components. 56 www.gateway.com - Gateway 995 | 995 Series Server User Guide - Page 63
screws that secure the bracket to the server. 19 Insert the plug module's cable into the cable guides inside the server. 20 Insert the electronics bay part-way into the back of the server, keeping the plug module in the reinstall all power supplies into the power supply cage. www.gateway.com 57 - Gateway 995 | 995 Series Server User Guide - Page 64
correct air flow and cooling, never remove a fan without immediately installing a replacement. To replace a hot-swap fan: 1 Remove the top rear panel. For instructions, see "Removing the top rear panel" on page 41. 2 Identify the failed fan. The fan fault indicator points to the failed fan while - Gateway 995 | 995 Series Server User Guide - Page 65
the instructions in "Preventing static electricity discharge" on page 36. Make sure that you turn off the server, then unplug the power cords and all other cables connected to the server. 2 Remove the top rear panel. For instructions, see "Removing the top rear panel" on page 41. www.gateway.com - Gateway 995 | 995 Series Server User Guide - Page 66
Chapter 4: Installing Components 3 Pull each fan out of the server. 4 Loosen the two captive screws on each end of the fan cage. Screws 60 www.gateway.com - Gateway 995 | 995 Series Server User Guide - Page 67
the instructions in "Preventing static electricity discharge" on page 36. Make sure that you turn off the server, then unplug the power cords and all other cables connected to the server. 2 Remove the fan cage from the server. For instructions, see "Replacing the fan cage" on page 59. www.gateway - Gateway 995 | 995 Series Server User Guide - Page 68
Chapter 4: Installing Components 3 Remove the two screws that secure the fan cage board housing to the fan cage. Screws 4 Lift the board housing away from the fan cage. 62 www.gateway.com - Gateway 995 | 995 Series Server User Guide - Page 69
housing onto the fan cage. 9 Reinstall the four screws that secure the board housing to the fan cage. 10 Reinstall the fan cage into the server, then reinstall each of the six fans. 11 Reinstall the top rear panel. www - Gateway 995 | 995 Series Server User Guide - Page 70
this procedure to add or replace hard drives in the hot-swap bay. Your server supports as many as five 1-inch high 3.5-inch SCA SCSI hard drives. You can purchase additional SCSI drives through your Gateway Sales or Technical Support representative. Drive 4 Drive 3 Drive 0 Drive 1 Drive 2 64 www - Gateway 995 | 995 Series Server User Guide - Page 71
must conform to Gateway standards. To replace a hot-swap hard drive: 1 Open the front cover door (if cover is installed). Caution Before you remove a failed drive, use the appropriate software and utilities installed on the server to stop all activity on the failed drive. Instructions for using - Gateway 995 | 995 Series Server User Guide - Page 72
Chapter 4: Installing Components 2 Identify the failed hard drive. A failed drive's status indicator is yellow. Hard drive status indicators 3 Press the green release button on the hot-swap tray lever, then swing the lever open all the way. 66 www.gateway.com - Gateway 995 | 995 Series Server User Guide - Page 73
4 Pull the tray straight out of the server. Installing drives 5 If you are replacing a hard drive, remove the four screws that secure the old hard drive to the drive tray, then remove the drive from the tray. Screw Screw - OR - Screw Screw www.gateway.com 67 - Gateway 995 | 995 Series Server User Guide - Page 74
in "Preventing static electricity discharge" on page 36. Make sure that you turn off the server, then unplug the power cords and all other cables connected to the server. 2 Remove the front cover, if installed. For instructions, see "To remove the front cover:" on page 39. 68 www.gateway.com - Gateway 995 | 995 Series Server User Guide - Page 75
panel. For instructions, see "Removing the top front panel" on page 43. 5 Disconnect the SCSI ribbon cable and the three power cables from the back of the cage. 6 Press the tab on each side of the drive cage with a small, flat tool such as a scribe or a flat screwdriver. www.gateway.com 69 - Gateway 995 | 995 Series Server User Guide - Page 76
instructions in "Preventing static electricity discharge" on page 36. Make sure that you turn off the server, then unplug the power cords and all other cables connected to the server. 2 Remove the front cover, if installed. For instructions, see "Using the front cover" on page 39. 70 www.gateway - Gateway 995 | 995 Series Server User Guide - Page 77
Installing drives 3 Press the tabs on each side of the tape drive bay's spacer, then pull the spacer out of the server. www.gateway.com 71 - Gateway 995 | 995 Series Server User Guide - Page 78
Chapter 4: Installing Components 4 Remove the two screws that secure each slide rail to the spacer, then remove the slide rails. Screws Screws 5 Attach each rail onto the tape drive using tape drive mounting screws shipped with your server. Screws Screws 72 www.gateway.com - Gateway 995 | 995 Series Server User Guide - Page 79
58. 9 Remove the fan cage. For instructions, see "Replacing the fan cage" on page 59. 10 Plug a power cable and an SCSI cable into the back of the tape drive. 11 Reinstall the fan cage, then reinstall all six fans. 12 Reinstall the top front panel onto the server. www.gateway.com 73 - Gateway 995 | 995 Series Server User Guide - Page 80
Remove the fans and the fan cage. For instructions, see "Replacing a fan" on page 58 and "Replacing the fan cage" on page 59. 5 Unplug the power and data cables that connect to the media drive bracket. 6 Remove the screw that secures the media drive bracket to the server. Screw 74 www.gateway.com - Gateway 995 | 995 Series Server User Guide - Page 81
instructions in "Preventing static electricity discharge" on page 36. Make sure that you turn off the server, then unplug the power cords and all other cables connected to the server. 2 Remove the media drive bracket. For instructions, see "Replacing the media drive bracket" on page 74. www.gateway - Gateway 995 | 995 Series Server User Guide - Page 82
bracket, then press the drive down onto the bracket until it snaps into place. Screw hole Alignment pin 5 Reinstall the media drive bracket into the server. For instructions, see "Replacing the media drive bracket" on page 74. 76 www - Gateway 995 | 995 Series Server User Guide - Page 83
"Preventing static electricity discharge" on page 36. Make sure that you turn off the server, then unplug the power cords and all other cables connected to the server. 2 Remove the media drive bracket. For instructions, see "Replacing the media drive bracket" on page 74. 3 Remove the CD drive. For - Gateway 995 | 995 Series Server User Guide - Page 84
lock the ribbon cable into place by pressing on the locking bar tabs. 9 Reinstall the CD drive, then reinstall the media drive bracket into the server. For instructions, see "Replacing the media drive bracket" on page 74. 78 www - Gateway 995 | 995 Series Server User Guide - Page 85
" on page 36. Make sure that you turn off the server, then unplug the power cords and all other cables connected to the server. 2 If you are installing a card into a standard PCI card slot, remove the inside panel. For instructions, see "Removing the inside panel" on page 45. www.gateway.com 79 - Gateway 995 | 995 Series Server User Guide - Page 86
Chapter 4: Installing Components 3 Press down on the card slot's locking clip, then rotate the clip out of the way toward the back of the server. 4 Push out the card slot's EMI shield. 80 www.gateway.com - Gateway 995 | 995 Series Server User Guide - Page 87
into the card slot. If the card is a full-length card, make sure that the end of the card slides into the full-length card guide next to the fan cage. 6 From the back of the server, press the card's locking clip in until it clicks into place. 7 Reinstall all panels. www - Gateway 995 | 995 Series Server User Guide - Page 88
be replaced by an identical card. If the card is a different type, turn off the server and disconnect power before changing cards. To replace a hot-swap expansion card: 1 Remove the top rear panel. For instructions, see "Removing the top rear panel" on page 41. 2 Identify the failed expansion card - Gateway 995 | 995 Series Server User Guide - Page 89
the card. 5 Remove the card from the server. 6 Insert the new card into the same slot you removed the old card from. If the card is a full-length card, make sure that the end of the card slides into the full-length card guide next to the fan cage. www.gateway.com 83 - Gateway 995 | 995 Series Server User Guide - Page 90
and all other cables connected to the server. 2 Remove the inside panel. For instructions, see "Removing the inside panel" on page 45. 3 Disconnect any cables attached to the card. 4 Press down on the expansion card's locking clip, then rotate the clip up and out of the way. 84 www.gateway.com - Gateway 995 | 995 Series Server User Guide - Page 91
server. 6 Insert the new card into the same slot you removed the old card from. If the card is a full-length card, make sure that the end of the card slides into the full-length card guide next to the fan cage. 7 From the back of the server, press the card's locking - Gateway 995 | 995 Series Server User Guide - Page 92
Your server supports from 512 is installed incorrectly, your server will not start. Partially filled banks are ignored by the server. For the most reliable off the server, then unplug the power cords and all other cables connected to the server. 2 Remove the top rear panel. For instructions, see - Gateway 995 | 995 Series Server User Guide - Page 93
Grasp the top of the memory board at the blue tabs, then pull the memory board out of the server. 5 Lay the memory board onto a flat surface before removing or installing memory modules. For more information on of the memory slot should secure the memory module automatically. www.gateway.com 87 - Gateway 995 | 995 Series Server User Guide - Page 94
the server. Make sure that the edges of the board slide into the memory board guides inside the server. Memory board guides 9 Reinstall all panels. 10 Turn on the server, then make sure that the operating system completely loads. If you receive an error, see "Memory" on page 141. 88 www.gateway - Gateway 995 | 995 Series Server User Guide - Page 95
from the front panel of your server. To replace the front panel board: 1 Follow the instructions in "Preventing static electricity discharge" turn off the server, then unplug the power cords and all other cables connected to the server. 2 Remove the top rear panel. For instructions, see "Removing - Gateway 995 | 995 Series Server User Guide - Page 96
Components 5 Remove the screw that secures the front panel board to the server. Screw 6 Pull the board away from the server by prying on the side closest to the standoff. Standoff 7 Insert the new front panel board behind the board guide slot on the right edge of the front panel bay. Board - Gateway 995 | 995 Series Server User Guide - Page 97
the server. 2 Remove the top rear panel. For instructions, see "Removing the top rear panel" on page 41. 3 Remove the inside panel. For instructions, see "Removing the inside panel" on page 45. 4 Remove the screw that secures the AC power plug module to the back of the server. Screw www.gateway.com - Gateway 995 | 995 Series Server User Guide - Page 98
server by lifting it up 1/4 inch, then pulling it toward the front of the server. Let the module hang over the side of the server. a 6 Remove the memory board from the server. For instructions, see "Installing memory" on page 86. 7 Press the two air duct retention clips together. 92 www.gateway - Gateway 995 | 995 Series Server User Guide - Page 99
Replacing the air duct 8 While holding the retention clips together, rotate the air duct away from the server, then lift off the air duct. 9 Insert the front of the new air duct into the server, then rotate the back of the air duct downward until it snaps into place. 10 Reinstall the AC - Gateway 995 | 995 Series Server User Guide - Page 100
in "Preventing static electricity discharge" on page 36. Make sure that you turn off the server, then unplug the power cords and all other cables connected to the server. 2 Remove the top rear panel. For instructions, see "Removing the top rear panel" on page 41. 3 Remove the inside panel. For - Gateway 995 | 995 Series Server User Guide - Page 101
Replacing the processor board 6 Tilt the processor board up and remove it from the server. 7 Insert the new processor board into the slots on the system board bracket, then lower the processor same time. 9 Reinstall the air duct and AC power plug module. 10 Reinstall all panels. www.gateway.com 95 - Gateway 995 | 995 Series Server User Guide - Page 102
the most current version of the BIOS. For instructions, see "Updating the BIOS" on page 115. Important You must have a processor in socket 1, or your server will not start. If you install multiple processors . If you do not have the tool, you can purchase one from Gateway. 96 www.gateway.com - Gateway 995 | 995 Series Server User Guide - Page 103
Preventing static electricity discharge" on page 36. 3 Remove the top rear panel and the inside panel. For instructions, see "Removing the top rear panel" on page 41 and "Removing the inside panel" on page 45 , the processor should still be undamaged. Continue with the procedure. www.gateway.com 97 - Gateway 995 | 995 Series Server User Guide - Page 104
Chapter 4: Installing Components 5 If you are adding processors, add them in the order of the numbered processor sockets. Socket 4 Socket 1 Socket 3 Socket 2 6 If you are adding a processor to sockets 3 or 4, remove the foam block. 98 www.gateway.com - Gateway 995 | 995 Series Server User Guide - Page 105
lever is fully opened when removing or inserting a processor into the socket. If the lever is not fully opened, the processor can be damaged. www.gateway.com 99 - Gateway 995 | 995 Series Server User Guide - Page 106
into the socket, make sure that: ■ The processor release lever is open all the way (135° from the closed position). ■ The triangular arrows on the corner of the processor , if necessary. Heat sinks from Gateway have thermal grease already applied. 11 Place the heat sink on the processor. 100 www - Gateway 995 | 995 Series Server User Guide - Page 107
12 Press the heat sink locking clips into place. Installing a processor 13 Replace all panels. www.gateway.com 101 - Gateway 995 | 995 Series Server User Guide - Page 108
the appendix for BIOS Settings in this guide. 2 Restart your server, then press F2 when the Gateway logo screen appears during startup. The BIOS off your server, then follow the instructions in "Preventing static electricity discharge" on page 36. 5 Remove the processor board. For instructions, see " - Gateway 995 | 995 Series Server User Guide - Page 109
Replacing the CMOS battery 6 Remove the six screws that secure the two processor board mounting brackets to the system board, then remove the brackets and the plastic overlay. Screws Screws www.gateway.com 103 - Gateway 995 | 995 Series Server User Guide - Page 110
note its orientation. You will need to install the new battery the same way. Battery 8 Push the battery retention clip away from the battery until the cords and peripheral device cables. 12 Turn on your server, then press F2 when the Gateway logo screen appears during startup. The BIOS Setup utility - Gateway 995 | 995 Series Server User Guide - Page 111
the appendix for BIOS Settings in this guide. 2 Restart your server, then press F2 when the Gateway logo screen appears during startup. The BIOS turn off the server, then unplug the power cords and all other cables connected to the server. 5 Remove the top rear panel. For instructions, see "Removing - Gateway 995 | 995 Series Server User Guide - Page 112
to the system board, then remove the brackets. Screws Screws 11 Remove all expansion cards, and note which slot each card was installed into. For instructions, see "Replacing a hot-swap expansion card" on page 82. 12 Remove the hot-swap expansion card curtains. Expansion card curtains 106 www - Gateway 995 | 995 Series Server User Guide - Page 113
the front end of each curtain up and out of the full-length expansion card guide. b Locate each of the tabs on the ends of the four curtains. The tabs protrude out the back of the server. Expansion card curtain tabs c Press and hold the tabs together, then pull each curtain out - Gateway 995 | 995 Series Server User Guide - Page 114
Chapter 4: Installing Components 13 Press down each of the three release tabs on the full-length expansion card guide, then pull the guide toward the back of the server. 108 www.gateway.com - Gateway 995 | 995 Series Server User Guide - Page 115
the system board, then remove that plastic overlay and the overlay under the processor board. Overlay screw 15 Remove the fans and fan cage. For instructions, see "Replacing the fan cage" on page 59. www.gateway.com 109 - Gateway 995 | 995 Series Server User Guide - Page 116
Front panel Fan signal SCSI channel A SCSI channel B IDE Diskette drive System board secondary power System board primary power System board power control 110 www.gateway.com - Gateway 995 | 995 Series Server User Guide - Page 117
Replacing the system board 17 Slide the server board ½ inch away from the back of the server. 18 Lift the side of the board furthest from the PCI card slots, then remove the board completely from the server. www.gateway.com 111 - Gateway 995 | 995 Series Server User Guide - Page 118
all panels. 27 Turn on your server, then press F2 when the Gateway logo screen appears during startup. The BIOS Setup utility opens. 28 Restore any BIOS settings that you wrote down in Step 3. If there are erorrs during startup or in the operating system, see "Troubleshooting" on page 119. 29 Save - Gateway 995 | 995 Series Server User Guide - Page 119
5 Using the BIOS Setup Utility Read this chapter to learn how to: ■ Open the BIOS Setup utility ■ Update the BIOS ■ Reset the BIOS settings to their factory defaults ■ Reset the BIOS passwords 113 - Gateway 995 | 995 Series Server User Guide - Page 120
to restore them later. You can record the settings on a printout of this guide's appendix for "BIOS Settings" on page 151. To open the BIOS Setup utility: 1 Restart your server, then press F2 when the Gateway logo screen appears during startup. The BIOS Setup utility opens. When you select menu - Gateway 995 | 995 Series Server User Guide - Page 121
"BIOS Settings" on page 151. 2 Restart your server, then press F2 when the Gateway logo screen appears during startup. 3 Record any custom BIOS settings on your printout. 4 Download the BIOS update from support.gateway.com. 5 Follow the instructions in the self-extracting BIOS update file. 6 Enter - Gateway 995 | 995 Series Server User Guide - Page 122
for "BIOS Settings" on page 151. 2 Restart your server, then press F2 when the Gateway logo screen appears during startup. The BIOS Setup utility opens. 3 Record any custom BIOS settings on your printout. 4 Follow the instructions in "Preventing static electricity discharge" on page 36. 5 Turn - Gateway 995 | 995 Series Server User Guide - Page 123
instructions, see "Opening the server case" on page 41. Warning Moving the jumper while the power is on can damage your server. Always turn off the server (BIOS reset) pins 8 Turn on the server and let the operating system load, then turn off the server. The BIOS settings are cleared. 9 Remove the - Gateway 995 | 995 Series Server User Guide - Page 124
server. 3 Remove the top panel. For instructions, see "Opening the server case" on page 41. Warning Moving the jumper while the power is on can damage your server. Always turn off the server 5 Turn on the server and let the operating system load, then turn off the server. The BIOS passwords are - Gateway 995 | 995 Series Server User Guide - Page 125
6 Troubleshooting Read this chapter to learn how to: ■ Get telephone support and training ■ Interpret error messages and codes ■ Troubleshoot If the suggestions in this chapter do not correct the problem, see "Telephone support" on page 120 for more information about how to get help. 119 - Gateway 995 | 995 Series Server User Guide - Page 126
Chapter 6: Troubleshooting Telephone support Before calling Gateway Technical Support If you have a technical problem with your server, follow these recommendations before contacting Gateway Technical Support: ■ Make sure that your server is connected correctly to a grounded AC outlet that is - Gateway 995 | 995 Series Server User Guide - Page 127
telephone to get answers to your questions: Resource Fax on demand support Tutorial support Gateway Technical Support Sales, accounting, and warranty Service description How to reach Order a catalog of documents on common problems, then order documents by document numbers. The documents will be - Gateway 995 | 995 Series Server User Guide - Page 128
Chapter 6: Troubleshooting Tutoring and training Gateway's Technical Support professionals cannot provide hardware and software training. Instead, Gateway recommends the following training resources. Resource Service description For more information In-store training at Gateway stores Our - Gateway 995 | 995 Series Server User Guide - Page 129
to troubleshoot your server problem if: ■ The power cords or plugs are damaged ■ Liquid has been spilled into your server ■ Your server was dropped ■ The case was damaged Instead, unplug your server and contact a qualified computer technician. If your server was damaged during shipment from Gateway - Gateway 995 | 995 Series Server User Guide - Page 130
, may indicate a problem that requires further troubleshooting. Diskette drive 0 seek to track 0 failed ■ Restart your server, then open the system board jumper settings. For instructions, see "Resetting BIOS passwords" on page 118. Memory size error ■ Restart your server, then open the BIOS Setup - Gateway 995 | 995 Series Server User Guide - Page 131
operating system ■ The master boot record may be corrupt. For troubleshooting information, see "The master boot record is corrupted" on page 141. System Event Log Full ■ Clear the event log. To clear or view the event log, restart your server, then open the BIOS Setup utility by pressing and holding - Gateway 995 | 995 Series Server User Guide - Page 132
exact message before calling Gateway Technical Support. For instructions, see "Telephone support" on page 120. ■ Restart your server, then open the BIOS Setup utility by pressing and holding F2 while your server restarts. Check your configuration settings. ■ When diagnosing problems, press the non - Gateway 995 | 995 Series Server User Guide - Page 133
to troubleshoot your server problem if: ■ The power cords or plugs are damaged ■ Liquid has been spilled into your server ■ Your server was dropped ■ The case was damaged Instead, unplug your server and contact a qualified computer technician. If your server was damaged during shipment from Gateway - Gateway 995 | 995 Series Server User Guide - Page 134
Chapter 6: Troubleshooting Boot process codes The table below lists Port-80 codes and explanations displayed during the boot process. Not all codes Reset Programmable Interrupt Controller Test DRAM refresh Test 8742 Keyboard Controller Set ES segment register to 4 GB 128 www.gateway.com - Gateway 995 | 995 Series Server User Guide - Page 135
35 36 37 38 39 3A 3C 3D 40 42 44 46 2-1-2-3 47 48 49 4A 4B 4C 4E Troubleshooting Reason Autosize DRAM, system BIOS stops execution here if the BIOS does not detect any usable memory DIMMs Clear 8 Display QuietBoot screen Shadow video BIOS ROM Display copyright notice www.gateway.com 129 - Gateway 995 | 995 Series Server User Guide - Page 136
Chapter 6: Troubleshooting CP Beeps 50 52 54 55 56 58 2-2-3-1 5A 5C 60 62 64 66 68 6A 6B 6C 6E 70 72 74 76 7A 7C Test for key lock on Set up hardware interrupt vectors Intelligent system monitoring Test coprocessor if present Detect and install external RS232 ports 130 www.gateway.com - Gateway 995 | 995 Series Server User Guide - Page 137
91 92 93 94 95 96 98 1-2 9A 9C 9E A0 A2 A4 A8 AA AC AE B0 B2 Troubleshooting Reason Initialize PC-compatible PnP ISA devices Re-initialize on board I/O ports Initialize BIOS Data Area Initialize Extended BIOS flag Check for errors POST done - prepare to boot Operating System www.gateway.com 131 - Gateway 995 | 995 Series Server User Guide - Page 138
Chapter 6: Troubleshooting CP Beeps B4 1 B5 B6 B7 B8 BC BE BF C0 C8 C9 DO D2 D4 D6 D8 DA DC Reason One short beep before point (CP) column lists the message's check point as seen by a port 80h card. CP Reason E0 Initialize chip set E1 Initialize bridge 132 www.gateway.com - Gateway 995 | 995 Series Server User Guide - Page 139
Initialize interrupt services F1 Initialize real time clock F2 Initialize video F3 Initialize beeper F4 Initialize boot F5 Restore segment limits to 64 KB F6 Boot mini DOS F7 Boot full DOS BMC beep codes Beeps 1-5-1-1 Reason FRB3 failure (processor failure) www.gateway.com Troubleshooting 133 - Gateway 995 | 995 Series Server User Guide - Page 140
Chapter 6: Troubleshooting Beeps 1-5-2-1 1-5-2-2 1-5-2-3 1-5-4-2 1-5-4-3 1-5-4-4 Reason CPU: empty slot CPU: no processors CPU: configuration error (such as VID mismatch) Power fault: Keyboard locked Monitor type does not match CMOS Offset address Offset address Offset address 134 www.gateway.com - Gateway 995 | 995 Series Server User Guide - Page 141
Troubleshooting Code 0233: 0234: 0235: 0250: 0251: 0252: 0260: 0270: 0271: 02B0: 02B2: 02D0: 0B00: 0B1B: 0B1C: 0B50: 0B51: Error Processor 1 with error Failed Processor 1, error detected taken offline Processor 2 with error Failed Processor 2, error detected taken offline www.gateway.com 135 - Gateway 995 | 995 Series Server User Guide - Page 142
Chapter 6: Troubleshooting Code 0B52: 0B53: 0B5F: 0B60: 0B61: 0B62: 0B6F: 0B70: 0B71: 0B74: 0B75: 0B7C: 0B80: 0B81: 0B82: Error message Failure description Processor Code BMC device(chip) failed Area CRC check failed BMC core Hardware failure BMC device(chip) failed 136 www.gateway.com - Gateway 995 | 995 Series Server User Guide - Page 143
Troubleshooting Code 0B83: 0B90: 0B91: 0B92: 0B93: 0B94: 0B95: 0B96: 0B97: 0BB0: 0BB1: 0BD0: 0BD1: 0BD2: Error message Failure description BMC chip) failed 1st SMBus device Error Some SMBus device (chip) failed detected 1st SMBus timeout Some SMBus device (chip) failed www.gateway.com 137 - Gateway 995 | 995 Series Server User Guide - Page 144
Chapter 6: Troubleshooting Code 8503: Error message Expansion ROM not initialized Reinstall the device driver. For instructions, see Using Your Server Companion CD. ■ Make sure that the drive is configured correctly by following the instructions in the drive's documentation. 138 www.gateway.com - Gateway 995 | 995 Series Server User Guide - Page 145
Troubleshooting ■ Turn off your server, then remove the CD drive and reinstall it. For instructions, see "Replacing the CD drive" on page 75. Your CD drive tray does not open ■ Press a straightened paper clip wire into the CD drive's manual eject hole. The drive tray opens. ■ If this problem happens - Gateway 995 | 995 Series Server User Guide - Page 146
more information about SCSI device configurations, see your drive's documentation. ■ Turn off your server, then remove all hard drives and push them in again to make sure that the drives are seated correctly. For instructions, see "Replacing a hot-swap hard drive" on page 64. 140 www.gateway.com - Gateway 995 | 995 Series Server User Guide - Page 147
Troubleshooting turn off your server and unplug the not covered by your server's warranty. Memory Caution server will not start. Partially filled banks are ignored by the server server start up ■ Open your server and make sure that the memory modules are installed correctly. For instructions - Gateway 995 | 995 Series Server User Guide - Page 148
the way from server does not turn on ■ Make sure that both AC power cords are connected to your server and a wall outlet. ■ If the power LED is green, the server is turned on, but you may not be seeing an image on the monitor. For monitor troubleshooting, see "Monitor" on page 142. 142 www.gateway - Gateway 995 | 995 Series Server User Guide - Page 149
Troubleshooting ■ If your server is plugged into a UPS, make sure that the UPS is connected securely to an electrical outlet, turned on, and working correctly. One way to check this is to plug the server directly into a wall outlet, bypassing the UPS. ■ Open your server and make sure that the power - Gateway 995 | 995 Series Server User Guide - Page 150
Chapter 6: Troubleshooting 144 www.gateway.com - Gateway 995 | 995 Series Server User Guide - Page 151
A Server Specifications The following specifications are for the standard configuration. Your server may contain optional equipment. All specifications are subject to change. 145 - Gateway 995 | 995 Series Server User Guide - Page 152
full-height, and low-profile PCI expansion cards 430 W modules (two standard, three optional for redundancy) Supports Windows 2000 Advanced Server. Compatible with: ■ Windows NT ■ Novell NetWare 6 ■ FCC Class A ■ UL ■ cUL Front: AC cords) Frequency: 47 Hz minimum, 63 Hz maximum 146 www.gateway.com - Gateway 995 | 995 Series Server User Guide - Page 153
MHz FSB ■ MCH memory controller (Northbridge) ■ ICH3 I/O controller (Southbridge) ■ 12 DIMM slots support from 512 MB to 24 GB total memory ■ Use only PC1600 (DDR 200) or PC2100 (DDR ■ Two Ultra320 SCSI channels ACPI compliance Supports: ■ S0 ■ S1 ■ S4 ■ S5 4U rackmount www.gateway.com 147 - Gateway 995 | 995 Series Server User Guide - Page 154
conditions. At no time should the server run under conditions which violate these specifications (5° to 35°C); derated 0.9°F (0.5°C) for every 1,000 feet (305 meters). Use of 2 GB DIMMs derates the server to 86°F (30°C) 10,000 feet (3,048 meters) maximum Operating wet bulb: Not to exceed 91.4°F (33 - Gateway 995 | 995 Series Server User Guide - Page 155
Additional specifications For more information about your server, such as memory size, hard drive size, and processor type, visit Gateway's eSupport page at support.gateway.com. The eSupport page also has links to additional Gateway documentation and detailed specifications for your own - Gateway 995 | 995 Series Server User Guide - Page 156
Appendix A: Server Specifications 150 www.gateway.com - Gateway 995 | 995 Series Server User Guide - Page 157
are listed. For a complete list of viewable BIOS settings, run the BIOS Setup utility. To view all BIOS settings: 1 Restart your server, then press F2 when the Gateway logo screen appears during startup. The BIOS Setup utility opens. 2 Select menus and submenus to display setting information. 151 - Gateway 995 | 995 Series Server User Guide - Page 158
PCI Slots 5-6 PCI Slots 7-8 SCSI Controller Option ROM Scan LAN Controller 1 (10/100) Option ROM Scan LAN Controller 2 (Gbit) Option ROM Scan Value 152 www.gateway.com - Gateway 995 | 995 Series Server User Guide - Page 159
ROM Scan Option ROM Scan Option ROM Scan Serial Port A Base I/O address Interrupt Serial Port B Base I/O address Interrupt Parallel port Mode Base I/O address Value www.gateway.com 153 - Gateway 995 | 995 Series Server User Guide - Page 160
Control Advanced Chipset Control BIOS submenu Security Setting Interrupt Value DMA Channel Legacy USB Support PS/2 Mouse Wake On LAN Wake On Ring Sleep Button Boot-time Diagnostic Screen ALT+) Secure mode boot Video Blanking Floppy write protect Power switch inhibit 154 www.gateway.com - Gateway 995 | 995 Series Server User Guide - Page 161
BIOS menu BIOS submenu Server Console Redirection Console Redirection Console Redirection Console Redirection Console Redirection Boot Setting Serial Port Address Baud Policy Thermal Sensor BMC IRQ Post Error Pause AC-LINK Platform Event Filtering [boot order] Value www.gateway.com 155 - Gateway 995 | 995 Series Server User Guide - Page 162
Appendix B: BIOS Settings 156 www.gateway.com - Gateway 995 | 995 Series Server User Guide - Page 163
on the product and in the documentation are followed. Warning Always follow these instructions to help guard against personal injury and damage to your Gateway system. Setting up your system ■ Read and follow all instructions marked on the product and in the documentation before you operate your - Gateway 995 | 995 Series Server User Guide - Page 164
■ Unplug the system from the wall outlet and refer servicing to qualified personnel if: ■The power cord or plug The system does not operate properly when the operating instructions are followed. ■The system was dropped or the recommended by Gateway. Important Do not use Gateway products in areas - Gateway 995 | 995 Series Server User Guide - Page 165
15 Class A Statement The server is designated as complying with is Part 68-compliant. See installation instructions for details. The Ringer Equivalence Number service may be required. The telephone company may request that you disconnect the equipment until the problem is resolved. www.gateway - Gateway 995 | 995 Series Server User Guide - Page 166
to maintain uninterrupted service. This equipment cannot be used on telephone company-provided coin service. Connection to party line service is subject to state Caution Changes or modifications not expressly approved by Gateway could void the FCC compliance and negate your authority to operate the product - Gateway 995 | 995 Series Server User Guide - Page 167
acceptable method of connection. In some cases, the inside wiring associated with a single-line individual service may be extended by means of a certified connector assembly. The customer should be aware that compliance Equivalence Numbers of all the devices does not exceed 5. www.gateway.com 161 - Gateway 995 | 995 Series Server User Guide - Page 168
(DHHS) Radiation Performance Standard. Should the unit ever need servicing, contact an authorized service location. Warning Use of controls or adjustments or performance of procedures other than those specified in this manual may result in hazardous radiation exposure. To prevent exposure to - Gateway 995 | 995 Series Server User Guide - Page 169
logo, GATEWAY, Gateway Astro, Gateway@Work, Gateway Connected touch pad, Gateway Connected music player, Gateway Cyber:)Ware, Gateway Education:)Ware, Gateway Flex Case, Gateway Gaming:)Ware, Gateway GoBack, Gateway Gold, Gateway Learning:)Ware, Gateway Magazine, Gateway Micro Server, Gateway Money - Gateway 995 | 995 Series Server User Guide - Page 170
Appendix C: Safety, Regulatory, and Legal Information 164 www.gateway.com - Gateway 995 | 995 Series Server User Guide - Page 171
Setup utility 114 C card installing 79, 82, 84 slot location 5, 7 troubleshooting 139 case opening 41 CD Gateway Server Manager 21 Server Companion 33 troubleshooting 138 CD drive installing 75 location 2, 3 troubleshooting 138 cleaning 18, 19 CMOS battery installing 102 connections diskette drive - Gateway 995 | 995 Series Server User Guide - Page 172
3 FRU/SDR utility 26 G Gateway Learn@Gateway 122 Learning Libraries 122 Technical Support 120 Web address 8 Gateway Server Manager 21 H hard drive indicator 2 installing 64 LED indicator 2 location 2, 3 troubleshooting 140 hard drive location 4 help telephone support 120 hot-swap expansion cards 79 - Gateway 995 | 995 Series Server User Guide - Page 173
70 J jacks see connections K keyboard cleaning 19 port 5 troubleshooting 141 L LAN alerts 31 LAN indicator 2, 5 LAN jack 5 LED indicators 2, 13, 14 line conditioners 11 M Main menu BIOS Setup utility 114 maintenance 18 Gateway Server Manager 21 recording BIOS configuration 20 master boot record 141 - Gateway 995 | 995 Series Server User Guide - Page 174
conditioners 11 protecting from surges 11 reset button 2 source problems 11 static electricity 36 troubleshooting 142 uninterruptible power supply (UPS) 11 power supply cage 148 system board 147 SSU 25 starting server 13 startup diskettes 20 static electricity 36 status indicator 14 168 - Gateway 995 | 995 Series Server User Guide - Page 175
cleaning 19 installing 70 location 2, 3 technical support FaxBack support 121 resources 120 Technical Support 120, 121 tips before contacting 120 telephone support 120 training CD 122 classroom 122 Gateway Learning Libraries 122 Learn@Gateway 122 troubleshooting add-in card 139 battery 127 beep - Gateway 995 | 995 Series Server User Guide - Page 176
170
-
 1
1 -
 2
2 -
 3
3 -
 4
4 -
 5
5 -
 6
6 -
 7
7 -
8
-
9
-
10
-
11
-
12
-
13
-
14
-
15
-
16
-
17
-
18
-
19
-
20
-
21
-
22
-
23
-
24
-
25
-
26
-
27
-
28
-
29
-
30
-
31
-
32
-
33
-
34
-
35
-
36
-
37
-
38
-
39
-
40
-
41
-
42
-
43
-
44
-
45
-
46
-
47
-
48
-
49
-
50
-
51
-
52
-
53
-
54
-
55
-
56
-
57
-
58
-
59
-
60
-
61
-
62
-
63
-
64
-
65
-
66
-
67
-
68
-
69
-
70
-
71
-
72
-
73
-
74
-
75
-
76
-
77
-
78
-
79
-
80
-
81
-
82
-
83
-
84
-
85
-
86
-
87
-
88
-
89
-
90
-
91
-
92
-
93
-
94
-
95
-
96
-
97
-
98
-
99
-
100
-
101
-
102
-
103
-
104
-
105
-
106
-
107
-
108
-
109
-
110
-
111
-
112
-
113
-
114
-
115
-
116
-
117
-
118
-
119
-
120
-
121
-
122
-
123
-
124
-
125
-
126
-
127
-
128
-
129
-
130
-
131
-
132
-
133
-
134
-
135
-
136
-
137
-
138
-
139
-
140
-
141
-
142
-
143
-
144
-
145
-
146
-
147
-
148
-
149
-
150
-
151
-
152
-
153
-
154
-
155
-
156
-
157
-
158
-
159
-
160
-
161
-
162
-
163
-
164
-
165
-
166
-
167
-
168
-
169
-
170
-
171
-
172
-
173
-
174
-
175
-
176
 |
 |

Gateway 995 Server
user's
guide
Contents
Index
Search