Gateway GM5266E 8511625 - Gateway Computer Hardware Reference (6-Bay Micro BTX - Page 28
following any instructions printed on the CD. - drivers
 |
View all Gateway GM5266E manuals
Add to My Manuals
Save this manual to your list of manuals |
Page 28 highlights
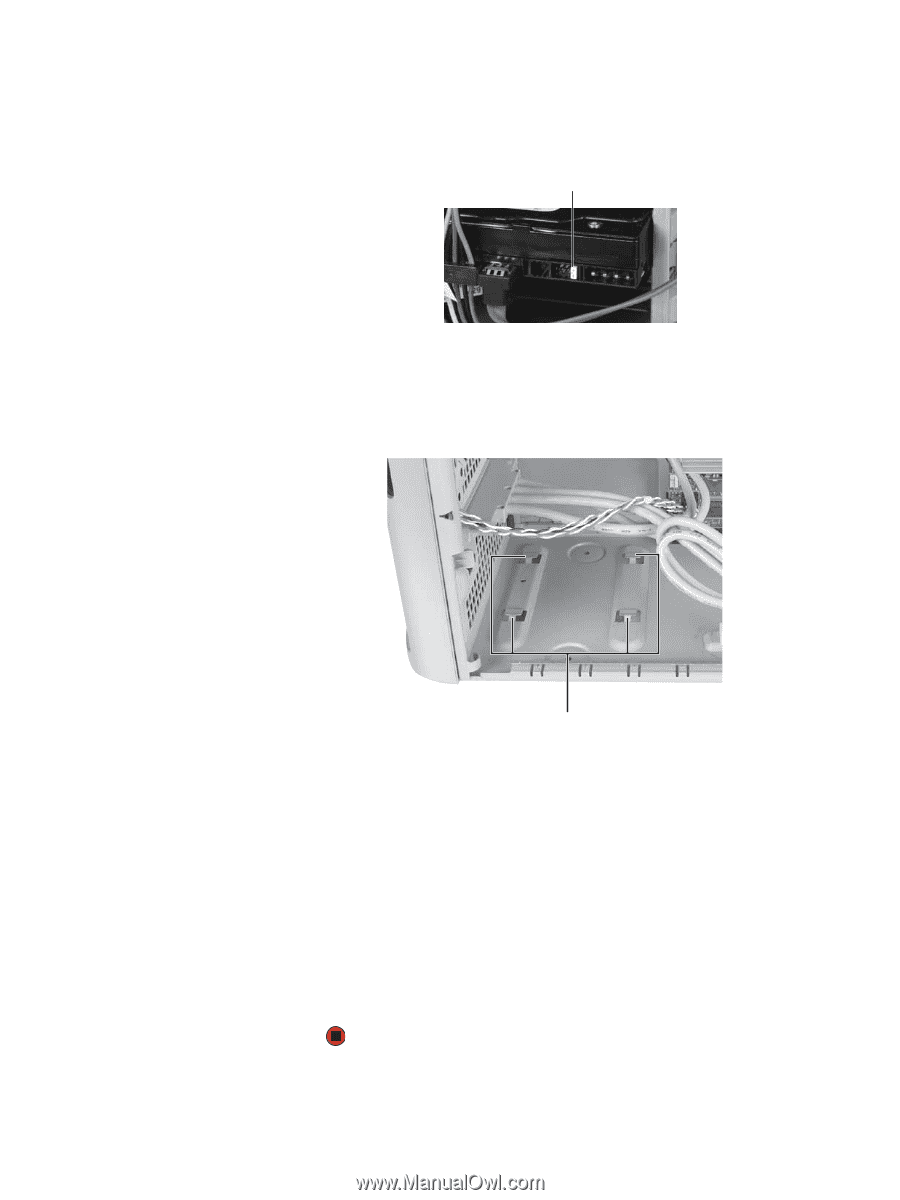
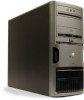
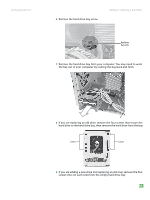
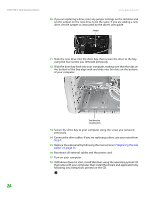
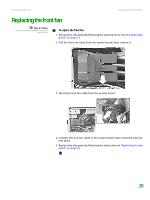
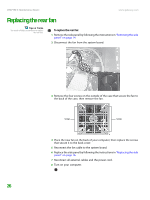
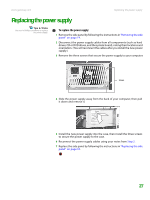
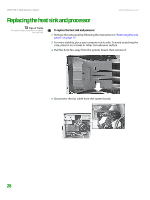
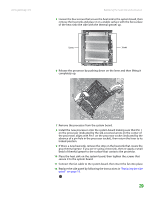
CHAPTER 3: Maintenance Basics www.gateway.com 10 If you are replacing a drive, note any jumper settings on the old drive and set the jumper on the new drive to be the same. If you are adding a new drive, set the jumper as instructed by the drive's user guide. Jumper 11 Slide the new drive into the drive bay, then secure the drive to the bay using the four screws you removed previously. 12 Slide the drive bay back into your computer, making sure that the tabs on the bottom of the bay align with and slide into the slots on the bottom of your computer. Hard drive bay mounting slots 13 Secure the drive bay to your computer using the screw you removed previously. 14 Connect the drive cables. If you are replacing a drive, use your notes from Step 3. 15 Replace the side panel by following the instructions in "Replacing the side panel" on page 16. 16 Reconnect all external cables and the power cord. 17 Turn on your computer. 18 If Windows does not start, install Windows using the operating system CD that came with your computer, then install the drivers and applications by following any instructions printed on the CD. 24
-
 1
1 -
2
-
3
-
4
-
5
-
6
-
7
-
8
-
9
-
10
-
11
-
12
-
13
-
14
-
15
-
16
-
17
-
18
-
19
-
20
-
21
-
22
-
 23
23 -
 24
24 -
 25
25 -
 26
26 -
 27
27 -
 28
28 -
 29
29 -
 30
30 -
 31
31 -
 32
32 -
 33
33 -
34
-
35
-
36
-
37
-
38
-
39
-
40
-
41
-
42
-
43
-
44
-
45
-
46
-
47
-
48
-
49
-
50
-
51
-
52
 |
 |