GE CGS980SEMSS Use and Care Manual
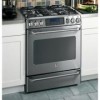
GE CGS980SEMSS - 30" Gas Range Manual
 |
UPC - 084691163626
View all GE CGS980SEMSS manuals
Add to My Manuals
Save this manual to your list of manuals |
GE CGS980SEMSS manual content summary:
- GE CGS980SEMSS | Use and Care Manual - Page 1
Cleaning Burner Assembly 32, 33 Burner Grates 34 Control Panel and Knobs . . . . . .35 Cooktop 35 Door Removal 37 Drawer 38 Griddle 34 Oven Bottom 37 Oven Light Replacement . . . . . .38 Oven Vents 35 Racks 37 Self-Cleaning 30, 31 Stainless Steel Surfaces 36 Installation Instructions 39 - GE CGS980SEMSS | Use and Care Manual - Page 2
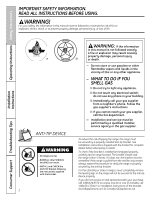
-tip bracket. For free-standing or slide-in ranges, never completely remove the leveling legs or the range will not be secured to the anti-tip device properly. If you did not receive an anti-tip bracket with your purchase, call 1.800.626.8774 to receive one at no cost (in Canada, call 1.800.561 - GE CGS980SEMSS | Use and Care Manual - Page 3
accordance with the Installation Instructions. Any adjustment and service should be performed only by qualified gas range installers or service technicians. s Do not attempt to repair or replace any part of your range unless it is specifically recommended in this manual. All other service should be - GE CGS980SEMSS | Use and Care Manual - Page 4
or LP) that is to be used. Your range can be converted for use with either type of gas. See the Installation of the range section. s WARNING: These adjustments must be made by a qualified service technician in accordance with the manufacturer's instructions and all codes and requirements of the - GE CGS980SEMSS | Use and Care Manual - Page 5
. s Do not lift the cooktop. Lifting the cooktop can lead to damage and improper operation of the range. s When disabling Gas/Control Lockout, make sure the surface controls are set to the OFF position. This will preclude gas flow when the range is turned on 5 Troubleshooting Tips Consumer Support - GE CGS980SEMSS | Use and Care Manual - Page 6
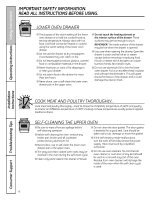
oven during the self-clean cycle. s Clean only parts listed in this Owner's Manual. s Do not clean the door gasket. The door part of the oven. Residue from oven cleaners will damage the inside of the oven when the self-clean cycle is used. Installation Instructions Consumer Support Troubleshooting - GE CGS980SEMSS | Use and Care Manual - Page 7
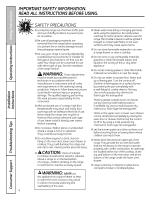
Operating Instructions GEAppliances.com UPPER OVEN Stand away from the range when opening the door of a hot oven. The hot air and steam that escape can cause burns to hands, face and eyes. s Do not use the oven for a storage area. Items stored in the oven can ignite. s Keep the oven free from - GE CGS980SEMSS | Use and Care Manual - Page 8
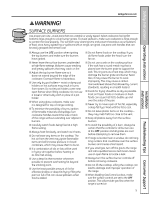
Be sure the burners and grates are cool before you place your hand, a pot holder, cleaning cloths or other materials on them. Installation Instructions Consumer Support Troubleshooting Tips Push the control knob in and turn it to the LITE position. How to Light a Gas Surface Burner Make sure all - GE CGS980SEMSS | Use and Care Manual - Page 9
to your health. Installation Instructions Troubleshooting Tips Consumer Support In Case of Power Failure In case of a power failure, you can light the gas surface burners on your range with a match. Hold a lit match to the burner, then push in and turn the control knob to the LITE position - GE CGS980SEMSS | Use and Care Manual - Page 10
are turned OFF. The griddle can only be used with the center burner. To insert the griddle, remove the center grate and replace with the griddle. NOTE: Do not clean the griddle in the if the griddle is used for an extended time. Installation Instructions Consumer Support Troubleshooting Tips 10 - GE CGS980SEMSS | Use and Care Manual - Page 11
Safety Instructions Operating Instructions Using the upper oven controls. (Throughout this manual, features and appearance may vary from your model.) GEAppliances.com Installation Instructions Troubleshooting Tips Consumer Support Features and appearance may vary. Oven Control, Clock, Timer - GE CGS980SEMSS | Use and Care Manual - Page 12
. This is because the flow of gas is automatically stopped and will not resume when power is restored until the glow bar has reached operating temperature. Upper Oven Light Touch the OVEN LIGHT pad to turn the light on or off. Installation Instructions Consumer Support Troubleshooting Tips 12 - GE CGS980SEMSS | Use and Care Manual - Page 13
cakes, pies Casseroles C Roasting - Small cuts of meat A or B Roasting - Turkey and large cuts of meat R or A 4-Layer cakes B&D Installation Instructions Troubleshooting Tips Consumer Support When baking four cake layers at a time, use racks B and D. Place the lower pans at the back of the - GE CGS980SEMSS | Use and Care Manual - Page 14
Operating Instructions Safety Instructions Installation Instructions Using the upper oven. Close the door. Always broil with the door closed. How to Set the Upper Oven for Broiling Place the meat or fish on a broiler grid in a broiler pan. Follow suggested rack positions in the Broiling Guide. - GE CGS980SEMSS | Use and Care Manual - Page 15
Instructions Operating Instructions Using the clock and timer. Not all features are on all models example, to enter 90 minutes as 1 hour 30 minutes, touch 1, 3 and 0 in that control section under Tones at the End of a Timed Cycle. Installation Instructions Troubleshooting Tips Consumer Support 15 - GE CGS980SEMSS | Use and Care Manual - Page 16
Operating Instructions Safety Instructions Using the clock and timer. To Reset the Timer If the display is still showing the time reset. Enter the correct time of day by touching the appropriate number pads. Touch the START pad. Installation Instructions Consumer Support Troubleshooting Tips 16 - GE CGS980SEMSS | Use and Care Manual - Page 17
the oven will continue cooking after the oven turns off. Installation Instructions Troubleshooting Tips Consumer Support How to Set a Delayed Start and Automatic Stop The upper oven will turn on at the time of day you set, cook for a specific length of time and then turn off automatically. Make - GE CGS980SEMSS | Use and Care Manual - Page 18
into the meatiest part of the inner thigh from below and parallel to the leg of a whole turkey. Installation Instructions Consumer Support Troubleshooting Tips How you have set, the probe and the oven turn off and the oven control signals. To stop the signal, touch the CLEAR/OFF pad. Use hot - GE CGS980SEMSS | Use and Care Manual - Page 19
the difference between convection bake and roast and traditional bake and roast, here are some general guidelines. Convection Bake s Preheat the oven. See the Using the Oven- Preheating and . s Place the rack in rack position (A). Installation Instructions Troubleshooting Tips Consumer Support 19 - GE CGS980SEMSS | Use and Care Manual - Page 20
Instructions Safety Instructions Using the convection oven. Installation Instructions the set temperature. See Auto Recipe™ Conversion in the Special Features section for more information of racks provided depends on your model. Because heated air is circulated evenly Support Troubleshooting Tips - GE CGS980SEMSS | Use and Care Manual - Page 21
food reaches the number you have set, the probe and the oven turn off and the oven control signals. To stop the signal, touch the CLEAR/OFF pad. Use hot pads to remove the cannot use timed oven operations while using the probe. Installation Instructions Troubleshooting Tips Consumer Support 21 - GE CGS980SEMSS | Use and Care Manual - Page 22
Turkey Breast (4 to 6 lbs.) 16-19 325°F 170°F * Stuffed birds generally require 30-45 minutes additional roasting time. Shield legs and breast with foil to prevent overbrowning Book. Your Kitchen Guide. USDA Rev. June 1985.) Installation Instructions Consumer Support Troubleshooting Tips 22 - GE CGS980SEMSS | Use and Care Manual - Page 23
the oven will continue cooking after the oven turns off. Installation Instructions Troubleshooting Tips Consumer Support How to Set a Delayed Start and Automatic Stop The upper oven will turn on at time of day you set, cook for a specific length of time and then turn off automatically. Make sure - GE CGS980SEMSS | Use and Care Manual - Page 24
12-Hour Shut-Off With this feature, should you forget and leave the oven on, the control will automatically turn off the oven after 12 hours during baking functions or after 3 hours during every 6 seconds.) Touch the START pad. Installation Instructions Consumer Support Troubleshooting Tips 24 - GE CGS980SEMSS | Use and Care Manual - Page 25
Instructions Installation Instructions GEAppliances.com Gas/Control Lockout (on some models) Your control will allow you to lock out the surface burners, oven burners and control panel so they cannot be activated. To lock/unlock the controls: Turn all surface burners off. Touch and hold the GAS - GE CGS980SEMSS | Use and Care Manual - Page 26
or temperature will be given. Touch the START pad. After a random delay period of approximately 30 seconds to 1 minute, ⊃ will appear in the display indicating that the oven is baking/ set in Sabbath. Remove the cooked food. Installation Instructions Consumer Support Troubleshooting Tips 26 - GE CGS980SEMSS | Use and Care Manual - Page 27
Instructions Operating Instructions GEAppliances.com How to Exit the Sabbath Feature Touch the CLEAR/OFF pad. If the oven is cooking, wait for a random delay period of approximately 30 returns. The oven control must be reset. Installation Instructions Troubleshooting Tips Consumer Support 27 - GE CGS980SEMSS | Use and Care Manual - Page 28
and flavor of baked goods. For best results with your old favorite recipes, use margarine, butter or stick spreads containing at least 70% vegetable oil. Installation Instructions Consumer Support Troubleshooting Tips 28 - GE CGS980SEMSS | Use and Care Manual - Page 29
350° F 20 minutes 425° F 30 minutes Installation Instructions Troubleshooting Tips Consumer Support Adjust the oven thermostat-Do it yourself OVEN COOLER TURN DISK Back of Lower Oven Knob (Appearance may vary.) K RETE Pull the OVEN CONTROL knob off the range and look at the back side. To - GE CGS980SEMSS | Use and Care Manual - Page 30
, replace it range and Installation Instructions Consumer Support Troubleshooting Tips How to Set the Upper Oven for Cleaning Turn all surface burners off. NOTE: The surface burners and control will the oven control will signal BURNERS OFF will flash and the control will signal if you set the - GE CGS980SEMSS | Use and Care Manual - Page 31
hold the GAS/CONTROL LOCKOUT pad for 3 seconds to turn it off. NOTE: The surface burners must be slide, apply a small amount of vegetable oil or cooking oil to a paper towel and wipe the edges of the oven racks with the paper towel. Installation Instructions Troubleshooting Tips Consumer Support - GE CGS980SEMSS | Use and Care Manual - Page 32
Safety Instructions Care and cleaning of the range. Be sure electrical power is off and all surfaces are cool before cleaning any part of the range. WARNING: If your range is removed for cleaning, servicing or any reason, be sure the anti-tip device is re-engaged properly when the range is replaced - GE CGS980SEMSS | Use and Care Manual - Page 33
warm oven for 30 minutes. Hole in burner head Replacement Burner Heads Replace burner heads over the range Slot Electrode Caps Replace the matching size caps onto the burner bases or heads. Medium cap Small cap Installation Instructions Troubleshooting Tips Consumer Support The oval burner - GE CGS980SEMSS | Use and Care Manual - Page 34
turn off all surface burners before removing the griddle. Use caution when handling a hot griddle. Installation Instructions Consumer Support Troubleshooting Tips Appearance may vary. The grates may be cleaned in a dishwasher. Outside Center Outside grate grate grate The oven has 5 rack - GE CGS980SEMSS | Use and Care Manual - Page 35
use abrasives of any kind. Unlock the touch pads after cleaning. Installation Instructions Troubleshooting Tips Consumer Support Surface burner knob Lower Control Panel (Front Manifold Panel) and Knobs It's a good idea to wipe the control panel after each use of the oven. Use a damp cloth to - GE CGS980SEMSS | Use and Care Manual - Page 36
Instructions Installation Instructions Care and cleaning of the range. Stainless Steel Surfaces (on some models) Protecting STAINLESS STEEL has a reputation for withstanding tough abuse for years. This is a key reason why it is so popular with the food service industry. However, stainless steel - GE CGS980SEMSS | Use and Care Manual - Page 37
scouring pad. Rinse well to remove any soap before selfcleaning. Installation Instructions Troubleshooting Tips Consumer Support Oven Racks and Drawer Racks The gray porcelain-coated racks may If the racks ever become hard to slide, wipe the rack edges or oven rack supports with vegetable oil. 37 - GE CGS980SEMSS | Use and Care Manual - Page 38
right drawer rail around the inner right rail guide and slide it in slightly to hook it. Slide the drawer all the way in. Removable Lower Oven Drawer Pan NOTE: Before performing any adjustments, cleaning or service, disconnect the range electrical power supply at the household distribution panel - GE CGS980SEMSS | Use and Care Manual - Page 39
• Note to Consumer - Keep this Owner's Manual and Installation Instructions for future reference. • Note - This appliance must be properly grounded. • Servicer - The electrical diagram is in an envelope attached to the back of the range. • Skill level - Installation of this appliance requires basic - GE CGS980SEMSS | Use and Care Manual - Page 40
BE LESS THAN 24 INCHES. EXCEPTION: Installation of a listed microwave oven or cooking appliance over the cooktop shall conform to the installation instructions packed with that appliance. s If cabinets are placed above the range, allow a minimum clearance of 30" between the cooking surface and the - GE CGS980SEMSS | Use and Care Manual - Page 41
Installation Instructions DIMENSIONS AND CLEARANCES Provide adequate clearances between the range and adjacent combustible surfaces. These dimensions must be met for safe use of your range. The location of the electrical outlet and pipe opening (see Gas Pipe and Electric Outlet Locations) may be - GE CGS980SEMSS | Use and Care Manual - Page 42
anti-tip bracket. For free standing or slide in ranges, never completely remove the leveling legs or the range will not be secured to the anti-tip device properly. If you did not receive an anti-tip bracket with your purchase, call 1.800.626.8774 to receive one at no cost (In Canada, call 1.800.561 - GE CGS980SEMSS | Use and Care Manual - Page 43
is convertible for use on natural or propane gas. If you decide to use this range on LP gas, conversion must be made by a qualified LP installer before attempting to operate the range on that gas. For proper operation, the pressure of natural gas supplied to the regulator must be between 5" and - GE CGS980SEMSS | Use and Care Manual - Page 44
Installation Instructions GAS PIPE AND ELECTRICAL OUTLET LOCATIONS Recommended area for 120V outlet on rear wall and area for through-the-wall connection of pipe stub and shut-off valve. Recommended area for through-the-floor connection of pipe stub and shut-off valve. 44 - GE CGS980SEMSS | Use and Care Manual - Page 45
Instructions FLEXIBLE CONNECTOR HOOKUP Pressure regulator Adapter Installer: Inform the consumer of the location of the gas shut-off valve. 1/2" or 3/4" Gas pipe Gas Flow into Range Flex connector (6 ft. max.) Adapter Gas shut-off valve RIGID PIPE HOOKUP OPTIONS 45° Elbow Gas Flow into Range - GE CGS980SEMSS | Use and Care Manual - Page 46
recommended for gas range receptacles. Ground Fault Circuit Interrupters (GFCI's) are devices that sense leakage of current in a circuit and automatically switch off power when a threshold leakage level is detected. These devices must be manually reset by the consumer. The National Electrical Code - GE CGS980SEMSS | Use and Care Manual - Page 47
flame extra large burner head. Medium head Small head Extra large cap Front of range Dual flame extra large cap Make sure that the heads and caps are replaced in the correct locations. D Grates Place the side and center grates on the cooktop. These grates are position specific. The undersides - GE CGS980SEMSS | Use and Care Manual - Page 48
Installation Instructions 6 CHECK IGNITION OF SURFACE BURNERS Operation of all cooktop and oven burners should be checked after the range and gas supply lines have been carefully checked for leaks. Electric Ignition Models Select a top burner knob and simultaneously push in and turn to LITE - GE CGS980SEMSS | Use and Care Manual - Page 49
E. After the range is level, slide the range away from the wall so that the Anti-Tip device can be installed. To determine if the bottom burner flames are burning properly, remove the oven bottom. Flames should have approximately 1 blue cones and, if range is supplied with natural gas, should burn - GE CGS980SEMSS | Use and Care Manual - Page 50
is unobstructed. CONVERTING TO LP GAS (or converting back to natural gas from LP) This range leaves the factory set for use with natural gas. If you want to convert to LP gas, the conversion must be performed by a qualified LP gas installer. The conversion instructions and LP orifices can be found - GE CGS980SEMSS | Use and Care Manual - Page 51
Burner parts not replaced correctly. • Allow the range to cool down and touch and hold the GAS/CONTROL LOCKOUT pad (on some models) for 3 seconds until LOC disappears from the display. • Make sure electrical plug is plugged into a live, properly grounded outlet. • See the Installation Instructions - GE CGS980SEMSS | Use and Care Manual - Page 52
Instructions Safety Instructions Before you call for service... Troubleshooting Tips Problem Possible Causes Gas/Control Lockout or Control Lockout feature is activated What To Do • If LOC appears in the display, the range control is locked. Turn this feature off to use the range. See the Gas - GE CGS980SEMSS | Use and Care Manual - Page 53
in the probe. LOC appears in the display The Gas/Control Lockout feature • Be sure the surface burner controls are turned OFF. is activated. Turn this feature off to use the range. See the Gas/Control Lockout section. Installation Instructions Troubleshooting Tips Consumer Support 53 - GE CGS980SEMSS | Use and Care Manual - Page 54
Instructions Safety Instructions Before you call for service... Troubleshooting Tips Installation Instructions Problem Display goes blank Possible Causes A fuse in your home may be blown or the circuit breaker tripped. The clock is in the black-out mode. What To Do • Replace slide range Controls - GE CGS980SEMSS | Use and Care Manual - Page 55
Please place in envelope and mail to: Veuillez mettre dans une enveloppe et envoyez à : OWNERSHIP REGISTRATION P.O. BOX 1780 MISSISSAUGA, ONTARIO L4Y 4G1 (FOR CANADIAN CONSUMERS ONLY) 55 - GE CGS980SEMSS | Use and Care Manual - Page 56
56 - GE CGS980SEMSS | Use and Care Manual - Page 57
.626.2002 (U.S.) or 800.661.1616 (Canada) (during normal business hours). Have your model number ready. Installation Instructions Troubleshooting Tips Consumer Support Grates Surface Burner Heads and Caps Surface Elements and Drip Pans Knobs or Griddle Oven Racks Oven Elements Experience - GE CGS980SEMSS | Use and Care Manual - Page 58
Troubleshooting Tips Consumer Support GE Gas Range Warranty. (For customers in the United States) All warranty service provided by our Factory Service Centers or an authorized Customer Care® technician. To schedule service, visit us on-line at GEAppliances.com, or call 800.GE.CARES (800.432.2737). - GE CGS980SEMSS | Use and Care Manual - Page 59
Operating Instructions GE Gas Range Warranty. (For customers in Canada) All warranty service provided by our Factory Service Centres or an authorized Customer Care® technician. To schedule service, visit us on-line at www.geappliances.ca, or call 1.800.561.3344. Please have serial number and model - GE CGS980SEMSS | Use and Care Manual - Page 60
any day of the year! For greater convenience and faster service, you can now download Owner's Manuals, order parts or even schedule service on-line. In Canada: www.GEAppliances.ca Schedule Service In the U.S.: GEAppliances.com Expert GE repair service is only one step away from your door. Get on
-
 1
1 -
 2
2 -
 3
3 -
 4
4 -
 5
5 -
 6
6 -
 7
7 -
8
-
9
-
10
-
11
-
12
-
13
-
14
-
15
-
16
-
17
-
18
-
19
-
20
-
21
-
22
-
23
-
24
-
25
-
26
-
27
-
28
-
29
-
30
-
31
-
32
-
33
-
34
-
35
-
36
-
37
-
38
-
39
-
40
-
41
-
42
-
43
-
44
-
45
-
46
-
47
-
48
-
49
-
50
-
51
-
52
-
53
-
54
-
55
-
56
-
57
-
58
-
59
-
60
 |
 |

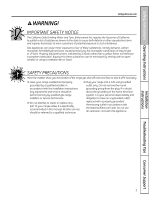
Safety Instructions
....
2–7
Operating Instructions
Aluminum Foil
.................
13
Clock and Timer
...........
15, 16
Gas/Control Lockout
..........
25
Lower Oven Drawer
...........
29
Oven
......................
11–31
Baking and Roasting
.........
13
Broiling, Broiling Guide
.......
14
Convection
...............
19-23
Oven Control
................
11
Power Outage
...............
12
Preheating
..................
13
Probe
........................
18
Racks
.......................
12
Sabbath Feature
.........
26, 27
Self-Cleaning
.............
30, 31
Special Features
.........
24, 25
Thermostat
..............
28, 29
Timed Baking
and Roasting
................
17
Timed Convection Baking
.....
23
Surface Cooking
............
8–10
Griddle
......................
10
Care and Cleaning
Burner Assembly
..........
32, 33
Burner Grates
.................
34
Control Panel and Knobs
......
35
Cooktop
......................
35
Door Removal
.................
37
Drawer
.......................
38
Griddle
........................
34
Oven Bottom
..................
37
Oven Light Replacement
......
38
Oven Vents
...................
35
Racks
.........................
37
Self-Cleaning
..............
30, 31
Stainless Steel Surfaces
.......
36
Installation
Instructions
...........
39–50
Air Adjustment
................
49
Anti-Tip Device
............
42, 50
Assemble Surface Burners
.....
47
Checking Burner
Ignition
.......................
48
Connecting the Range
to Gas
....................
43–45
Dimensions and Clearances . . .41
Electrical Connections
.....
46, 47
Leveling the Range
............
49
LP
............................
50
Troubleshooting
Tips
......................
51–54
Accessories
...............
57
Consumer Support
Consumer Support
. . .Back Cover
Ownership Registration
for Customers in
Canada only
..............
55, 56
Warranty for Customers
in Canada
.....................
59
Warranty for Customers
in the U.S.A
.
..................
58
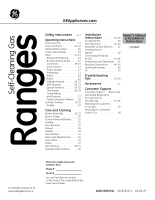
Ranges
183D5580P241
49-85159-1
04-09 JR
CGS980
Owner’s Manual
& Installation
Instructions
GEAppliances.com
Self-Cleaning Gas
Write the model and serial
numbers here:
Model #
____________________
Serial #______________________
You can find them on a label
on the front of the range behind the
lower oven drawer.
In Canada contact us at:
www.GEAppliances.ca